

Introduction: Interfacing Brushless DC Motor (BLDC) With Arduino


This is a tutorial about how to interface and run a Brushless DC motor using Arduino. If you have any questions or comments please reply in comments or mail to rautmithil[at]gmail[dot]com. You can also get in touch with me @mithilraut on twitter.
To know more about me: www.mithilraut.com
Step 1: List of Components

- Arduino UNO
- BLDC outrunner motor (Any other outrunner motor will work fine)
- Electronic Speed Controller (Choose according to the current rating of the motor)
- LiPo Battery (to power the motor)
- Male-Male Jumper cable * 3
- USB 2.0 cable type A/B (To upload the program and power the Arduino).
Note: Make sure you check the connectors of battery, ESC and Motors. In this case we have 3.5mm male bullet connectors on the Motor. So I soldered 3.5mm female bullet connectors on the output of ESC. The Battery had a 4.0mm Male Female connector. Hence I soldered appropriate female male connectors on the input side of ESC.
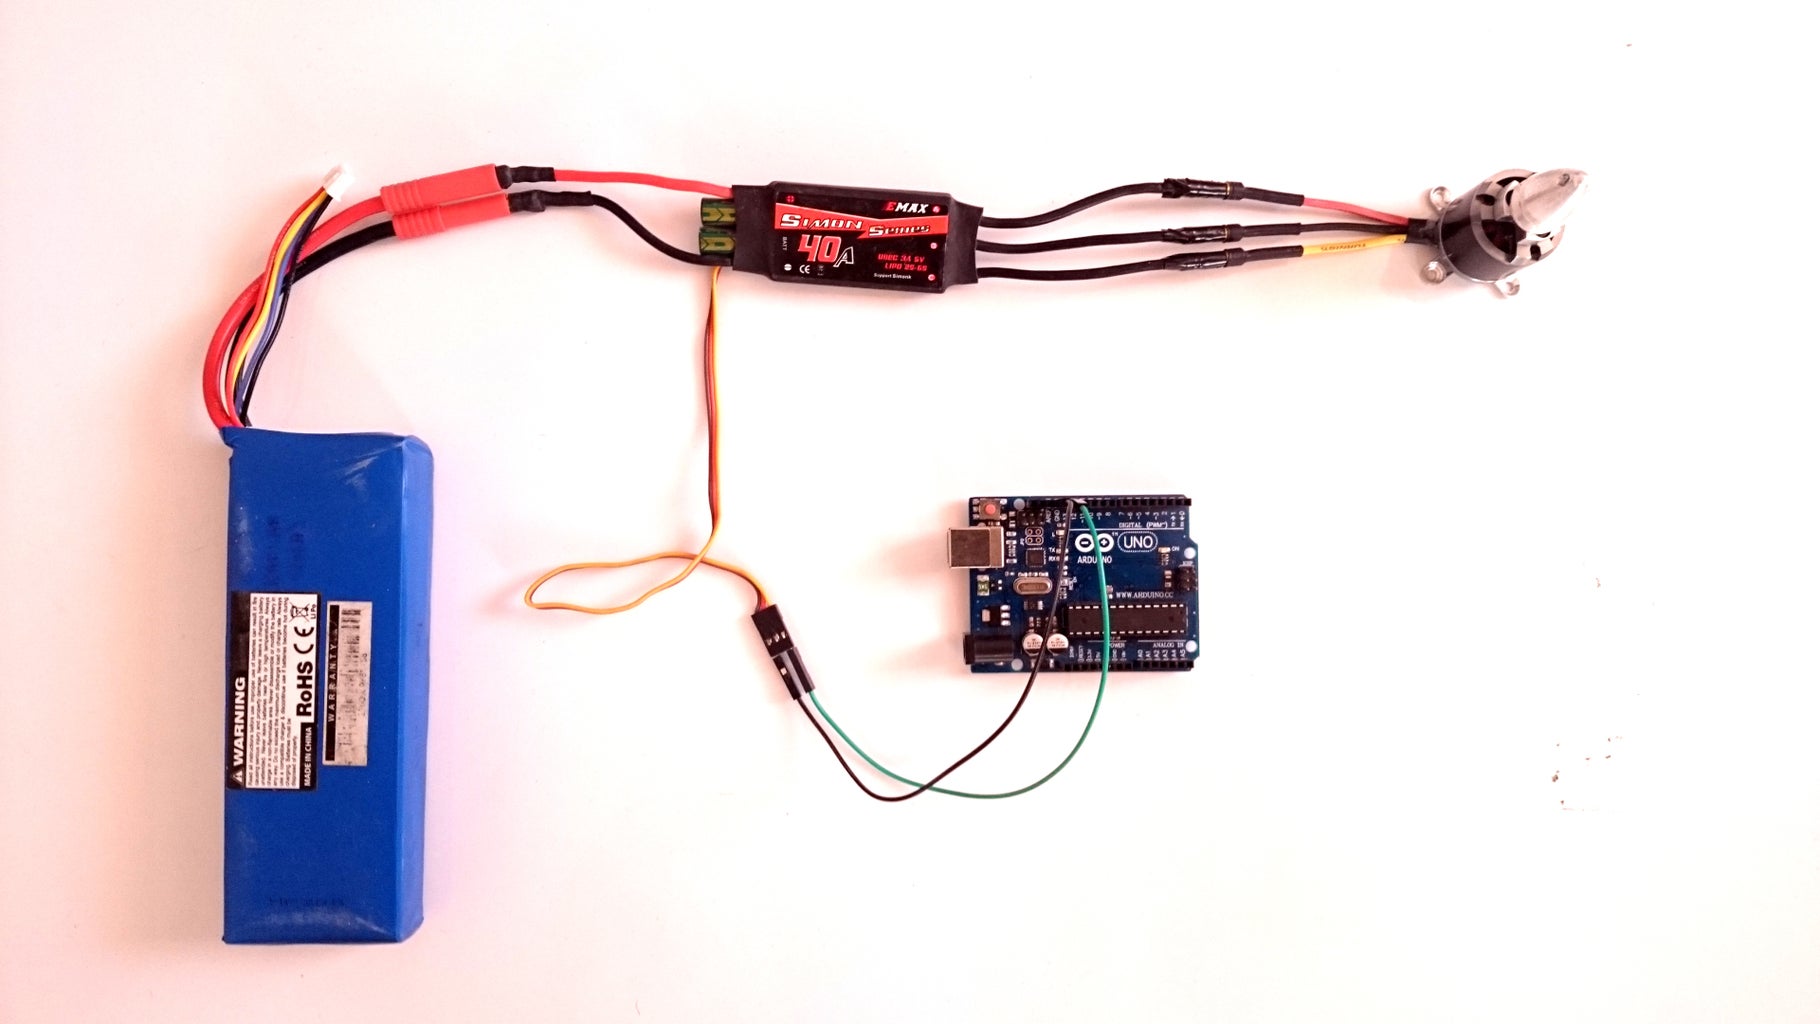
Step 2: Connections

Connect the motor to the output of ESC. Here, the polarity doesn't matter. If you switch any 2 of the 3 wires, the motor will rotate in opposite direction.
Connect the '+' & '-' of battery to the Red(+) and Black(-) wires of ESC respectively.
From the 3pin servo cable coming out of the ESC, connect the Brown cable to the 'GND' pin on Arduino. Connect the Yellow cable to any digital pin. In our case its digital pin 12.
Step 3: Programming Arduino UNO

If you are new to Arduino then you can download, install and setup the Arduino from here.
Connect the Arduino to the PC. Open Arduino IDE and write this code. Under 'Tools' select
Board: Arduino/Genuino UNO
Port: COM15 (Select appropriate COM port. To find out the COM port open device manager and look for Arduino UNO under 'Ports')
Click Upload button on the upper left corner.
#include <Servo.h>
Servo esc_signal;

void setup()
{
  esc_signal.attach(12);  //Specify here the pin number on which the signal pin of ESC is connected.
  esc_signal.write(30);   //ESC arm command. ESCs won't start unless input speed is less during initialization.
  delay(3000);            //ESC initialization delay.
}

void loop()
{
esc_signal.write(55);	  //Vary this between 40-130 to change the speed of motor. Higher value, higher speed.
delay(15);
}
Step 4: Note
The correct way to run the motors is to
1. Connect the battery to the ESC to power up the ESC.
2. Power the Arduino.
If you do the other way round, the Arduino will run the arm sequence and the ESC will miss those commands since it isn't powered up. In this case press the reset button on the Arduino.


