

Introduction: IoT Oil Tank Gauge With IBM Bluemix and Maximo


The concept for this Instructable is to create an IoT device that sends alerts when oil in an oil tank is low. This can be configured for industry, or in this case, to alert a homeowner of a low tank level through a text message and automatically create a work order for an oil delivery company to refill the tank.
For hardware, we are going to use the NodeMCU device which is an ESP8266 on a development board, and the hall effect module from the Arduino TinkerKit. I will note that there are MANY ways you could choose to detect the height of the level gauge on the oil tank, so I would encourage experimentation with other sensors as well.
Additionally, I chose to use IBM Bluemix to act as a MQTT broker and to host Node-RED. IBM Bluemix is a cloud platform which we will use to easily create a application to connect our IoT devices to other services. Using this we can facilitate communications to other services, such as Twilio and dweet.io, and send http REST requests to interact with external systems. In our case, we will be interacting with IBM Maximo. Maximo is an enterprise asset management system which is commonly used by service providers for work management. It supports REST which we will use to integrate between Bluemix and Maximo.
Step 1: Set Up Your Hardware


For this exercise we will be using an ESP8266 "NodeMCU" chip from Amica (http://a.co/gY0eq9Y), and the analog Hall effect sensor included with the Arduino TinkerKit (http://a.co/86jlUlD). The magnets I used can be found here: (http://www.homedepot.com/p/MASTER-MAGNETICS-1-2-in-Neodymium-Rare-Earth-Magnet-Discs-6-per-Pack-07046HD/202526367)
We will connect these components to the NodeMCU with the positive going to the 3V3 pin, the negative going to ground, and the output pin (middle) going to the A0 (Analog) pin.
The Hall effect sensor detects a magnetic field when it is in close proximity to it and outputs a value. There are both analog and digital Hall effect sensors, with many varieties available. The sensor I have chosen is an analog sensor, so we will get a number output based on how strong the field is.
Step 2: Configure IBM Bluemix


You can create a free trial account on IBM Bluemix to experiment with this functionality. There already is a great guide on how to get started here:
https://console.ng.bluemix.net/docs/starters/IoT/i...
I created my app using the Internet of Things Platform Starter Boilerplate. From there I proceeded as shown in the link above to create an entry for my device, using the Internet of Things service.
Carefully note your org id, credential, device id, and device type, as you will need these in the next step.
Step 3: Create Your Sketch in the Arduino IDE


I used the Arduino IDE to modify and upload my sketch to the NodeMCU Device. There is an IBM developer works Recipe on the basics of setting up and connecting the device, seen in the next link. This includes directions on how to attach the necessary libraries and configure the Arduino IDE.
https://developer.ibm.com/recipes/tutorials/connec...
I followed these instructions and modified this sketch to suit my specific needs. You will need to substitute in your own values at the top of the file. Additionally, I modified the publish and loop sections to publish not one, but three values: the current and previous readings, as well as the location of the device. We will be able to select the values individually from the JSON payload in the next step.
Attachments

Step 4: Test Your Sketch and Bluemix Configuration

At this point, you may power on your NodeMCU device, and once logged into IBM Bluemix, you will be able to connect your device. The devices tab on Bluemix will indicate whether your device is connected or not.
Step 5: Configure Your Node-Red Flow


There is yet another IBM Developer Works article on creating work orders in Maximo from a REST request in Node-Red. I started with the flow found here but modified it for my liking:
https://www.ibm.com/developerworks/community/blogs...
I added the IBM IoT node in place of the joystick input, added some logic to filter out full level readings from the device, and added some additional tweaks to the create new work order function. At this point, you will need to do some fiddling with your sensor and magnet combination to see what the values are displayed when the sensor is triggered. Node-Red has a debug tab and node that can be used to display the payload received from the IoT device.
For mine, I noted that the value was over 600 when the magnet was in the bottom quarter of the gauge, so I used this as my limit to trigger the Node-RED environment to take action. I also wrote a function which would return false if the previous and current values were both above this 600 threshold, so it would not generate multiple notifications or work orders.
You will also need to sign up for an account at Twilio if you would like to use that node. It will give you a token and API which is needed to configure the node. When you import the flow, you will need to configure the Twilio node with your API and token values before it will work.
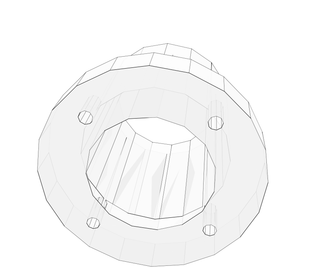
Step 6: Create the Mounting Bracket


Initially, I wanted to mount the Hall effect sensor on top of the sensor so that I may be able to calculate the distance from the indicator, but I found the magnet/sensor combo I had didn't have the range to support this. So I created a second bracket and mounted it at the bottom so that I could detect when the magnet got to the 1/4 tank mark. I have attached the .stl files for this bracket for 3D printing.
Once you have the sensor module and NodeMCU installed, you can test and ensure that the readings are consistent with the previous configuration.


Step 7: Test That Work Order Generates in Maximo

Assuming everything is configured correctly, you will receive a new work order at the specified location in Maximo. If you do not, check your configuration in the previous steps, and see the article below for tips on using the Maximo Rest API.
https://www.ibm.com/developerworks/community/wikis...
Thank you for your time and let me know if you have any questions!

Participated in the
First Time Authors Contest 2016

Participated in the
Arduino Contest 2016

Participated in the
IoT Builders Contest


