

Introduction: IoT Photon + Leap Motion-Based Robot


A while ago, I built a PICAXE-based Touchless Sensor Controlled Robot that used a hand movement-tracking Leap Motion sensor to drive. Unfortunately, that robot needed to be plugged into a computer to function, which limited its usefulness. To fix this, I decided to go wireless with a Particle Photon-based robot.
This robot also supports keyboard control, so if you don't have a Leap Motion or don't want to shell out $80 USD for it, you can easily use your keyboard instead.
Step 1: Materials - Parts

To build this Wi-Fi Leap Motion robot you will need:
- 1x Particle Photon (a Core may work too, but I haven't tested this)
- 1x L293D dual H-bridge motor controller
- 1x LM7805 voltage regulator
- 2x 100uF capacitors
- 2x 0.1uF capacitors
- 1x power switch
- 1x half-size breadboard
- 1x 9V battery
- 1x motor power battery (I used 6 AA batteries which gave me 9V total)
- 2x motors with wheels (I got mine from an old line-following robot kit)
- 1x robot body (I used a 4.75" x 4.75" piece of plexiglass)
- 2x small bolts (these will keep the front of the robot from touching the ground, and can be any size)
- 4x nuts (these will attach the bolts to the robot body)
- Some wire
- Tape
Step 2: Materials - Tools


To build this Wi-Fi Leap Motion robot you will need:
- 1x pair of safety glasses
- 1x drill press (a hand drill will work, but a drill press is easier)
- 1x drill bit (the size of which is determined by your two bolts. The hole must be big enough to allow the bolts to fit easily through the hole)
- 1x adjustable wrench
- 2-part epoxy or other strong adhesive (for attaching the motor gearboxes to the robot body)
Step 3: Materials - Software


To program this Wi-Fi Leap Motion robot you will need:
- A computer
- A good Wi-Fi connection (and a password to get on said Wi-Fi connection)
- Particle Dev (or some other way to get my code onto the Photon)
- Python 2.7
- The latest version of the Spyrk Python library (this allows Python on a computer to control a Photon via Wi-Fi)
- A Particle username and password
- Your Photon's name (the Photon must be registered to the above username and password)
If you only want to run the robot using your keyboard, you will need:
- Pygame for Python 2.7
If you want to run the robot using a Leap Motion sensor, you will need:
- Leap Motion SDK from developer.leapmotion.com (this requires you to sign up for free as a developer)
Note: As far as I know, these libraries are all compatible with Windows, Mac, and Linux.
Step 4: Why a Photon?

Easy! The Particle Photon has built-in Wi-Fi connectivity, so it can be programmed or controlled via the Internet. This allows for a wireless robot, and makes updating code generally easier.
Plus, Particle has provided an easy-to-use smartphone app called Tinker, which allows you to control a Photon (this robot!) from your smartphone. This provides an easy way to test your electronics (or control the robot if you don't feel like messing with Python).
NOTE: If you haven't done so already, at this time follow the guide at https://docs.particle.io/guide/getting-started/start/photon/ to set up your Photon for use.
Step 5: Build the Electronics


Now that you're sufficiently excited about the Photon's capabilities, let's start this project by building the robot's electronics. I've attached Fritzing drawings of the circuit, and attached the Fritzing file to this step. The circuit is pretty straightforward.
Once you've made the circuit, check your wiring and make sure everything is in place. If everything passes inspection, turn on the circuit. The Photon's RGB LED should pulse white, then blink green, then slowly pulse cyan, indicating that it's operational and ready to be controlled.
Attachments

Step 6: Build the Robot Body


The robot body I built was an easy, basic robot body, consisting of a square of plexiglass, two motors, and a pair of bolts. The simple design allowed me to spend more time prototyping the electronics, but a more polished robot body would work just as well.
Attach your motor gearboxes to the back two corners of the plexiglass square. I'd recommend epoxy, but didn't have any on hand so I used copious amounts of Scotch tape instead.
To attach the bolts, drill two holes in the plexiglass about 1 and 1/16" from the edges, and 1/8" from the front. The holes must be large enough for your bolts to fit through easily, but not large enough for the nuts to slip through.
Thread one nut onto each bolt (about halfway down the threads), then slide the bolts into their holes, making sure that the head faces toward the ground. Next, thread the other two nuts onto the bolts so that the plexiglass is sandwiched between the nuts. Adjust the bolts so they extend an equal amount from the plexiglass (mine extended about 3/8" from the plexiglass) and tighten the nuts. At this point your robot body is complete and you proceed to mounting the electronics.
Step 7: Add the Electronics

To make this step as painless as possible, I simply used tape to attach the electronics to my robot. It works surprisingly well (when in large enough quantities) and is easily replaceable.
Attach the breadboard in the middle, between the two drive motors. Make sure that the Photon's USB port is facing outward (in case you'd like to power the Photon from USB). Put the 9V battery (Photon power source) on one side of the breadboard, and the 6V battery pack (motor power source) on the other side. That's it! Your robot is now complete and ready to be programmed.
Step 8: Program the Photon
Particle offers two official ways to program a Photon: Particle Build and Particle Dev. Particle Build (https://build.particle.io/build) is a web-based IDE that allows you to program your Photon without downloading anything. Particle Dev (https://www.particle.io/dev) is basically the downloaded version of Build, but offers more customization and the ability to import locally saved files.
I've attached my code to this step, and because it is a .ino file, I'd suggest using Particle Dev to upload it to your Photon. However, if you have Arduino Editor installed, you can also use it to open the file, then copy-paste the file's contents into Particle Build. Either method will work.
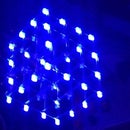
Once the code is uploaded the Photon should run through its connection procedure as usual, but with one small change: the blue LED connected to D7 will flash once, signalling that the robot is ready for use.
Attachments
Step 9: Setup the Keyboard Controller Program

Before using the Leap Motion, let's first test the robot with simple keyboard controls. Download the attached .zip file, and unzip its contents somewhere on your computer (I prefer the Desktop). You'll also need Python 2.7 installed, so make sure you've done that before continuing.
Now, the Python script requires your Particle username, password, and device name to function, so make sure you have those on hand. Also keep in mind that they will be saved in an unencrypted form (a text file, to be exact) and thus should be kept in a secure location on your computer.
To make adding your Particle information easy, I set up a config file system for this program. Just open the folder you downloaded and open config/pyPhoton.txt. Replace username with your Particle account's username, password with your Particle account's password, and device name with your Particle device's name.
Finally, open a command line window and type cd(path)/pyPhoton, where (path) is the location of your pyPhoton folder (for example, the Desktop's path on Windows is "C:/Users/user/Desktop"). Turn on your robot, then type python pyPhoton.py. If all goes well, a black window will appear; once this window has appeared, your robot should be functional!
To drive the robot using a keyboard, use W and S to drive the left wheel forward and backward, respectively. Use I and K to drive the right wheel forward and backward, respectively.
Attachments
Step 10: Adding the Leap Motion

If your robot functions with keyboard control, then you're ready to go touchless with a Leap Motion! To do this you will need a copy of the Leap SDK, which can be obtained (after signing up as a developer) from https://developer.leapmotion.com/. You'll also need the Leap Motion controller script, which is attached to this step in a .zip file. Download and unzip its contents somewhere on your computer (again, I suggest the Desktop).
The Leap Motion SDK is simply a collection of files that allow programs to interface with the Leap Motion. Which files you need depends on your operating system, so make sure you know what OS you're using (and whether it's 32-bit or 64-bit). Once you know this information, check the list below to see what files you need from the Leap SDK.
Windows:
32-bit:
- /lib/Leap.py
- /lib/x86/Leap.dll
- /lib/x86/Leap.lib
- /lib/x86/LeapPython.pyd
64-bit:
- /lib/Leap.py
- /lib/x64/Leap.dll
- /lib/x64/Leap.lib
- /lib/x64/LeapPython.py
Linux:
32-bit:
- /lib/Leap.py
- /lib/x86/LeapPython.so
- /lib/x86/libLeap.so
64-bit:
- /lib/Leap.py
- /lib/x64/LeapPython.so
- /lib/x86/libLeap.so
Mac:
- /lib/Leap.py
- /lib/LeapPython.so
- /lib/libLeap.dylib
Copy the files your operating system requires to the same folder as the Python controller script (the folder should be called leapPhoton).
Attachments
Step 11: Finalizing the Leap Motion Controller

This Leap Motion version of the Python controller uses a config file, just like the keyboard version we used earlier. The final step in this project is to edit that config file, found at config/leapPhoton.txt. Edit the file in the same manner as your keyboard controller config file, replacing username with your Particle account's username, password with your Particle account's password, and device name with your Photon's name.
Open a command line window, and like before, type cd (path)/leapPhoton, where (path) is the location of your leapPhoton folder. Connect your Leap Motion to the computer, turn on your robot, then type python leapPhoton.py. You should now be able to wave your hands above the Leap Motion to induce movement in the robot. Congratulations, your wireless Leap Motion-controlled robot is complete!
To drive the robot, simply tilt your hands back and forth (change their pitch). Tilting the left hand forward and backward causes the robot's left wheel to drive forward and backward, respectively. Tilting the right hand forward and backward causes the robot's right wheel to drive forward and backward, respectively. Leveling your hands stops the robot's wheels.
Step 12: Final Words
And you're done! At this point you should have a fully functional Wi-Fi connected robot that can be controlled by either a keyboard or hand gestures.
Some things to note:
Because the robot uses Wi-Fi, its reaction time will vary based on your Internet situation. I've found that the robot is quite responsive under normal Internet conditions (about a 1/8 second delay for the command to take effect), but if other people are performing high-bandwidth actions (such as large downloads or video streaming) the robot's performance drops significantly.
The robot must be turned on and connected to the Particle cloud (RGB LED in cyan "breathing" mode) before the Python controllers can be run. This is because the controllers perform a check to verify that the Particle device is connected, and don't start if the device is not found.
The controls take some practice to feel intuitive, so play around with the gestures and see what feels comfortable for you. If you are having trouble using the controls, simply hide your hands from the Leap Motion to stop the robot's wheels, allowing you to start again from the beginning.
As always, I'd love to hear any comments or suggestions you may have, and would be glad to help out if a problem arises. Just send me a message or leave a comment and I'll see what I can do.

Participated in the
Arduino All The Things! Contest


![Tim's Mechanical Spider Leg [LU9685-20CU]](https://content.instructables.com/FFB/5R4I/LVKZ6G6R/FFB5R4ILVKZ6G6R.png?auto=webp&crop=1.2%3A1&frame=1&width=306)


