

Introduction: Kid Kave


This is my balcony off of my great room.The hole in wall was a built in cabinet I built 12 years ago.12 years of collecting dust.The balcony was mostly for looks until the big boss(my wife) had a idea to turn it into usable space.
Step 1: Back of Built in Before I Removed It


This is a view from my garage upstairs looking at back of built in before I removed it.Almost all of this room is under a layover roof connecting my garage to my house.
Step 2: Building Walls


In this step I built 3 walls before cutting into living area to keep dust down
Step 3: Toy Cabinets, Insulation and Sheetrock


Here I built and installed toy cabinets.I insulated and sheetrocked also.Trying to do as much as possible before cutting out wall seperating garage and living area
Step 4: Removing Wall and Cabinet


My boys couldnt wait to grab a slugo and smash thru!
Step 5: Walls Out


The wall is out and in the dumpster.My boys had a fun time breaking thru and I had fun cleaning everything up.uggggg
Step 6: Tying in Sheetrock.


Luckily all the framing lined up and connecting sheetrock went well.
Step 7: Building Railings


I built all railings out of kd(to save $) in my garage.Did stain and poly then brought inside and installed.Even post caps are homemade from scraps.
Step 8: Ladder to Kid Kave


Ladder is also kd.2x12 rails and 2x8 steps.The ladder had alot of steps involved and took about a week to get done.Alot of time staining and applying polly.
Step 9: Railings and Ladder Are In!


Needed to install ladder to get up and down and railings for saftey.
Step 10: Finishing It Up


In this step we got the trim done and installed carpet.I used a old door for entry to garage.I used chaulkboard paint on kave side.Installed lights and some outlets with usbs built in.
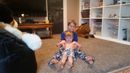
Step 11: Moving In!


I finished just before Christmas.The timing was great because we had a place to put all the new toys my boys got from santa.Me and mom got a new tv and moved the old one to the kid kave.

Third Prize in the
Small Spaces Contest


