

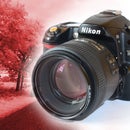
Introduction: LED Macro Light - DIY


I am not big macro freak I don't buy a macro lens to not use it. Sometimes it's handy but that's all for me. Instead of a macro lens I bought three close-up+ filters for my 85mm lens with the filter thread 67mm diameter. First I took some macro shoots using my super bright LED torch, but later of course my brain started to clicking to make a LED macro light.
I am not competing with those cheap plastic, I just wanted to do something by myself. On the market there are several LED macro lights to buy. The only thing what I don't like in most of them, that they have those converter rings screwed on to the filter ring of the objective and that ring slides in to the macro light frame.
Most of the cheap versions are not stable at all. Slipping, turning around and not to mention about the weight and force what that poor, mostly plastic filter thread has to take because of that macro light. Depending of what kind of lens you use it might give unwanted pressure and force to the optical element, which is not good at all especially for zoom lenses with a moving front element.
My version is attached to a particular lenses lens hood, which holds very strong and it is attached to the lens housing not to the optical elements.
So lets see what I had to start with:
Step 1: Necessary Components


- camera with the lens, in my case Nikon 85mm f1.8 with 67 mm filter thread,
- close up+ filter set,
- 36 pcs. bright white 5mm LED,
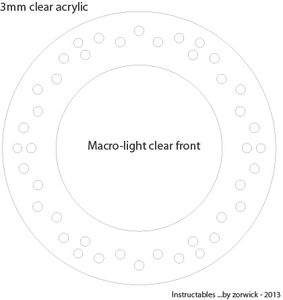
- 3 mm clear acrylic,
- 3 mm opal acrylic,
- 8 mm black acrylic,
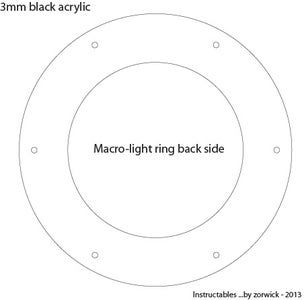
- 3 mm black acrylic,
- an old flash unit to disassemble,
- battery
- wires
Tools I used: laser cutter, circular saw, glue, sandpaper, soldering iron, drill.
The most important thing is to have the correct measurement of the lens hood which will hold the ring.
Two important diameters needed to make the light ring body, one on the end and one 8 mm higher, just because my ring body is cut from an 8mm thick acrylic.
This lens hood is cone shaped therefore it's easy to place this ring without worrying that will fall off.
I wanted to find a cheap lens hood to fix permanently but unfortunately I could not find any, that is why I have this solution. These lens hoods are rather expensive, I did not want to damage the one what I have.
Step 2: Making the Light Ring


Having the lens hood dimensions and the 5 mm white LEDs I decided to place 36 light sources into the ring.
For the easy assembling I have 3 main section:
The front elements are glued together. I cut two opal and one clear ring. The top ring is from opal acrylic to soften the lights and has only the 6 holes for screw inserts. The middle ring is clear acrylic and has all the LED and screw holes, same as the last opal layer.
The black body is cut from 8 mm acrylic, and the back cover plate cut from 3 mm acrylic.
Inside of the lighted rings I inserted and glued thin ring to block the light which can cause flare.
I glued the 6 screw inserts into the front elements placed all the LEDs one by one and soldered them together divided into two groups, left and right. Sometimes it's good to have the light coming from one side that is why I divided them. The power unit has two switches to light them up.
(I uploaded the ring drawing in .ai format, feel free to use and modify them.)

Step 3: Making the Power Unit


Well, this was the biggest question. There are many options to choose and all of them has pros and cons.
The most obvious is to use the camera battery, but it is not that easy at all as it looks and besides nobody wants to drain the camera battery because of the lights.
Having an external power source is a good choice, but if it is not attached to camera than its difficult to use it.
There are macro lights with batteries inside the ring unit itself. I found those to heavy and actually most of those lights use AAA battery and I wanted better power source.
I choose the one with an external power source using AA batteries, mounted to the camera for better portability. The idea was to find an old flash unit open it up and use only the battery holder and the flash shoe to attach it to the camera.
I cut the flash shoe off leaving some plastic to attach it to my little box which has the batteries inside and the two light switches. Before you disassemble any flash unit, make sure it is not charged!
The battery holder what I got is the perfect one, because I could replace the batteries when I need to.
I used the metal connection plates from the old flash. I cut a piece of acrylic shape around those little metal parts and run the wires to the top where the switches are.
The whole box is just glued together except the battery door and the top where all the switches and wires are. At the and I connected the wires from the light ring.
Step 4: Using the Macro Light With the Camera


To use the macro light with the camera, first I need to put the ring to the lens hood. To do that I need to remove the cover plate from the ring, insert the lens hood to the gap, place the cover ring back to hold it in place and tight the screws. Then I put the close-up rings on to the lens and mount it to the camera. Now I just need to connect the lens hood to the lens and the power unit to the camera.
Usually I don't use lens hood so I just keep the macro light and the hood assembled.
Step 5: Macro Pictures

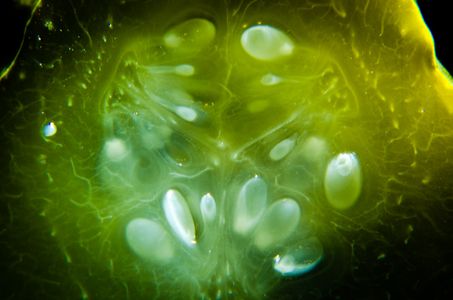


Here are some shoots what I took using this light unit and the close-up filters.
These are full sized 16 megapixel shoots.
Pictures on my Flickr page:
http://www.flickr.com/photos/24907525@N05/sets/72157632015365929/
---

Participated in the
The Photography Contest


