

Introduction: Lasercut Measuring Tool


I've been working in various shops for years and I often run across unlabeled shelves of material that have different thicknesses. What's a shop rat to do?
This simple measuring tool fits in your pocket or a tool drawer and circumvents using the measuring tape, which is less accurate and more work for quickly determining the depth of a piece of wood in the scrap bin.
Step 1: Open Up Illustrator and Make a Rounded Rectangle

If you have another vector-editing program other than Illustrator, you can replicate these steps in your program of choice.
Use the Rounded Rectangle tool, make a 3" x 2" rectangle. Set the stroke width to .001 for laser-cutting (or whatever your laser-cutter requires for vectors). A 3-inch by 2-inch piece piece of acrylic comfortably fits in your pocket.
Step 2: Create Slots for the Material

The material I use typically comes in 1/8", 3/6", 1/4", 5/16" and 3/8". You can set up your own sizes — smaller, larger or go metric.
Create rectangles that are 1.25" wide and for the height, the thickness of each sheet that you want to measure.
Step 3: Position Slots

Position the slots with an equal amount of space between each one. 1/4" is about right.
Step 4: Pathfinder Subtraction

Use the Pathfinder tool to subtract the area of the rectangles from the rounded rect shape.
Step 5: Add Fractional Numbers

Add your number values to the left of it's matching slot.
Just in case you're not familiar with laser-cutting, you will have to use Create Outlines to convert text for raster-etching.
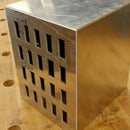
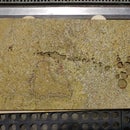
Step 6: Laser Cut and Use

Laser cut this simple shape. I'd recommend using 3/16" acrylic. It will take only a couple minutes, so be sure to make extras for your friends.
I left the paper on for better text legibility.
I've included the Illustrator file (the text hasn't been converted to outlines just yet).
Enjoy!


