

Introduction: Lego Arduino Nano Without Header Pins Housing


I needed a housing for my Arduino Nano that doesn't have any header pins soldered to it. I wanted it nice and small.
Step 1: Build the Sides


The gap is there to allow the arduino to fit nicely and have access to the reset button.
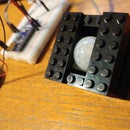
Step 2: Build the Top and Bottom.


The "Handle" piece at the back keeps the arduino from sliding around too much.
You could use a 4x8 piece for the bottom, but this allows you to have some wires come out the bottom if you need a few pins connected.
Step 3:


The little ramp pieces keep the arduino nice and snug. Note there is a 2x2 piece under the top to keep the USB tight while the cable is pushed in.


