

Introduction: Make a Wooden Spiral Pendant


Then I saw someone with a rock spiral pendant and I thought perhaps I could do that in wood. Most of this instructable is about how to create the art in Coreldraw. I assume that you know how to laser cut something.
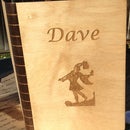
This distinctive spiral pendant is unusual and can be personalized to be the perfect gift.
Made from wood, it has a hole for a string, personalized writing and a pleasing shape. If you want, you can make two at once!
Materials List:
- Wood (I used 1/8" craft plywood that I got at Michaels)
- Epilog Laser Cutter (I used Techshop's laser)
- CorelDraw (also available at Techshop)
I made it at Techshop! http://techshop.ws
Step 1: Make a Spiral


At the risk of sounding like a commercial, Coreldraw makes this pretty easy.
Select the spiral tool (one of the polygon tools, 7th from the top on the left hand side or just press “A”). Click and drag the tool to create a spiral. I think you want it more-or-less circular but maybe your elliptical spiral medallions will be the talk of the town.
Select the spiral and then select the shape tool (2nd tool from the top or F10). Now click on every line segment you don’t want and press delete. I trimmed it down to be only 2 turns (with a bit of overlap to make 3) but you can make more or fewer. You can also grab the little handles with the tool and drag the segments in various directions but that’s not what we’re doing today.
Change the size to about 2” (or maybe a bit smaller) either by selecting it and dragging the corner in or out until it’s 2” or by editing the size box (it’s just above the ruler – the box all the way to the right is position, the one to it’s left is size).
Change the line width by pressing F12 and selecting “20 pt”. Obviously you can try other values – more and the spirals will be wider, less and the spirals will be narrower. 20 Pt is about the place where the black parts and white parts are even.
In that same dialog box, select the middle end caps (the one that’s rounded).
Step 2: Turn It Into a Bitmap

We want to get just the outline of this so we can cut it on the laser. Convert it to a bitmap with Bitmap->convert to bitmap.
Step 3: Do Outline Trace

Select the bitmap, right click and select “outline trace->Line art”. In the dialog box select “delete original” and “remove background”. Then click OK.
Step 4: Make It an Outline

Select the fill tool (12th tool on the left side, looks like a paint bucket) and select “no fill”. Then press f12 to bring up the outline tool again and select “hairline outline”. Now it will cut this shape out.
Step 5: Add Text

You can add text to the spiral. Select the text tool (11th tool on the left, looks like an A) and type some text. Get it so it looks the way you like it using the various parameters (font, size, etc). Make sure it’s no higher than the spiral is wide.
Select the text and then click on Text->fit text to path. Then move the cursor over the spiral and it will move the text into the spiral. It takes a bit of careful positioning to get it where you want it. Moving it single pixel can radically change the result. If you aren’t getting what you want, try zooming in closer and trying again.
Step 6: Add a Hole

Use the ellipse tool (f7) to create a hole in the spiral. Be sure to make it’s width hairline. This is the hole for the string. You can’t make it too big or the spiral will break but if it’s too small you won’t be able to get a string through it. I made it 1/8 inch.
Step 7: Make a Second One

As it stands, there will be the spiral that you want and you’ll leave behind another spiral that will be attached to the scrap material. You can cut that out, too and get TWO spirals if you want. It depends a lot on how thick the first one is as to whether the second one will be useful
Use the straight-line connector tool to connect the end of your original spiral to the next inner spiral. Again, make sure it’s a hairline width line.
If you want to use this as a pendant, add a hole
Step 8: Cut It

Put some wood on the laser etcher, set the proper power and speed for both etching and vector cutting and let her rip! I used 1/8” wood.


