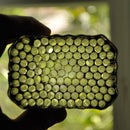
Introduction: Make a Flash Filter to Add Drama to Your Photos
Using inexpensive materials you can make a gel filter holder to add color to your flash pictures
Step 1: Cut the Top of Of the Soda Bottle
Jab the scissors through the side of a clean clear plastic soda bottle. Don't jab your hand. Start cutting off the top. Try and make a nice straight cut so your friends will be impressed with your scissors skill.
Step 2: Cut the Bottom Off of the Soda Bottle
Again, exploiting your amazing prowess with the shears, cut the bottom off of that soda bottle.
Step 3: Cut Straight Up the Side of the Soda Bottle
Now, cut up the side of the soda bottle. Try and position the cut where the glue from the label is so that it doesn't end up blocking any of the light from the flash
Step 4: Bust Out the Color Filter Gels
These are basically colored cellophane squares. Professional folk like to call them "gels" so they can sound special. They can cost about 20 bucks or so from a camera store. Try on line too! Adorama or BHPhoto has them.
Step 5: Cut the Gels Into Smaller Squares
These are about 3 x 4.5 inches. That's 7.62 x 11.43 cm for all you metriphyles.
Step 6: Clip Your Spiffy New Gel Holder on Your Flash and Give It a Try!
Since the plastic bottle tends to curl up, it really works well holding the filter against your flash head.
Step 7: Aint It Cool!
This was shot with the blue filter about 3 feet from my head. Kinda spooky huh?
Step 8: The Red Gel Adds a Whole Other Element to the Picture
Just plain red here, but try mixing two or more to create your own special mood. Enjoy!
Participated in the
Epilog Challenge


