

Introduction: Mini Lunchbox Arcade


Being of a certain age, I love retro gaming because it makes me nostalgic for my childhood when I would always ask to go to our local Pizza Hut so I could shell out my hard earned quarters on a game of Dig-Dug or PacMan. Having already built a retro gaming arcade cabinet, I thought it was time to make something more portable. And what could be more portable and retro than an old-fashioned tin lunchbox?
Don't like reading? Watch the video overview instead!
Step 1: What You Will Need

To build this project, you'll need to buy or source these parts:
Hardware components
Step 2: Preparing the Lunchbox

For portability, I'm using a smaller sized lunchbox, but any run of the mill lunchbox with your favorite characters on the lid will do.
The one concern of using a metal lunchbox is that it is conductive, and putting electronics on a conductive surface is not the best idea. So before adding any electronics inside the lunchbox, I lined it with Kaplon tape, which is a great electrical insulator that doesn't add any bulk to the project.
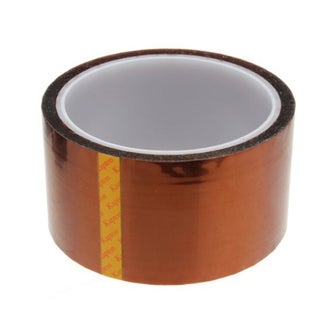
Kaplon Tape
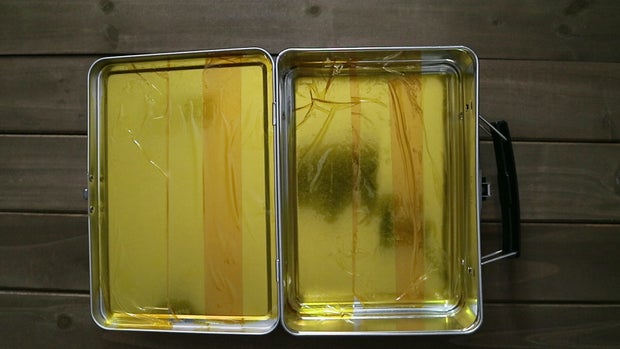
Lining The Box with Kaplon Tape
Step 3: Setting Up the Raspberry Pi

As with a majority of my projects, the illustrious Raspberry Pi computer will be playing the part of the "brains". I chose it because of its portability, low power consumption, flexibility, and breadth of online support.
Raspberry Pi 3 B
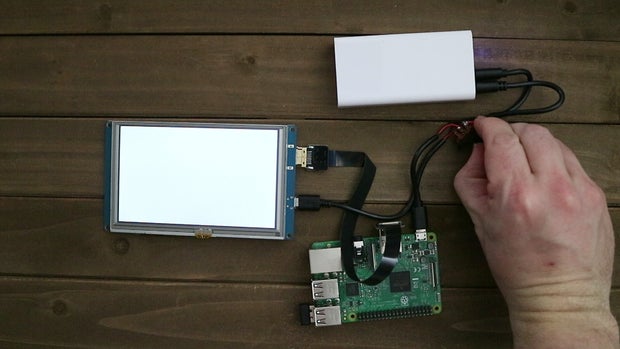
Starting out, the Pi will need a keyboard, mouse, power source, a micro-SD card, and a display (I'm using my 5" LCD display). These will be needed to set up the Pi initially. Once you have all those items, the next step is to download an operating system for the Raspberry Pi.
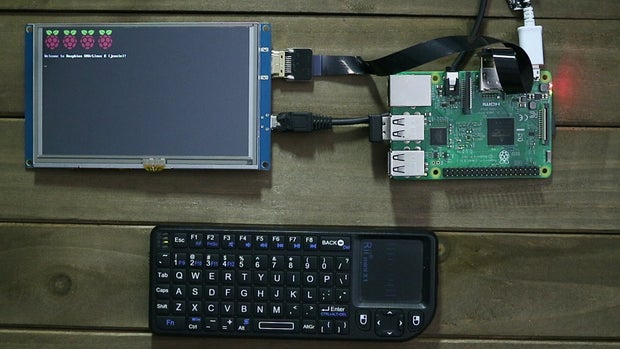
Raspberry Pi, Screen, and Keyboard/Mouse
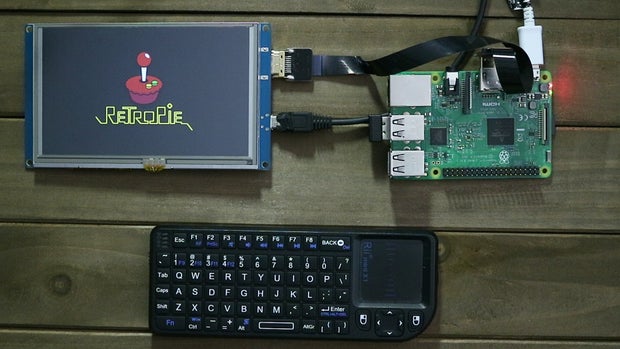
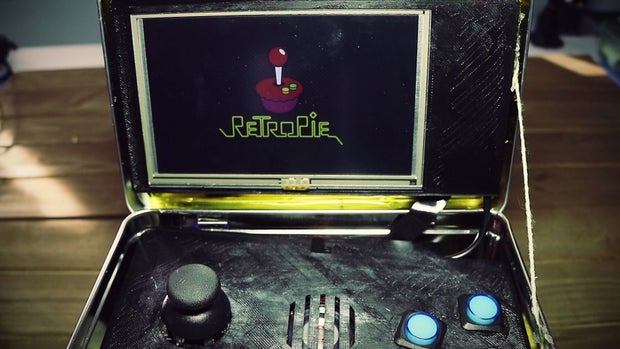
The easiest way to get a Raspberry Pi to run retro games is by installing a pre-made arcade image. A simple Google search shows dozens of different arcade images available for the Pi. Feel free to do your own research and choose the one that best fits your use case. The one I decided to go with is RetroPie.
You can click here to go to the RetroPie download page , and be sure to download the edition that matches which version of the Raspberry Pi you are using.
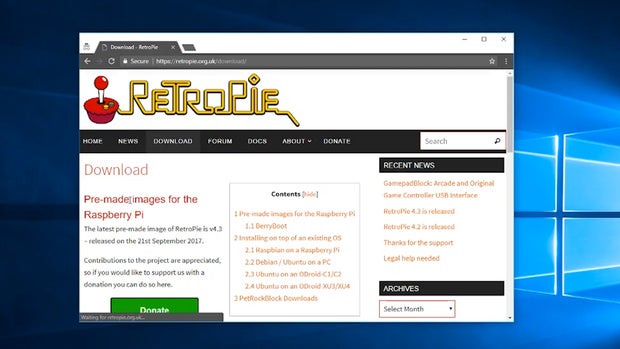
RetroPie Download Page
In order to get the Raspberry Pi to boot to RetroPie, we first need to burn the image to a micro-SD card. A good program to do this is is called etcher.io. With the micro-SD card inserted into your computer, simply run etcher.io, select the RetroPie image, select your micro-SD card, and then click burn.

Ethcer interface
Once that task has finished, you can put the micro-SD card into the slot on the Raspberry Pi, and with all the other peripherals attached, plug in the power. It should boot up to the RetroPie interface.
Step 4: Configuring RetroPie

With my setup, the first thing I noticed is that the RetroPie interface doesn't completely fill the screen. So that's immediately one thing that needs to be tweaked. But we'll come back to that later.
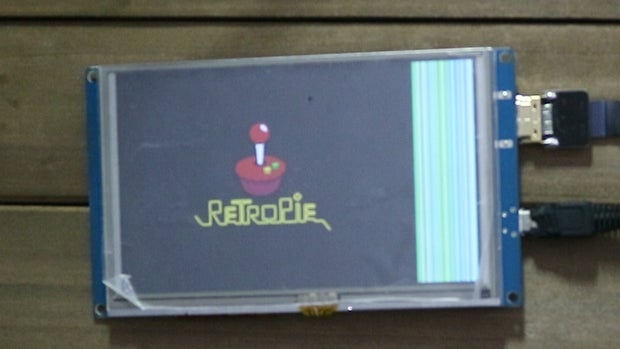
Retro Pie on 5" LCD
The first thing RetroPie wants you to do is setup your inputs. Instead of operating by a standard mouse, it operates by game controlls, such as "Start", "Select", "Up", "Down", "A", "B", etc. Since we just have our keyboard hooked up for now, feel free to set up any key combination for your input that works best for you. We'll change it later once we have our controls hooked up.
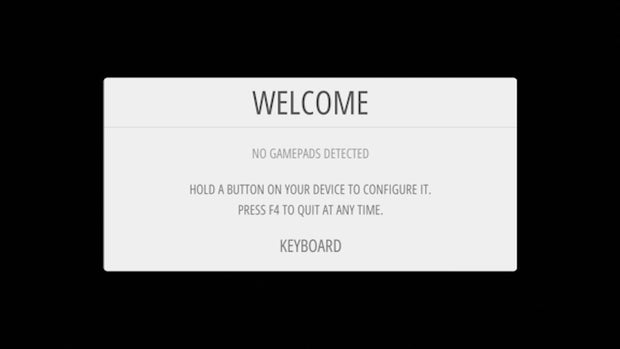
RetroPie Welcome screen
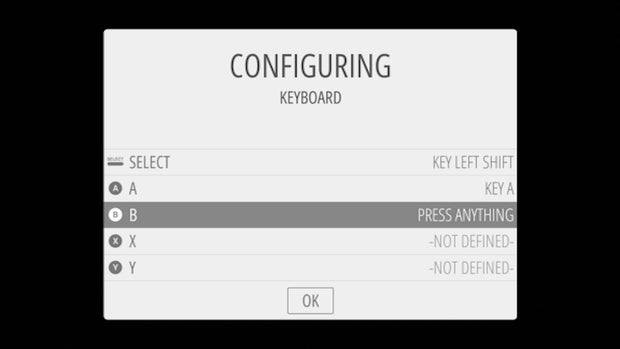
RetroPie Controller Configuration Screen
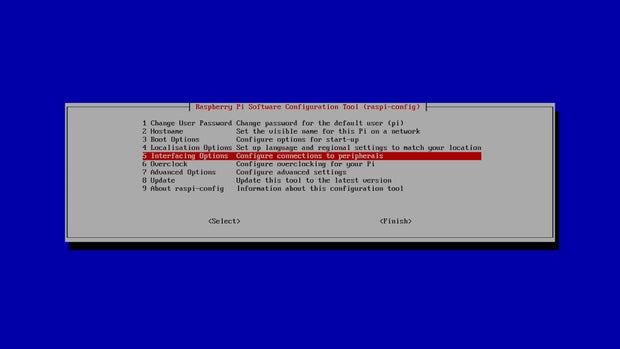
The next critical thing to do is connect it to wifi. So using the buttons you've configured, select "RetroPie" to go to the configuration menu. From there, go down to the "Wifi" options and follow the prompts to connect to your Wifi. Once it connects, it should show you the Pi's IP address. Remember that for later.
So that we can connect to the Pi remotely, we also need to enable SSH, so go up to "Raspiconfig", select "Interfaces", then go to SSH and enable it. With that done, we can now finish up the RetroPie configuration through SSH.
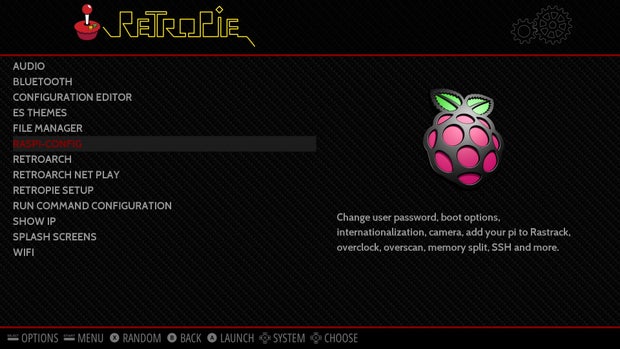
Main Menu - RaspiConfig
Interface Options
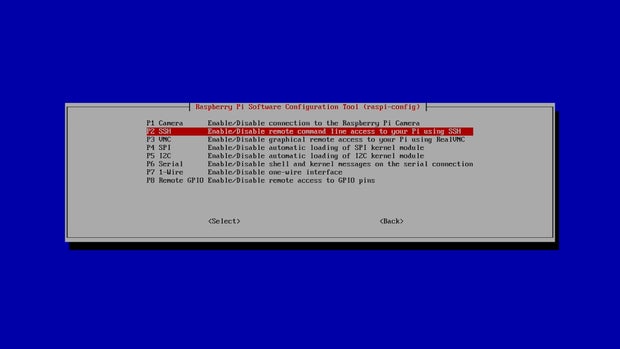
Enable SSH
Step 5: Fixing the LCD Screen

To remotely connect to the Pi from a different computer, you need an SSH client installed. On Mac and Linux you can use the terminal. On Windows, you can download Putty.

Putty SSH client
Then simply connect using the Pi's IP address that we recorded in the previous step.First on the docket is fixing the display issue on my 5" LCD. To do this, we need to edit the boot/config.txt file adding (or uncommenting) these entries:
sudo nano /boot/config.txt
#add or uncomment these lines<br>Framebuffer_width=800
Framebuffer_height=480
Hdmi_force_hotplug=1
Hdmi_group=2
Hdmi_mode=87
Hdmi_cvt 800 480 60 6 0 0 0
Device_tree=bcm2710-rpi-3-b.dtb #differs depending on your Pi
Dtoverlay=ads7856,penirq=22,speed=100000,xohms=150
Dtparam=spi=on
Please note that the "Device_tree" entry will differ depending on the version of the Pi that you're using. The one above is for the Raspberry Pi 3. Here's what it would be for other Pi's:
- Raspberry pi b+ - Bcm2708-rpi-b-plus.dtb
- Raspberry pi b - bcm2708-rpi-b.dtb
- Raspberry pi2 b - bcm2709-rpi-2-b.dtb
Then reboot your computer to finalize the changes. If all goes well, the screen should be fixed:
sudo reboot

Screen fix before
Screen fix after
Step 6: Installing the Arcade Bonnet

This wouldn't be a worthy arcade project if we didn't have a joystick and arcade buttons. So after purchasing some, the trick was figuring out how to connect them all to the Raspberry Pi. Luckily, I stumbled across this Raspberry Pi Arcade Bonnet from Adafruit. It's a simple board that sits on top of your Raspberry Pi GPIO pins and allows you to connect several different buttons, an Analog or digital joystick, and a speaker. The Arcade Bonnet was crucial in making this project work.
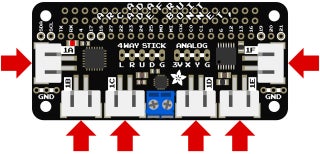
Adafruit Arcade Bonnet
So I connected my joystick, 6 buttons, and a speaker to the Arcade Bonnet. It's a lot to explain here, but if you need more information on how to connect your Joysticks and buttons to the Arcade Bonnet, you can visit the documentation page on Adafruit's websites.
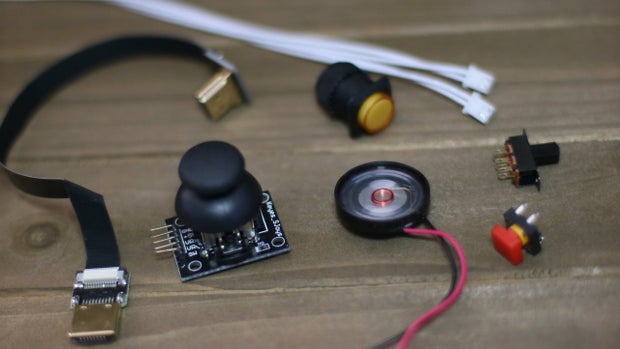
Components For Arcade Bonnet
Then with the Pi turned off, I connected it to the Pi's GPIO pins. After turning the Pi back on, we can now connect to it via SSH to install the Arcade bonnet software and make everything work. To get the buttons and joystick working, just run this script that pulls the installation files from the Adafruit github repository.
curl -O https://raw.githubusercontent.com/adafruit/Raspberry-Pi-Installer-Scripts/master/arcade-bonnet.sh
sudo bash arcade-bonnet.sh
Getting the audio working is a two step process. First, run this script and reboot your Pi.
curl -sS https://raw.githubusercontent.com/adafruit/Raspberry-Pi-Installer-Scripts/master/i2samp.sh | bash
sudo reboot
After reconnecting, run the exact same script a second time and reboot again.
curl -sS https://raw.githubusercontent.com/adafruit/Raspberry-Pi-Installer-Scripts/master/i2samp.sh | bash
sudo reboot
After the second reboot, the speaker should be working. Now that we have a joystick and arcade buttons to control the Pi, we don't need the default keyboard settings that we set up initially. So after connecting to the Pi via SSH again, you can run this command to go into the configuration settings:
sudo ~/RetroPie-Setup/retropie-setup.sh
And then go to Manage Packages -> Core Packages -> emulationstation and reset the input. After rebooting one last time, it should prompt you to set up your controls again. But this time, you can use your keyboard and buttons as the inputs.
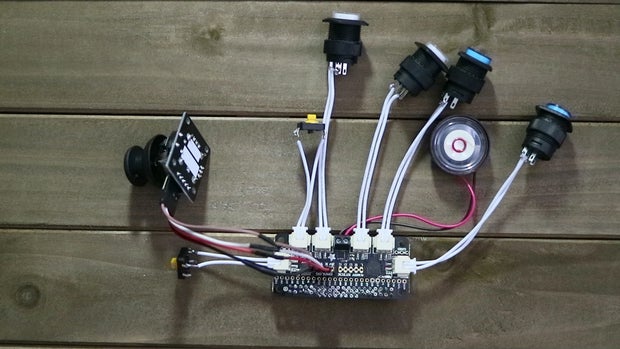
Bonnet With Components Attached
Step 7: Loading Games

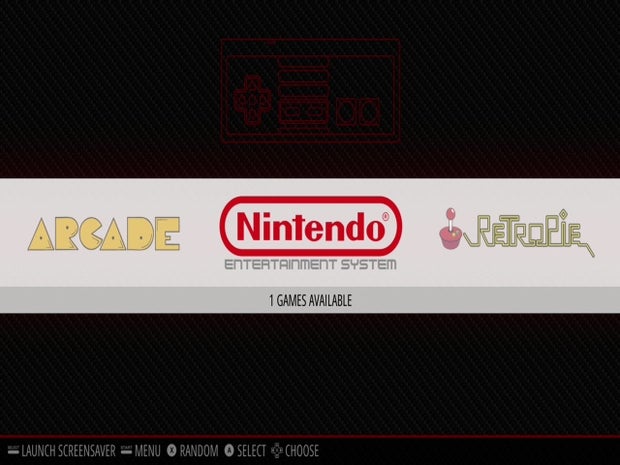
What would an arcade be without games? Games that will play with RetroPie are known as ROMs. These ROM's can be for various different platforms (Arcade, NES, SNES, Xbox, Playstation, etc). How you obtain these ROM's is comletely up to you. But if you just want to test it out, you can download some free arcade ROM's for non-commerical use from here.
Now how do you get it on the games on the Pi? By default, the RetroPie has file sharing enabled. So you can basically type in the Pi's IP address into Windows file explorer to see the folders to put the ROMs. Where you put them depends on the type of game you're adding. Arcade games go in the MAME folder, Nintendo games go in the NES folder, Playstation games go in the Playstation folder, etc. Once you have your ROMs copied over and you reboot your Pi, you should now see your games in the RetroPie menu.
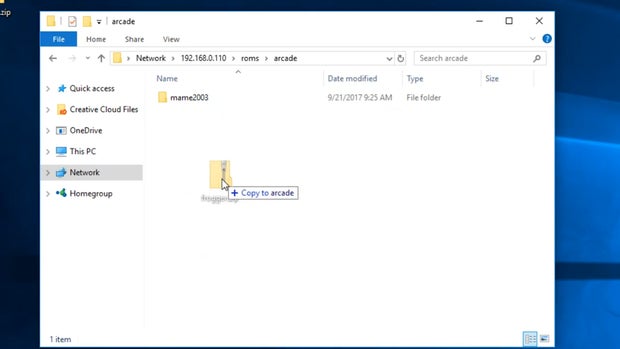
Copying ROM's To The Shared Folder On The RetroPie
When launching a game, you may or may not experience an issue with the controls not working. This is because, in some instances, you have to set up the controls specifically for each emulator you're using. For instance, if you're playing a Nintendo game, you have to hit the buttons equivalent to "Select + X" to access the emulator settings where you can then map your controls and save them. For arcade games, you can hit the button equivalent to the "Tab" key (may require plugging in a keyboard temporarily) and then map the controller buttons to the right commands.
Copying ROM's To The Shared Folder On The RetroPie
With the controllers working and the games installed, let's make it portable.
Step 8: Putting It All Together

Before we can start shoving everything into the lunchbox, we need to be able to power it from a portable power source. Since both the 5" LCD and the Pi can be powered from a 5v micro-USB source, I'm simply using a rechargeable backup battery pack with dual USB jacks.
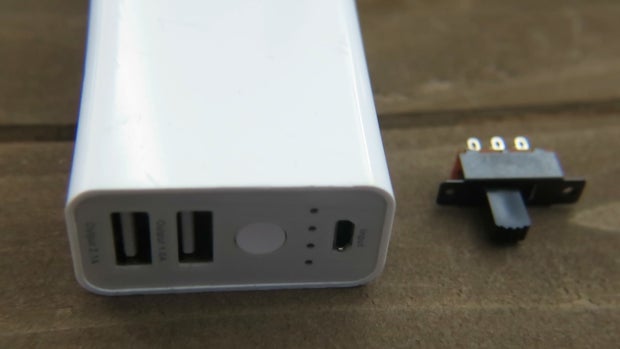
USB Charger Battery Pack
Since I don't want the Pi and the monitor to be continuously draining power from the battery pack, I cut open some USB cables and soldered them to a dual channel switch so that I could turn both the Pi and the monitor off by flicking a single switch.
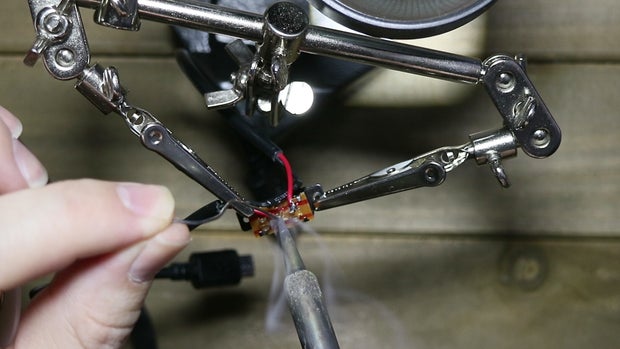
Soldering USB Cable Wires To Power Switch
Testing Out The Switch And Power Supply
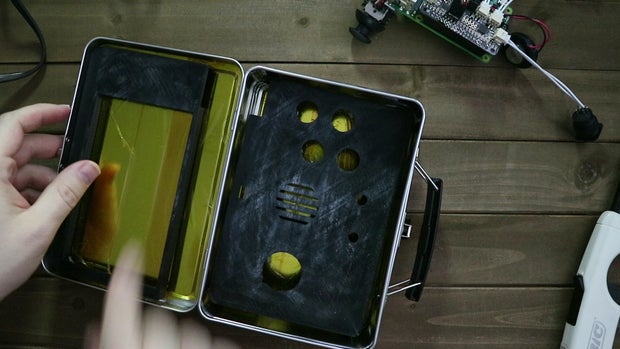
That should do it for all the components, now we just need to dump everything into the lunchbox. And by "Dump", I mean strategically place. And do that, I 3D printed a screen holder that I hot-glued to the lid of the lunchbox, and a controller board that I affixed the buttons, joystick, speaker and switch to.
3D Printed Components
That, along with using flat HDMI and USB cables to save space, made it so that everything fit inside the lunchbox nice and neatly.
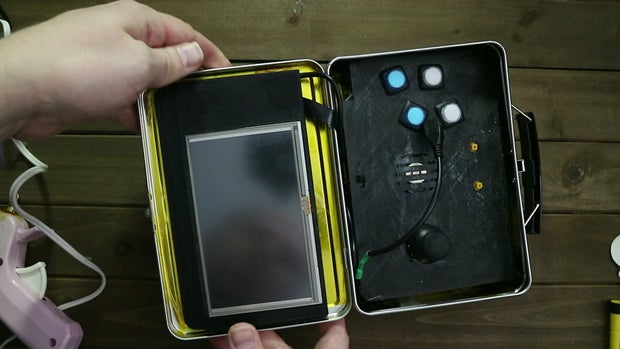
Lunchbox With All Components In Place
With the battery pack charged up, I flipped the switch, let RetroPie boot up, selected a game and started playing! Now with video games inside my lunchbox instead of junk food, hopefully I'll finally start losing some weight...
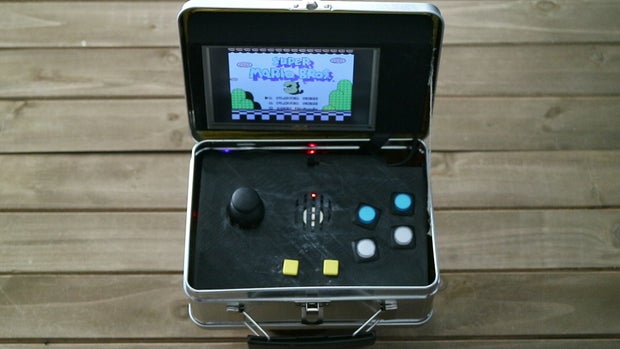
Final Product
Final Product Close Up

Participated in the
Microcontroller Contest


