

Introduction: Minibike Seat Suspension (Coleman CT200U)


Many minibikes have no suspension aside from the give of the tires. This is a somewhat easy modification to make riding more comfortable.
There are several ways that people are using the springer kits. This solves a few issues I have.
In many, I don't like the look of the seat towering over the stock position. This design does sit above stock, but due to the recessed nature of the bracket its a good compromise.
Having the seat only attached by the front hinge wasn't going to work for me. I didn't feel like I had total control of the bike. It was too floaty.
this design creates more of a direct link without looking entirely too silly (to me)
I'm happy to answer any questions as time permits.
Supplies
1. Springer seat kit (hinge and springs)
1. 1/2 inch thick OSB or comparable substrate
1. 3 3/4 closed bar holder
4. 1" pipe hangers
2. 1/4-20 6" threaded rod
4. 1/4-20 locknuts
1. 5/16x2x5 square u bolt
Misc stuff I used laying around
a few self tapper screws
2 wood screws
length of bike inner tube
patch of sheet metal
I ordered the springer kit from Amazon, there are several 3 inch springs
the rest I got from my local hardware store, or had lying around the garage.
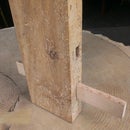
Step 1: Disassemble Seat/make Substrate.


So we need to add a substrate to the stock plastic one., i used OSB and cut to the stock size.
Carefully Remove the staples from the bottom of the seat. Trace the plastic seat tray onto the OSB. cut and shape OSB. I feathered the edges to ease reupholstery.
Transfer the bolt pattern from the plastic to OSB
create pocket for the Ubolt
bolt on springer Hinge.
place backer bar the same depth as the plastic pocket. this should be in line with the ubolt
Step 2: Ubolt Retention Plate


Make a plate to retain the ubolt to OSB.
This metal will also be the spring wear plate.
Thread copper tubing onto ubolt legs
Step 3: Drill Closed Bar Holder


Find the centerline of the closed bar holder.
Drill 2 holes to correspond with the ubolt legs. This hole should accept the slider sleeve.
In addition, 2 inside stock holes should be made symetric by adding 2 holes the same size.
Step 4: Assemble the Seat


both my bikes had damage already to the foam below. I took this time to shore it up with glue and duct tape.
Put seat back in reverse order.
Bolt substrate to plastic using stock bolts.
Carefully stretch seat cover over OSB and staple.
Step 5: Assemble Seat/shock

Sleeve the u bolt. Sandwich springs between seat and ubolt.
Run nuts on ubolt ends to retain.
Step 6: Modify Conduit Hangers


Create tabs to hook into closed bar holder.
Cut a tab by removing the sides of the open end. The tab should terminate close to the center rib feature.
Bend the resulting tab up away from the body.
Cut a length of old bike innertube to cover the curved bit. Leave the new tab, and the fastener hole exposed.
Step 7: Attach to Minibike


Bolt the hinge to bike.
slip hanger tabs through bar holder
bolt beneath with threaded rod/lock nuts


