

Introduction: My Metal Hand Doorknob


Once upon a time, before COVID, I visited the WNDR museum in Chicago with my family. (If you ever visit Chicago, you should check out this museum!) And I was inspired by the bronze metal hand bathroom doorknob. The doorknob was unique, it felt sturdy and heavy and like usual, when I see something so original I always get this insatiable desire...and I decided I had to build a metal hand doorknob for my house. You might be thinking, why not make a hand out of plastic as that would be WAY easier, but trust me, you can tell the difference when you grab a real metal hand vs. a plastic hand and I wanted the amazing feeling of a metal hand.
I talked to a friend, artist and equally addicted maker, and asked if he wanted to make some metal hands with me. As I assumed, he was enthusiastically interested and so we started making plans together. It was fun to figure out together how to make this dream of a hand doorknob a reality.
Our initial plan was to find a free 3D model of a human hand, print the model in PLA plastic and cast the hand in metal in sand using a lost-PLA-ish technique. We ended up not going this route, but I'm still working to successfully 3D scan my hand so I can more easily make other things in life that incorporate my hand!
Quick disclaimer, I am self taught in everything I'm writing about this 'ible. I'm not an expert, but I love to experiment and figure things out and these techniques worked for me. There are so many dangerous steps in this 'ible, so please proceed forward cautiously and at your own risk.
Supplies
SUPPLIES
- 1.5-3 lb of Perfect Mold 1.5lb Mold Making Material for Detailed Molds
- 20 lb of Premium Jewelry Making Casting Powder Lost Wax Investment Powder
- 5 lb of Quality Injection Wax Flexible Aqua Wax Beads Jewelry Lost Wax Casting
- 1 spool of Moldlay wax-like filament
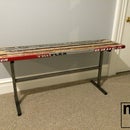
- Flask (I built mine using 12x24" 22 gauge steel sheet), spot welder to weld sheet metal, 2 C clamps
- 2 two gallon buckets for mixing investment
- 2 small disposable garbage cans for mixing and creating alginate mold
- 2 disposable "chip" paint brushes
- 12"x24" 22 gauge sheet metal
- 6 pounds of aluminum ingots, 18 pounds of copper ingots
- (optional) metallic metal paint
- (optional) bondo
- Kwikset doorknob
- Play sand
TOOLS
- Pottery kiln or oven capable of getting to > 1000 degree Fahrenheit
- CNC Plasma cutter or drill with .45" drill bit
- Random orbital electric sander (no sand paper required) to vibrate mold material
- Drill press and spade/paddle bit (probably 7/8" or something close to that)
- Harbor Freight 220V spot welder
- Scale for measuring weight of investment to get right mixture
- Kitchen measuring cups
- Large metal mixing spoon
- Furnace with crucible to melt metal and appropriate tools including tongs
- Ingot mold (or muffing pan)
- Kitchen hand mixer to mix mold materials
- Hot glue gun & hot glue
- 2" clear packing tape
- Measuring cups and CC syringe for precise measurement of water for investment mixing
- Propane torch
- Putty knife
- Kitchen sauce pan for melting wax pellets (note, this pan will be destroyed in the process and won't be able to be used for cooking ever again).
- Respirator or dust masks
- Eye protection
- Welding gloves
- Fire extinguisher
- Angle grinder and thin cutoff wheels, wire wheel and optionally course flap sanding wheel
- Dremel with small cut off wheels
- Wire brush
- Pliers
- Calipers
- Exacto knife
- Old soldering iron for melting wax
Step 1: Can I Get a Hand?


In search of a free 3D model...
Following our initial plan to find and print a 3D model of a hand, I assumed there must be lots of human hand 3D models on thingiverse.com, youmagine.com or on other 3D printing file sharing sites, and certainly we could find a model that has the hand modeled in a "hand shake" position (thumb out a bit, fingers slightly spread apart and fingers bend a bit). But in the fall of 2020, I only found one freely available hand 3D model in the "hand shake" pose in my Internet searches. And the one model that I found had fingers that were so skinny that it did not look like a real human hand as it was too slender. You can see me experimenting with this 3D printed model in the pictures.
Once I determined we were not going to be able to easily find a 3D model of a hand, we decided it would be more interesting anyway if we modeled our own hands for our doorknobs.
Our plan
It may seem a bit convoluted, but we create a flexible mold and then create a wax model of the hand from the flexible mold. Then, using the wax model, we create a second mold, called an investment mold, and then melt out the wax from the wax model to create the final mold. Then we pour molten metal into the final investment mold. If anything goes wrong throughout this process, you unfortunately have to start from the beginning as every mold and the intermediate wax model are all destroyed in the process of creating the final metal hand. The good news is that it is pretty simple and most of the materials are fairly inexpensive. There are a lot of different tools required for this 'ible, but if you do some research, you might be able to find an alternative to some of the more expensive tools.
Here are the steps for this overall 'ible:
- Create a mold of my hand - this step creates a flexible alginate mold of my hand in a hand shake position.
- Make a wax model of my hand - this step uses the flexible alginate mold from the previous step to create a wax model of my hand.
- Make a flask - this step makes a flask, which can be thought of as the exoskeleton (or container) of the investment mold (the investment mold will be created in the next step)
- Make an investment mold - this step uses the flask created in the previous step to encase the wax model of my hand, from two steps previous, into investment. The investment dries a bit like cement or plaster into a hard substance.
- Melt the wax out from the investment mold - this step is where the investment mold is heated in a kiln to bake the investment material and heat the wax so it melts out of the investment, leaving the final mold into which molten metal will be poured.
- Pour molten metal into investment mold - this step is where we melt metal in a furnace and pour the molten metal into the investment mold, which we finalized in the previous step.
- Extract metal model from investment - this step is where we dig the final metal hand model from the investment material.
- Clean up the metal model - this step is where we clean up the resulting metal model and make sure it does have any sharp edges and paint it if desired.
- Attach metal hand to doorknob - this is the final step where we modify the doorknob and metal hand and fasten the hand as a functioning doorknob that opens the door when you turn the hand knob.
In the next step we will create the mold of my hand...
Step 2: Create a Mold of My Hand


In this step, we will create an alginate, single-use, flexible mold of my hand.
This step is kinda messy, so definitely put down a drop cloth on the ground and on your working surface. I recommend a long table as a working surface for this step. And although alginate appears to be pretty safe stuff, it would be smart to wear a respirator or dust mask while measuring and mixing to make sure you don't get Perfect Mold dust inhaled in your lungs. If the weather is nice, this would be great to do outside!
We used Perfect Mold which is an alginate-based mold material. This material is safe to have against your skin, is inexpensive, dries quickly, creates incredibly detailed molds and is flexible so you can remove your hand once the mold solidifies properly! The mold is single use because under most conditions, the mold needs to be destroyed to remove your model (more about this in a future step) This is the go-to material that folks use to mold different body parts, especially hands.
We want our final metal hands to include the entire hand and a portion of the wrist, so it is important that our mold encapsulates the entire area we wish to be included in our final metal hand. It is easy to cut off excess material once we cast a metal hand in a future step, but it is impossible to add more metal after the fact, so we erred on the side of molding higher up the wrist than we thought we'd want and need.
It might sound silly, but if you want your hand to be in a particular position in your mold, you need to practice the position so you get the feel for the desired hand and finger position without looking at your hand...because when your hand is in the mold material, you will not be able to see your hand's position and it is not easy to know the exact position of your hand.
This mold material is pretty easy to clean off anything metal or plastic, but we used a small flexible garbage can that we purchased from a dollar store. We bought several of these small garbage cans so we could use them to mix as well as holding the mold. You can use whatever container you want, there are two things to consider:
- The container ideally will have rigid sides that don't flex so the flexible mold material will hold its shape and not flex in or out as that will alter the size of the mold and can distort your final wax model that is molded in this mold.
- The ideal sized container is just a bit bigger than the size of the body part for which you are making a mold. Ideally you have about 1/2-1" of extra room for mold material behind the size of your hand so the resulting mold is solid all around, but does not necessarily use a lot of unnecessary mold material.
- If in doubt, buy more mold material and use a larger container as a container that is too small will not work, but a container that is too larger just requires more material, but works fine.
Mixing the Perfect Mold material
Perfect Mold sets VERY quickly, read the instructions on the back of the bag or for whatever product you are using. And use a timer on a smartphone to make sure you track the time as you only have 1 1/2 - 2 minutes from the time you start mixing to the time your hand has to be properly inserted and still for the mold to set perfectly. It is really easy, just plan ahead!
Although Perfect Mold can be mixed by volume or by weight, we found it easier to mix it by volume. Carefully measure 1/2 a cup + 1/3 cup (level and not packed!) of perfect mold mix to 1 level cup of water. Our technique was to measure out approximately ten 1/2 + 1/3 cups into an intermediate container and added ten cups of water to a different, but final, container were we intended to mix in the dry Perfect Mold material and then use as the vessel where the hand will be submerged and the mold will be made. Per the instructions, it is important to add the Perfect Mold material to the water and not the other way around!
Once the Perfect mold is poured into the water, we stirred first with a large metal spoon for approximately 30 seconds to get the material somewhat mixed. Then, using a kitchen hand mixer, we stirred the mixture for another 60 seconds, stopping a few times to stir with our large spoon to ensure no dry mix was left on the sides or bottom of our container. Take care while mixing to keep the mixer's beaters underneath the surface so you are not introducing air to the material.
Once you have mixed for a total of 90 seconds, start coating the hand to be modeled with the alginate mixture. Using two hands, smear the alginate material all over the hand to be cast, then slowly lower that hand (which is already covered in mold material) into the vessel with the mixed Perfect Mold. It is helpful to slowly lower, then raise a bit, then lower more, then raise a bit repeatedly as you lower your hand to the appropriate depth over approximately 5 seconds. This allows you to better ensure your hand is coated properly and should avoid or reduce air bubbles. Air bubbles that set up, in the mold against your hand, create bumps on your future casting.
Once your hand is fully submerged, wiggle your fingers a bit and make sure that your fingers are positioned as you desire for your mold. And make sure no part of your fingers or hands are within approximately 1/2" of any side of the container. You may feel some small chunks with your hand, don't worry, if you carefully smeared mold material on your hand previously, these chunks should not cause any negative effect.
If you find that the mold material is not going as high as you want because your container is too big or you didn't mix enough Perfect Mold, have some scrap pieces of wood (1"x2" x 18" works well) handy to push into the material, away from your hand, to take up volume and raise the level of the Perfect Mold material in the container. (See the wood sticking out of the mold material in photos for this step if this does not make sense).
Then, set a timer on your smartphone and keep your hand as still as possible for 5 minutes. After 5 minutes, you can start to gently wiggle your fingers and twist your hand and you will feel the release of the mold material from your hand. Once you feel like you've released the material from your skin, you can gently and slowly lift your hand to remove it from the mold material. The mold material is flexible and will stretch to allow your hand to release from the mold without harming the mold.
Now that your hand is removed from the mold, shine a light into the mold and you should be able to see extreme detail in the mold that reflects your palm and the back of your hand. Don't touch inside the mold and leave the mold material inside the container where it solidified. Set the mold aside for the next step.
In the next step we will make a wax model of my hand...
Step 3: Make a Wax Model of My Hand


In this step, we will melt wax pellets and pour the molten wax into the Perfect Mold mold that we created in the pervious step.
I don't know how long the Perfect Mold, single-use mold will last after it is created. The mold material seems to hold a lot of moisture even after the material "sets", so I'd assume over time the moisture would evaporate and the quality of the molds would deteriorate. However, I'm just guessing and we made it a point to always pour our wax into the mold within a few hours of creating the mold. And our results were amazing.
We used Prestige wax pellets from Amazon for our wax model. For our first hand, we melted the pellets in a kitchen sauce pan using two propane torches to provide heat (from above and below). It took a very long time to melt the wax using torches and it was not fun. On our second hand we melted the wax using the stovetop of a "shop stove" on medium-high in a sauce pan. Note that your sauce pan will never be able to get clean or be used for food again and lots of nasty smell and smoke is created while melting the wax using either technique, so make sure you have proper ventilation.
Make sure you melt enough wax to pour and fill your entire hand in your mold. We melted 2 lbs of wax pellets for each hand. 2 pounds was more than enough and we were able to reuse unused wax...so melting too much wax is better than melting too little wax.
Once your wax pellets is fully melted in your sauce pan and you have no more pellets of unmelted wax, it is time to pour into your mold. First, carefully shake out your mold to make sure nothing fell into your mold cavity. Then place your mold with the open wrist facing up on a flat stable surface. Finally, slowly pour melted wax into your Perfect Mold mold in a steady stream to avoid trapping in air during your pour. As you are initially pouring, you should have a sander on the side of the mold container to create some vibrations to encourage the extraction of any bubbles.
Note that once the wax is melted in a metal sauce pan and is take off the heat source, it stays liquid for easily 5+ minutes...so you have lots of working time. But vibrating bubbles should be done during the first 30 seconds of the pour only. The molten wax level in your mold may drop a few times over 2-3 minutes from the beginning of the wax pour. Keep topping off the wax by pouring wax into the top of your mold to make sure the wax comes to the very top of the mold.
Give the wax time to solidify. The time required will be dependent on many factors, but most importantly, the size/volume of wax in the mold. During winter, we put the alginate molds in a pile of snow outside to help cool the wax more quickly. You definitely want to be patient and you don't want to pull the hand out of the mold before it is fully set and solid! We waited about 1.5 hours, for the hand to cool and solidify, before we extracted it from the mold.
To extract the wax model from the mold, you will be destroying the single-use mold. First, make sure your wax is fully cooled and solid or else you will wreck your model and mold. Once you are sure your wax has cooled to a solid, carefully tearing off pieces of the flexible mold material. The cooled wax is surprisingly strong, but it would be possible to break the casted wax hand. So break off small pieces of the mold materially slowly and carefully. Be especially careful removing mold material from in-between tight spaces like between the fingers. Once the hand is completely removed from the mold, clean it off with water or a soft brush to make sure all pieces of the mold are removed.
Inspect the hand and look for any imperfections in the casting. You can use a very sharp knife (e.g. exacto knife) to remove any protruding surface imperfections (which would likely be due to air bubbles against your hand In the mold). Any indentations or imperfections in your wax model can be repaired by melting and adding wax to your hand model. I've found it easiest to use an old soldering iron to melt small pieces of wax. If you do work on any imperfections on your hand, start practicing in a place that is not prominent in as it may take a bit of practice to get the hand of melting and adding wax.
In the next step we will build a flask...
Step 4: Make a Flask


In this step, we will create a flask.
A flask is a metal open ended cylinder (or container) that will hold our investment material. In later steps we will heat our investment material and the metal exterior flask helps avoid cracking of the interior investment material.
The holes in commercial flasks, I believe, are so moisture can evaporate more easily from the investment material as it is drying or being baked in the kiln. If you are like me and don't want to buy a flask, just make sure you find something metal and somehow cut or drill holes in it so the investment can dry properly. I've included the SVG layout for my flask in case anyone else wants to use their CNC plasma to create a flask like I did.
Flasks are kinda expensive and I had metal laying around, so I decided to save some money and build my own flask. Flasks are reusable, so you can use it for projects beyond this 'ible. If you don't want to make a flask, you can easily buy one online.
I built my flask by cutting lots of .45" holes in a 12"x24" piece of 22 GA steel. And then bent and clamped the metal into a cylinder along the 24" length, resulting in a cylinder that is 12" tall. The sheet overlaps about 2 inches on each end of the sheet of metal. Finally, I spot welded the metal using my Harbor Freight 220V spot welder. Last step was to flatten the cylinder a bit to create more of an ellipse shape when viewed from above, to better fit the width of my hand.
In the next step we will make an investment mold...
Attachments

Step 5: Make an Investment Mold


In this step, we will create vents and encase your wax hand model from the previous step in investment material.
This step is about embedding your wax hand into investment material so it can be melted out to create yet another mold that is capable of accepting molten metal in future steps. This step involves mixing powder investment with water, definitely wear a respirator or dust mask to protect your lungs!
Test fitting wax hand to temporary bottom
In a future step, we will pour wet investment material into the flask, so we need to temporarily prepare to have a wood bottom on the flask (we will also tape up the holes in the sides of the flask so they don't leak!) to ensure it does not leak as the wet investment material dries. You need to find a piece of wood to cover the bottom of the flask. The wood can be any shape as long as it is the same size or larger than the bottom of the flask. I used a rectangular piece of 3/8" plywood, but any flat wood that is 1/4" or thicker will work fine.
Later, we will glue the wax hand, wrist side down, to the wooden board, so it is important to inspect the wax hand model and make sure the bottom of the hand (where the hand's wrist meets the board) is flat. You can use a sharp knife or a piece of heated metal or hand saw to cut and smooth the bottom.
Venting
Proper vents will be important while pouring molten metal (in a future step) to ensure that air/gasses are able to escape out from the mold as molten metal flows into the mold. For our mold, we'll be pouring molten metal down thru the wrist and into the palm of the hand and finally into the fingertips, which will be at the very bottom of the mold. While I'm not an expert in venting, it seemed logical that we'd want to have a vent for each of the 5 fingers to ensure the metal fully fills all of the hand, and especially into the fingertips. So we created a vent for each finger that allows gasses and metal to flow into and beyond the fingertips which should result in the fingers being fully filled with metal.
While vents are typically created using wax, we decided to use pieces of Moldlay 1.75mm filament for our vents. I happened to have Moldlay filament handy and it is essentially wax that is already formed into a 1.75" spool for 3D printing wax models. For each finger, we cut two 12" pieces of Moldlay filament, twisted the filament together and dipped the entire twisted 12" length of twisted filament into melted wax in order to coat it and make it solid and coated with wax with no voids between the two pieces of filament. Essentially, we were able to make a much wider vent, probably around 4mm wide, by combining two pieces of wax-like filament and then connected them together and adding bulk by dipping them into melted wax. Because the filament melts (518 degrees Fahrenheit) at a much higher temperature than the wax (163 degrees Fahrenheit), it was easy to dip the filament into the wax and there was no risk of the filament melting in the process of coating it.
A vent needs to run from the fingertip to the bottom of the mold (the side with the wrist). This is done by melting one side of the vent into each fingertip and glueing the other side of the vent to the temporary wood base. We picked the fingernail rather than the finger tip pads as a better place to attach our vents because we wanted the vent to be as close to the tip of the finger as possible and also wanted to attach the vent in a place where we could grind the vents off (off of the final metal model) and not have a negative impact on our final metal model. We felt we could successfully grind and smooth out and "hide" where we had vents on the fingernails easier than grinding the finger pad of the fingers.
To attach the 12" vent pieces to the wax hand fingernails, we found it easiest to melt a divot in the wax hand's fingernail using an old soldering iron. The divot would stay molten for a 3-5ish seconds, during which, we stuck one end of the vent/twisted filament into the molten divot. We'd hold it still and after approximately 10 seconds, the wax would harden and the vent would be glued into place on the fingernail side. We repeated those steps for all 5 fingers.
Attaching hand to temporary bottom
Place the hand on the 3/4" plywood bottom and verify it is positioned in a place where the flask can be placed around it and the wax model and venting will not touch the side of the metal flask sides. Once you are okay with the position of the hand and vents, hot glue the hand and every vent in place to the wood bottom.You will need to trim the length of each vent so it can be positioned inside the flask comfortably away from the sides of the flask.
You want to ensure that the hand and vents are sealed, with hot glue, around the entire perimeter where the hand and vents meet the wood bottom. This will ensure that the final investment cast has an opening for the wrist of the hand as well as the vents on the bottom of the final investment cast.
Coat hand in investment to avoid bubbles
It is very important that you mix the investment with water to the exact specifications per the directions for the investment material that you are using. For us, using Prestige investment and "conventional mixing" instructions, it was specific to add 1 pound of investment powder for every 181.6 CCs (or .77 cups) of water. You will want to mix the entire bag or have a scale for measuring the weight of the powder. And the instructions specifically state that you add powder to your water. The instructions call for 4 minutes of mixing, followed by 4 minutes of using a vacuum to remove bubbles. We adapter our technique to not use a vacuum as we don' the that equipment and I think it worked really well.
We assumed that the mixture of investment powder and water had an impact on whether the investment mold would crack before or during our molten metal pour, so we took extreme care to measure the powder and water very accurately. We did not experience ANY cracks in our investment, so I think our attention to detail paid off!
We started by mixing a small batch (according to the directions, but scaled down) of approximately 1/2 pound of investment into 91 CCs of water. You'll want to use a smart phone to use a stopwatch as the mixing time is quick and critical that it is done according to the instructions. We initially mixed for 30 seconds using a large metal spoon to get the powder started to be mixed with the water. We then mixed for 3.5 minues using a kitchen hand mixer being careful to keep the beaters submerged in the investment as to minimize pulling in any air. Simultaneous to the mixing with the hand mixer, we had a random orbital sander, without any sand paper attached, against the side of the bucket to create vibrations and encourage bubbles to exit the mixture.
Once the 3.5 minutes elapsed, we used a disposable "chip brush" paint brush to paint investment onto the hand and vents. We were careful to paint it on while making sure there were no bubbles trapped in the investment. This technique ensures the first layer of investment is solid to the wax and minimizes the chance of bubbles and should result in a higher quality final cast piece.
Glue flask to bottom
Now that you are done painting the first layer of investment on the model and vents, using a hot glue gun and normal hot glue gun glue, from the outside of the flask hot glue the bottom of the metal flask to the wood base while ensuring that the flask does not touch the hand or vent pieces as that could scrape off the investment. The flask needs to be water tight to hold the investment material, so you need to wrap clear plastic shipping tape around the entire outside of the flask to cover the holes that I CNCed.
Fill flask with investment
Finally, mix enough material for the whole flask. our flasks required about 10 lb of investment.
We mixed 10 pound of investment into 1816 CCs of water. And we mixed for 30 seconds using a large metal spoon to get the powder started to be mixed with the water. We then mixed for 3.5 minutes using a kitchen hand mixer being careful to keep the beaters submerged in the investment as to minimize pulling in any air. From time to time during our mixing, we used our large metal spoon to scrape the sides and ensure that all powered was mixing properly. Simultaneous to the mixing with the hand mixer, we have a random orbital sander, without any sand paper attached, against the side of the bucket to create vibrations and encourage bubbles to exit the mixture.
After 4 minute of mixing, slowly pour the investment into the flask and fill it to the very top.
The instructions for the investment call for the flask to sit undisturbed for 90-120 minutes before heating the flask in a kiln to burn out the wax. We allowed our flasks to sit undisturbed for approximately 8 hours before we started our burnout.
In the next step we will melt the wax out from the investment mold...
Step 6: Melt the Wax Out From Investment Mold


In this step, we will remove the temporary wood bottom, remove the tape and heat the flasks to melt out the wax.
Using a razor knife, cut away as much hot gun glue as possible that is gluing the base of the flask to the temporarily wood bottom. Next, using a propane torch, heat the bottom of the flask to melt the hot glue and use a putty knife to slowly and gently pry the temporary wood bottom off the flask.When you release the wood bottom, it should not disturb the investment material or the wax model.
The flasks are then placed on a pan on the bottom of an electric kiln oven. The flasks are raised just a bit above the pan with rocks holding the flasks up a few inches from the pan on the bottom of the kiln, to allow the wax to drip into the pan as it melts.
I have a 30 year old kiln that I bought on Craigslist, so we used an external temperature sensor to monitor the temperature of the kiln. And we baby sat the kiln and manually turned the kiln from low to medium to high in order to keep the temperatures as close to the investment burnout schedule as possible. (see the investment schedule PDF).
After 10 hours, we turned off the kiln and allowed the temperature to start to fall until 300 degree Fahrenheit, at which point we thought it would be safe to remove a flask from the kiln using a long metal hook and without getting too close to the open kiln.
While the kiln was slowly cooling down from the max temp of approximately 1400 degree Fahrenheit, we began the next step which involves melting metal...
In the next step we will pour molten metal into the investment mold...

Step 7: Pour Molten Metal Into Investment Mold


In this step, we will melt aluminum and pour it into the investment mold.
We are using a basic propane melting furnace to melt our metal outside to ensure optimal ventilation of all gasses released during the melt. We wore long sleeve cotton pants and shirt as well as eye protection and a face shield and welding gloves to protect our hands.
We used two different metals for two different hands: aluminum and copper. Aluminum is probably the cheapest, and maybe easiest, source of metal to find. To keep things simple, I bought recycled aluminum ingots from eBay. (However, I would have had the same quality aluminum if I gathered beer and pop cans along with other miscellaneous aluminum things being recycled and melted them all down and poured them into a muffin pan to create small aluminum ingots). We melted recycled copper tubing and copper wire to cast the copper hand.
While your time may vary, my propane forge will melt aluminum and fill 3/4 of a #8 crucible in approximately 15-20 minutes. My crucible is graphite, and if you don't know, the crucible is the vessel in which you melt metal using some heat source. And, BTW, a #8 crucible's exterior measurements are approximately 7-1/2" x 8-3/4" and the interior measurements are approximately 6" in diameter x 8" deep.
We melted approximately 6 pounds of aluminum and 18 pounds of copper for our two hands, this gave us more than enough metal for the pour...but you definitely want to have more metal vs. not having enough metal during your pour. It only takes me about 15 minutes to melt the aluminum and 20 minutes to get the copper molten.
You want to be heating your metal while your flask is still cooling in the kiln. Once your metal is molten, carefully remove your flask from the kiln using a long hook to avoid having to lean over the kiln as once the top is opened it is releasing extreme heat. It is not recommended to open a kiln over 200 degree Fahrenheit, so use caution and be careful opening the kiln. It is possible for the wax to catch fire in the kiln, so assume flames might shoot out the top of the kiln if you open it when it is hot. (note, if you are doing multiple pours in > 1 flasks, only take out 1 flask at a time and leave the other flasks to say warm). We placed our flask upside down in a metal bucket (with the opening of the mold facing up), covered the bottom of the flask with a small piece of wood, and used a small gardening shovel to fill in room temperature Home Depot play sand around the flask. Burying it in sand will help keep the flask warm and help avoid any cracking of the flask's investment material.
We then remove our crucible (filled with molten metal) from the propane furnace using a crucible tool we built. Then scoop out slag, using a long metal spoon, that is on the surface of the metal, and finally slowly and steadily pour the metal into the wrist opening of the investment cast. We continue to pour until, ideally, metal backs up from all openings, but especially from the primary wrist opening in the investment cast.
And finally, pour any remaining molten metal, that was not required to fill the flask mold, into a muffin pan to create small individual ingots. Once cooled, these ingots can be stored and used for a future casting project.
In the next step we will extract your metal cast model from the investment...
Step 8: Extract Metal Model From Investment


In this step, we will extract the cooled metal hands (aluminum and copper) from the investment mold.
After the molten metal is poured into the investment mold, wait about 10-30 minutes to allow the metal to cool a bit as it is very very very hot. Even after 30 minutes, the poured metal still may be so hot that it can burn you, so make sure to wear protective equipment for your eyes, hands, arms, feet and body before attempting this step. This step is best done outside where the ground can be sprayed with a hose as investment material will get on the ground.
Fill a 5 gallon bucket with water. Wearing eye and other protection, pickup the flask with tongs to remove it from the sand filled bucket. Then slowly lower the investment filled flask into the bucket of water. It is likely that the water will boil around the flask and it will result in the water splashing around outside the bucket. As you lower the flask, it will gradually stop boiling and splashing, although this could take up to a few minutes.
The water in the bucket will get warm, but should not be so warm to harm you. However, the flask, investment material and metal casting will remain very very very hot. Use tongs to lift the flask above the water, dig a long screwdriver gently into the top of the investment. If you are patient, the investment will soften in the water. Continue to dig out the investment and let it drop into the 5 gallon water bucket. Eventually, the cast metal model will likely fall through the bottom of the flask and into the bucket. Using tongs, pickup the cast metal model and remove it from the bucket. There will still be lots of investment stuck to the model, especially around small openings and crevasses. The model will still be so hot it could burn you, so use caution and don't touch it! Using gloves and a soft bristle brush, brush off the remaining investment while periodically dipping the model into a clean bucket of water.
In the next step we will clean up the metal cast model...
Step 9: Clean Up the Metal Model


In this step, we will clean up and make sure the model does not have any sharp edges.
Using an angle grinder with a thin cutting wheel, cut off excess metal at the base of hand/wrist so the hand will sit against the wall flush. Using the same grinder, or a Dremel, carefully and slowly cut off all the metal venting that exits the hand from the fingernails. It is better to go slow so you don't take off too much material.
Using a wire wheel or course flap wheel on your angle grinder, carefully knock off any rough spots without accidentally grinding away any desired details (e.g. veins on creases in skin that were replicated in the metal cast model).
Any large pieces of metal that you cut off can be saved and remelted on your next casting project!
Once my aluminum hand was cleaned up, although I was happy with the overall result of the casting, there was some minor pitting on the back of the hand. This bugged me, so I mixed some bondo and used a gloved hand to work the bondo into the pits. Sorry I don't have pictures of this step. And I lightly sanded the bondo so it was just filling the pits and not reshaping the surface of the hand or hiding any desired hand details.
The bondo dries grayish white, so I wanted to introduce a touch of color to the hand to camouflage the bondo while keeping the metal look. Painting was 2 steps:
- Step 1 was to paint the hand liberally with a disposable brush with one of my favorite paints, Modern Masters Reactive Metallic Iron paint, b/c it can oxidize and really looks like rusty metal. I thought it would be a nice touch to allow for some oxidation/rust on my hand.
- Step 2 was to use a wire wheel on my angle grinder (you could instead use a wire brush or sand paper) to remove most of the paint, but leave the dark paint in the crevasses, in any deep spots and covering the bondo. Once the hand was completely painted, you cannot see the pitting or bondo, I was very happy.
In the next step we will attach the metal hand to the doorknob...
Step 10: Attach Metal Hand to Doorknob


In this step we will modify a cheap Home Depot doorknob and aluminum hand to allow the hand to work as a functional turning interior doorknob.
I wanted a doorknob that would be easy to modify to allow me to attach the hand on the outside of my home office door and actually unlock the door when the hand is turned. I selected this kwikset doorknob because it was inexpensive, felt it would match the other existing knobs in my house and I suspected the knob would be easy to modify based on its hollow design.
Note that only one side of the doorknob needs to be modified. The other side of the doorknob (the side that does not have my hand) and the door itself do not require any modification.
I'd recommend you wear eye protection and gloves in this step to stay safe!
Here are the basic steps to modify the doorknob and mount the hand as a functioning doorknob, see the detailed pictures for more details:
- Using a thin cutting wheel on an angle grinder, cut 4 evenly spaced slits into the doorknob
- Using a thin cutting wheel on an angle grinder, cut the top off the doorknob to expose the hollow interior of the doorknob
- Using pliers, and being careful to not get cut on the freshly cut metal, bend the four "tabs" up on the door knob and begin to form them into a cylinder-shaped shaft. The metal is thin enough where this is really easy to shape. Yet the metal is thick just enough to hold its shape and provide an adequate shaft for the hand doorknob.
- Once the doorknob shaft is shaped into a cylinder do your best to make it as uniform as possible so it has a pretty consistent diameter along its length.
- Using calipers, measure the diameter and length of the shaft you created on the modified doorknob. The diameter is the size drill bit you will need to bore out a hole in your metal hand.
- Get creative and built a jig or fasten the hand in a vice (carefully to not mar the finish or break your hand by clamping it too tight). Use a drill press to drill a hole into the wrist to allow the previously created doorknob shaft fit inside. This is the hole in the wrist of the hand that will hold the hand on the door. So you should take care to ensure the angle of your shaft will result in your hand having the desired orientation once it is fastened to the door.
- Drill the shaft hole in the hand using a space/paddle bit. A wood bit works fine on aluminum. Drill the shaft about .25" deeper than the length of the shaft so the shaft on the doorknob will fit into the hand without the shaft bottoming out in the bored hole.
- Fasten your modified doorknob (don't need to worry about the hand for this quick check) on the door and double check that the door can still be opened by turning your newly created shaft and that nothing is binding. You may need to use pliers to gently grab the doorknob shaft that you created. If you find any resistance to the door knob turning or opening, figure out what got bent or twisted and fix that now (by straightening whatever got bent) before you go on to the next step.
- Finally, with the hand positioned exactly as you want it permanently fastened to the modified door knob shaft, using a cordless drill, drill a perpendicular hole that comes up through the wrist of the hand, through the doorknob shaft that you created, and into the other side of the hand. And tap the hole so you can insert a set screw. I used a .25" tap as I had .25" bolts laying around. You can use any size set screw but I thought a larger, .25", bold head looked cool.
- Finally, screw in the set screw and verify that the doorknob works properly.
That's it, congratulations on your awesome new doorknob. If you make a hand doorknob, please post a picture so we can all admire it!

First Prize in the
Metal Contest


