

Introduction: Navigation Using Apriltag and Raspberry Pi


This is a work in progress but the most basic codes have been implemented for proof-of-concept. I will continue to update this page for specific applications such as robotic and specific examples of indoor navigations. Feel free to follow this page for upcoming updates.
AprilTag is a visual navigation application developed by the University of Michigan to provide highly efficient, high accuracy localization for indoor and outdoor navigations. It is not a novel idea, AprilTag was built from the OpenCV libraries. You can develop different kinds of tags using OpenCV, and that's exactly what AprilTag provides. By generating predefined unique pictures and dimensions, the OpenCV algorithms are used to identify them and obtain the positions and orientations.
For efficiency, AprilTag uses little as 8x8 pixels, up to 10x10 pixels, it only takes six to seven bits to process the identity of a tag. In addition, with black-and-white picture, it has high tolerance to low lighting which makes this detection more robust.
OpenCV link: https://opencv.org/
AprilTag link: https://github.com/AprilRobotics/apriltag
You may find it very difficult to figure out how make it work by simply using the original link and information provided by the creator of Apriltag (University of Michigan). I had to spend quite a bit of time tinkering. All of the hard work to do the coding and the step-by-step instructions have been done so you do not have to. Send me a feedback if I miss anything and additional information are needed.
Supplies
- Raspberry Pi 4. You may be able to use a different SBC (Single Board Computer) as well.
- Logitech USB camera C310, about $25.
Step 1: Raspberry Pi, Open CV, and Apriltag Installations
- Install Raspberry Pi OS using the Raspberry Pi instructions from the website https://www.raspberrypi.com/documentation/computers/getting-started.html
- On a terminal window, type:
- sudo apt update, to update the Linux system
- sudo apt full-upgrade, to upgrade existing installed software packages
- pip install opencv-python, to install Open CV
- pip install imutils, to install additional OpenCV libraries
- pip install apriltag, to install AprilTag
- pip install dt-apriltags, to install additional AprilTag libraries.
- pip install transforms3d, to install 3D transformation libraries such as translation and rotation
- pip install moms-apriltag, to install tag picture generation.
Step 2: Web Camera Verification

- It should be plug-and-play, standard Raspberry Pi OS should have the driver.
- Plug the USB webcam.
- To check whether the Raspberry Pi sees the camera:
- On a terminal: type "lsusb"
- It should return a line something like "Bus 001 Device 003: ID 046d:081b Logitech, Inc. Webcam C310"
Step 3: Picture Preparation for Camera Calibration
Without a reference, it's impossible to know the relative position and orientation of objects in a picture. Different cameras may have different focal lengths for example. In this step we will prepare a picture for the camera calibration.
Reference: https://docs.opencv.org/4.x/dc/dbb/tutorial_py_calibration.html
AprilTag has a specific picture used for calibration:
- Download a picture of a chessboard from my github site: https://github.com/suriono/apriltag/blob/main/camera_calibration/chessboard.png
- Print the picture without adjusting the picture size (set the printer to print as it is).
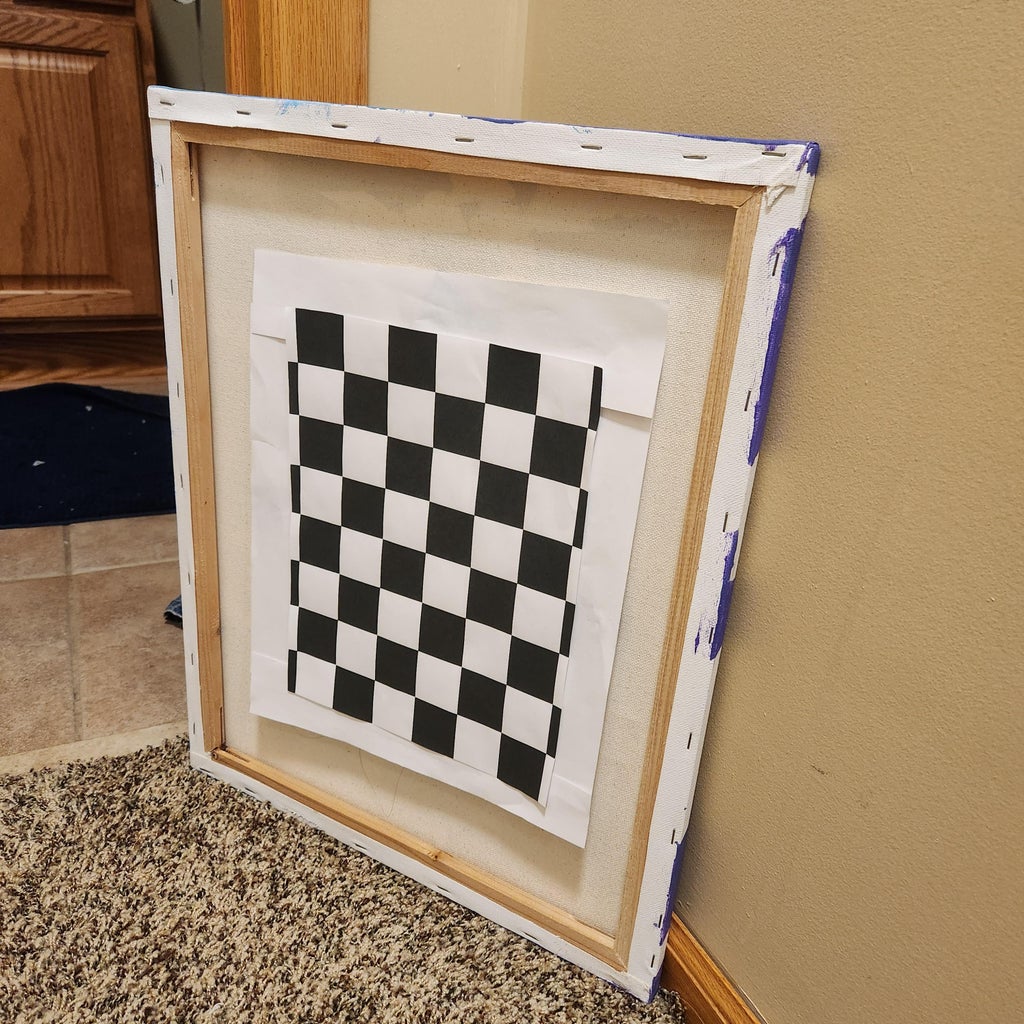
- Glue the cheesboard picture into a white piece of paper. It is very important to surround the picture with a white frame (such as a white paper), otherwise the calibration will not work.
- Attach the chessboard picture to a piece of cardboard, or anything for the convinient of holding the picture.
Step 4: Camera Calibration


- Download my codes:
- Create a folder in your working directory, with the name of "camera_calibration"
- Go to this new "camera_calibration" folder
- Copy files from my GitHub: https://github.com/suriono/apriltag/tree/main/camera_calibration
- The file named "calibration_savez.npz" is the output of calibrated data from my camera. You can delete that file, or use it for your own experiment. Upon successful calibration procedures below, this file will be generated by my code.
- Point the webcam toward the chessboard picture.
- Run my code: "python calibrate_camera.py":
- When the code successfully calibrates the camera, you should see the colorful lines and circles augmented into the edges of the chessboard, see the picture no. 4 in this section.
- A new "calibration_savez.npz" will be created. You can delete this prior to calibration to ensure this file is truly the output of your camera calibration.
- If the code fails to calibrate, move the picture around, most of the time you may need to move it closer.
Step 5: The First Test: Obtain the Position and Orientation of a Tag From the Raspberry Pi's Camera


This is the first test to ensure the camera is calibrated and the Raspberry Pi is ready for navigation.
Steps:
- Download an AprilTag tag picture from my GitHub: https://github.com/suriono/apriltag/blob/main/images/tag36h11_00.png
- Print the picture, you may enlarge the picture (and later provide the code with the size of the picture).
- Download my codes from my GitHub: https://github.com/suriono/apriltag
- Edit the "test_find_tags/test_multiple_tags.py" file, adjust the size of the tag you printed from the step no.2 above:
- The line in the code: "tagfinder_obj = tag_finder.Detector(0.047)", the last value of "0.047" is the distance of the pixels from left to right, see the 3rd picture in this section, in meter (0.047 = 47mm).
- Place the picture in front of the camera and run the following from a terminal window:
- python test_tag_from_camera.py
- See the YouTube video showing the result:
- X, Y, Z position of the tag relative to the camera
- Yaw, pitch, and roll for the orientation
- An augmented reality (AR) of an arrow to demonstrate how to augment graphics into a live video. In this AR it is a 2D augmentation, it can also be rendered in 3D.
Step 6: The 2nd Test: Obtain the Position and Orientation of the Raspberry Pi's Camera From a Tag
This is the 2nd test to ensure the camera is calibrated and the Raspberry Pi is ready for navigation. This is the opposite of the 1st test; this test is the position and orientation of the Raspberry Pi's camera relative to a tag. Mathematically it is the inverse of the transformation matrix from the 1st test.
- Download the codes from my GitHub: https://github.com/suriono/apriltag
- Similar to the previous step, this time run the following command on a terminal:
- python test_camera_from_tag.py
- When you run the python code, it will display the coordinates of both the tag relative to the camera, and the camera relative to the tag. Watch my YouTube video
- Purple text: the coordinates (X,Y,Z,yaw,pitch,roll) of the tag relative to the camera.
- Green text: the coordinates of the camera relative to the tag.
Step 7: The 3rd Test: the First Robotic Prototype


This is the first practical example for this project. An AprilTag picture is used to navigate a robot. By obtaining the (X,Y,Z) position and the (yaw,pitch,roll) orientation, the robot is navigated toward the AprilTag above the robot in this demonstration.
For a real world application, imagine a building where the ceilings are filled with unique AprilTag pictures for navigation.
The first diagram shows how an Arduino is connected to L298N motor driver. Having an Arduino is optional, technically the Raspberry Pi could be used to drive the motor but for quicker prototyping (this is not the final product) and arduino is used.
Not shown in the diagram is the Raspberry Pi is connected to the Arduino using a USB cord. The serial communication goes through the USB cord.
The codes to run this prototype are available in my GitHub : https://github.com/suriono/apriltag. To run it:
- VNC to the Raspberry Pi.
- On a terminal window, type: "python test_robot.py"
- Using the picture from Step 5 to navigate the robot as shown in my video.
Step 8: The 4th Test: Multiple Tags Navigation
Stay tuned for the next navigation prototype test......


