

Introduction: PIFpack SERIOUS


Packing to leave should not be hard. PIFpack is a large hanging tool-organizer that folds, zips and fastens into a backpack. Making it easier to become nomadic in your practice of making and manipulating the world.
This work is part of a larger collection of items to support a Wearable Studio Practice. Making it easier to become nomadic in your practice of making and manipulating the world.
The PIFpack photos in this step are of the first prototype. The photos in the following step are are of the final version documented in this Instructable.
Step 1: PIFpack SERIOUS 30l


The world, experienced through the hands of a maker is a malleable place. Making things and making things happen, are means of exploring what we don’t know. Our studios provide space for our ideas to unfold. Conveniently organized tools at hand, everything is in it’s right place. The studio provides infrastructure, power, shelter. Working in our studios, the days slip by. But the walls of our studio also confine our practice to a particular place. What can we experience when we pack up our tools and take our practice outdoors?
A Wearable Studio Practice is a collection of wearable and portable items that make it easier to become nomadic in your practice of making and manipulating the world. But foremost it is a mindset, of making as a means of experiencing the world.
Step 2: Not a Tool-box


The PIFpack is not a tool box. I prefer to think of it as a piece of mobile furniture, a segment of my studio that travels with me to accompany my tools and my work. I use in in my studio in just the same way that I use it in the wild or on the road.
My own practice is in electronic textiles and so many of my tools are hand-tools that can fit in this backpack. The layout is modular, so you can re-arrange the pockets and pouches to better suit your own tool needs.
It took me 2 days to sew the entire backpack. If you are a confident sewer, I would expect it could take you 3-4 days to make your own PIFpack following this Instructable. If you're not used to sewing, then it will take you longer. The hardest part is deciding where what tool should go and choosing the best pouch/pocket/fastening solution to hold each tool.
PIFpack was inspired by the week-long PIFcamp hacking event held in the Slovenian Alps in the summer of 2016. If you look at the last two steps of this Instructable you will see photos of the very first prototypes as well as photos of PIFpacks on the road and in the wild. You can see more items in the collection on the Wearable Studio Practice website.
Step 3: CURIOUS - INTERESTED - SERIOUS


The PIFpack SERIOUS is the largest in a series of three PIFpack designs. It is intended to really carry all of my tools (and some materials) with me when I travel.
When zipped up into it's backpack shape it measures 30 x 20 x 50 cm (=30l volume - is that really correct? It seems so less for the size).
When unzipped and hung it measures 50 x 140 cm.
In it's open hanging state, the PIFpack layout is designed so that the tools are located at a good reach height and in sight.
Step 4: Overview

The steps in this Instructable are organized in the order in which I took them to make the red PIFpack SERIOUS. Breaking down the PIFpack into a list of individual items that can (to some extent) be treated as independent elements I get the following:
* Upper Belts and Buckles
* Side Zippers
* Insert
* Back Panel
* Upper Side Pouches (and Additions)
* Component Pouch
* Upside-down Pouch
* Outside Access Zipper
* Lower Side Pouches
* Lower Side Elastic
* Lower Side Velcro
* Folding Holes
* Hanging Loops
* Closure Velcro
* Lower Belts and Buckles
All of these items are connected to what I will refer to as the "Base Tarp".
Step 5: Materials and Tools


MATERIALS
* Tarpaulin (tarp)
Berlin >> DE >> http://www.extremtextil.de/catalog/PVC-tarpaulin-... USA >>
* 2 x 65cm zippers
* 1 x 35cm zipper
* Condura fabric (or canvas like, not too heavy)
Berlin >> DE >> http://www.extremtextil.de/catalog/Cordura-1000de...
* Powermesh
* Fold elastic
* Elastic (various widths, strengths depending on what tools or materials you want to hold with it)
* Velcro
* Plastic rings
* 1cm metal snap fasteners
* 5mm diameter aluminum rods
* 3cm wide straps
* 2 x buckles (or other fasteners)
* Rope (1cm diameter)
* Sewing thread
TOOLS
* Nice big table for working at
* Rulers
* Pens, pencils, gelpen (for marking the tarp)
* Cutter knife and cutting mat
* Scissors
* Sewing machine (a good household machine should do)
* Hole maker, hole punch
* Snap tool
* Masking tape
* Double sided sticky tape
Step 6: Base Tarp: Trace and Cut


The base pattern for this bag is really simple, it is basically a large rectangle (50 x 140 cm) that folds up into the bag. You will need a large flat working area to lay out the full sheet of tarp material and transfer the pattern dimensions to it.
Make sure you find a good gel pen or soft pencil for marking the tarp. You will need to do a lot of drawing on it, and being able to see what you marked is crucial.
Step 7: Base Tarp: Mark Regions


Once you've cut out the base tarp, mark with bold (erasable) lines the division of the surface into the following regions:
* Upper Strip
* Upper Center
* Upper Sides
* Bottom Center
* Bottom Sides
* Lower Center Lower Strip
Step 8: Upper Center: Sew Velcro


Cut four strips of soft side Velcro (loop side) and sew them along the edges of the back area as shown in the photos.
Step 9: Back Panel: Trace, Cut and Sew


This is the outer back panel of the backpack through which rope will be pulled to make for padding, stiffening and comfort when carrying. This is basically a rectangle of Condura (treated canvas).
Mark the sewing lines that will hold the rope.
Finish the edges by folding them over once 1cm on all sides and stitching around with the machine.
Step 10: Back Panel: Attach


This is the first step that will have you maneuver the large piece of tarp on the sewing machine. Get used to it because this is the just beginning.
Sew the back panel on to the outer side of the base tarp.
Start with the center lines and work your way out.
Step 11: Base Tarp: Fold Holes


Now we jump to something completely different.
So that the Velcro closure flap will fold over nicely, add a line of holes (1.5mm diameter, 1cm spaced) along the bottom edge as marked in the pattern.
Step 12: Base Tarp: Hanging Loops


Cut out the hanging loop attachments out of tarp (2 for the top edge, 2 for the bottom edge - these will make it easier to fold up the bag for zipping it closed).
Fold in half, insert ring, and sew on the corners of the base tarp.
Step 13: Base Tarp: Closure Velcro


This strip of Velcro holds the top slit closed when the bag is zipped up.
Step 14: Base Tarp: Buckles


Melt the edges of the synthetic belt material with a lighter, thread them through the buckles and sew them back on themselves.
Step 15: Base Tarp: Top Belt

Sew the top belt to the outside surface of the upper edge of the base tarp.
Step 16: Base Tarp: Side Zippers


Mark a 1cm parallel line to the side edges of the base tarp. Mark this on the outside side of the tarp. The Zippers will be sewn on the outside for effect. The zippers split, each unzipped end attaching to the far top and bottom of the base tarp edges, and the end where the zipper comes off last sits at the mid point with a 3cm gap where it is not attached to the tarp.
To make life easier, you can use double sided tape to hold the zipper in place before sewing it. The tape can then be removed.
Step 17: Test: Zipping and Folding


Zip and fold your PIFpack together to get a sense for the final form.
Step 18: Upper Side: Pouches


For my tools I decided to make a series of tiered pouches that stack one directly above the next on each of the upper back sides. The pouches are cut with an angle so that when they are sewn together they have volume to contain the tools.
The heights of these pouches are:
* 16 cm
* 12 cm
* 10 cm
* 8 cm
To make even more use of the surface area of these pouches, you can add extra features to them.
In the following steps I show how to add:
* elastic straps: slits for threading elastic through to make tool holding straps
* magnet: for holding pins, screws and other small ferrous items
* powermesh stretch pocket: for holding all kinds of things
* holes: for threading elastic through, or attaching something later by sewing it on
Step 19: Pouch Addition: Elastic Straps


Mark, punch and cut holes and slits and then thread a piece of elastic through.
Step 20: Pouch Addition: Magnet


Add a magnet by sewing in between the pouch and an extra piece of tarp - in this case a square. Don't forget to insert the magnet before closing it.
Step 21: Pouch Addition: Powermesh Stretch Pocket


Cut a piece of powermesh to size and sew a strip of fold-elastic along the opening edge.
Step 22: Pouch Addition: Holes

Making holes almost anywhere in the tarp creates opportunity to attach things to later.
Step 23: Upper Side Pouches: Check Fit


Lay out your pouches and make sure they fit along the side strip of your backpack.
Step 24: Upper Side Pouches: Sewing Down


Begin sewing from top to bottom along the side edge closest to the zippers. Basically on top of the zipper.
When you get to the pouch with the fold-elastic and powermesh, fold these over and under the pouch's tarp edge for a clean finish.
Reverse back and forth at least once when going over each pouch opening to enforce this area, because it is where all the tension will be when a pouch if full of tools
Step 25: Upper Side Pouches: Sewing Up and Over


When you get to the bottom of the last pouch, keeping the needle in the tarp and lifting the presser foot, turn a right angle and sew across. Repeat again and sew all the way back up to the top.
Step 26: Upper Side Pouches: Sewing Accross


Sew the bottom sides of the pouches closed.
Step 27: Upper Side Pouches: Check Back


After finishing, always check the back side of your sewing to make sure it is good.
Step 28: Upper Side Pouches: Pouch Additions in Action


Pins on the magnet and elastic through the holes.
Step 29: Upper Side Pouches: the Other Side


Repeat the last steps so that you have pouches on the other side of your bag too.
Step 30: Upper Side Pouches: Finished


Your side pouches should look something like this when they are done.
Step 31: Base Tarp: Bottom Strap


Attach the bottom strap along the horizontal center line of the bottom area on the outer side of the base tarp. Mark the middle of the strap and the middle of the bag and align these for placement.
Step 32: Test: Straps


See how the bag looks now that both straps are attached.
Step 33: Component Pouch: Trace, Cut, Prep


This pouch hangs in the center of the bag when it is open and sits and the very bottom of the backpack when closed. I use it to hold two component boxes that fit exactly inside. They are the heaviest items in my bag so they are placed at the bottom.
Trace the pattern onto the Condura and powermesh and cut them out.
Sew the fold elastic to the powermesh.
Step 34: Component Pouch: Sew Powermesh Bottom


To connect the powermesh to the Condura, first sew only the bottom edge - inside out. Then when it folds over it will have a nice finish.
Step 35: Component Pouch: Sew Dividers


Sew the lines to divide the powermesh pockets into two.
Step 36: Component Pouch: Sew Corners


Fold and sew the corners of the pouch (right sides together) and turn them out to make the 3D pouch.
Step 37: Component Pouch: Finish Top Edge


This should really be done first, but can also be done at the end. To give the top edge a nice finish simply fold it over twice 1cm and sew.
Step 38: Component Pouch: Attach


Attach the component pouch to the base tarp. Fold the fold-elastic and powermesh over and under the Condura edges for a nice finish.
Step 39: Test: Component Pouch


Make sure the pouch fits what you want to use it for.
Step 40: Upside-Down Pouch: Trace, Cut Sew Zippers


This is a simple large pouch that attaches to the lower center area. The contents of this pouch will be upside down when the bag is closed, and flipped when it is opened. Even though it's a simple construction, it takes some time to make, and the measurements of the individual pieces and your seam allowances need to either be kept very accurate. Or you can tweak it a bit as you go. As you will see I did.
First trace and cut out all the pattern pieces for this pouch. Then attach the zippers.
Step 41: Upside-Down Pouch: Complete Side Strip


To complete the side strip, sew the one part of the strip that you've just created with the zippers, and the second strip piece of solid fabric together - right sides together. This should produce a long strip, long enough to go all the way around your rectangular top piece of fabric.
Step 42: Upside-Down Pouch: Sewing Together


To sew the side strip to the top piece of fabric so that the zipper aligns perfectly in the center of the top side, mark the centers of both zipper and top side and start by sewing these two aligned centers together. Sew in the direction of the short end of the strip and end 2-3 cm before the end so that you have enough of a fabric flap to connect the other long end of the side strip to. Go back to the zippers center point again and continue sewing in the other direction, all the way around until you are back at the other end. Sew close to the end and then stop. Sew the two ends together before going back and sewing over the gap that remains between the side strip and the top piece.
Step 43: Upside-Down Pouch: Tweaking the Design


As I was sewing the side strip to the top piece of material I noticed that my strip was not going to be long enough to reach all around, so I added in this extra piece of green Condura fabric just before finishing to sew all around.
Step 44: Upside-Down Pouch: Finished


You should end up with something like this.
Step 45: Upside-Down Pouch: Zipper Acccess


So that you can access the lower pouch from the outside when the backpack is closed, add a zipper to the base tarp before attaching the lower pouch to the tarp.
To add the zipper, cut out a strip of tarp where it should go. Baste the zipper to the tarp with some masking tape or double sided tape and then sew along both sides of the zipper.
Step 46: Upside-Down Pouch: Attaching


Mark the center of the top side of the lower pouch and the center of the area it should attach to the base tarp and start sewing from there. Sew all around.
Step 47: Upside-Down Pouch: Outside Access

Make sure you didn't sew anything on in the wrong place (this happened to me so many times:)
Step 48: Lower Side Pouches: Trace, Cut, Sew


These are probably not the best kind of pouch to attach to the lower area - which ends up upside down when the backpack is closed. I would recommend adding elastic straps here instead to hold things in place. But in case you do want to add pouches:
* copy and cut the pattern
* finish the top edge
* sew the corners to make 3D
Step 49: Lower Side Pouches: Velcro


So that these pouches can close (because otherwise their contents will spill out), add a strip of Velcro to the tarp side and the pouch side.
Step 50: Lower Side Pouches: Attach


Fold over the edges and sew around to attach.
Step 51: Lower Side Elastic: Attach


This turned out to be a really useful use of the lower space. Combining a strip of strong, sturdy, wide elastic that can hold a specific container.
Step 52: Lower Side Velcro: Attach


Still not quite sure exactly what will get attached to this strip of Velcro, and if it will hold well when the backpack is closed and roughed around. But Velcro is always useful...
Step 53: Test: Arrangement of Pouches


Hang up your PIFpack and see how it feels.
Step 54: Back Panel: Insert Rope


Depending on how thick and stiff your rope is, this will be easier or tricky to do. Basically push the rope through the tube spaces between the tarp and the back panel. Look at the pattern and photos to see how the rope should be distributed on either end to also make up the handle for holding and the upper and lower parts of the carrying strap.
Step 55: Back Panel: Distribute Rope


Yes, the upper parts being made entirely from rope is not very comfortable. This is on the list of things to improve and solve better next time (see the last steps of this Instructable).
But now that you have the rope part done you can actually "try on" your PIFpack.
Step 56: Test: Try It On!


Close it up and try it on. Fill it with some weight to get a feeling for how comfortable it is.
Step 57: Insert

The insert is a separate piece of tarp (30 x 50 cm) that attaches to the back area via Velcro. This makes it much easier for two reasons:
* being able to add the back panel for the rope.
* being able to sew on pouches in this area without having to deal with the whole piece of base tarp in the sewing machine.
Step 58: Insert: Velcro


Sew the hook sides of the Velcro onto the back of the insert.
Step 59: Insert: 3 Pouches


These three pouches sit at the bottom of the insert and are intended for heavier bulkier tools, like pliers, soldering irons and snap tools. Instead of using these pouches which are a bit more involved, you could also add the type of pouches used along the sides.
Trace and cut the pattern from Condura.
Sew the corners to make 3D.
Step 60: Insert: Attach 3 Pouches


Fold over the edges and sew around to attach to the lower part of the insert. Then sew the two dividing lines.
Step 61: Insert: Powermesh Pockets


Cut the powermesh and attach the fold-elastic.
Step 62: Insert: Powermesh Pockets Bottom


Use masking tape to keep the powermesh from stretching when you sew it. This happens especially when sewing longer distances. Like before on the component pouch, sew the powermesh on so that it can fold over to hide the seam. This will only be possible for the bottom seam, the side seams will be exposed - see next step.
Step 63: Insert: Powermesh Pocket Sides


Sew the sides and dividing lines.
Step 64: Insert: Thread and Wire Rack


5mm aluminum rods fit perfectly on to 10mm metal snaps. This can be used to make thread and/or wire racks. Trace and cut the pattern and add the snaps.
Step 65: Insert: Thread and Wire Rack Assembly


Press the snaps into the rods.
Step 66: Insert: Thread and Wire Rack Elastic Fix


The connection to the rods doe not hold for long as the soft aluminum gets widened. To hold the whole thing together it works to add strips of elastic as shown.
Step 67: Test: Insert


Velcro the finished insert to the inside of the PIFpack, pack it with tools and try it out.
Step 68: Test: Pincushion


Add some thick felt into one of the powermesh pockets to turn it into a pin&needle cushion.
Step 69: FINISHED


Load your PIFpack with tools, hang it up, wear it and start using it. For sure you will find faults with the design, ways to improve it and much more. The best way to know what to change is to start using it right away.
Step 70: Rool-up Tool Organizer


This addition to the PIFpack is covered in a seperate Instructable:
Rool-up Tool Organizer >>
Step 71: Logo: Personalize


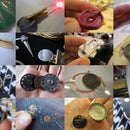
Add your personal version of the WSP logo. This starts by punching a 3 x 3 grid of holes spaced 1 cm apart. Add additional fabric as you please - for the PIFpack collection I've been using a square shape of fabric. Use thick thread to sew it together. You can sew the initials of your name or a shape.
Step 72: To Be Improved

Long list of things to fix and solve better next time:
* adjustable closing mechanism for shoulder straps, maybe something like this: Line Lock >> http://diygearsupply.com/product/lineloc-3/
Step 73: First Prototypes


Step 74: On the Road and in the Wild


Step 75: Andy's PIFpack SERIOUS


Andrew Quitmeyer built himself his own PIFpack following these instructions in 2 days.
Here some of his feedback from Andy that I am working to incorporate:
I printed out my PIFpack instructions and stapled it into different sections. Made it easier to work on different parts.
Would be nice to somehow identify which parts can be done independently and which hinge on other parts for being done first.
Could the top and bottom pieces of tarp be done in two separate parts?
Is “powermesh” the official name of that fabric?
What is “fold elastic”?
Step 9 - back panel dimensions are not listed, had to figure out myself
Step 10 - not totally sure where these are
Step 11 - point out which sides velcro goes on top and bottom
Step 12 - had to figure our dimensions for pockets
Step 15 - how long strips should be? how to center them?
Is there a good way to stop the zippers at top?
Step 20 - making pockets is the most fun
Step 30 - left my straps way too long
Step 32 - dimensions of this pouch?
Step 76: Days Go by Inside the Studio


tools conveniently organized
boxes-inside boxes
everything in it’s right place
the studio provides
infrastructure
shelter
space
outside these walls there are different materials
challenges
new places
improvised spaces
packing to leave should not be hard
as much as the act of making-is a form of creative expression
it’s also a means | of experiencing the world
shrinking tube, ripping seams, sewing circuits, planning projects
with my tools at hand i pay attention to things i’ve never seen before
my tools translate what i can not explain
i learn
my studio provides
infrastructure
shelter
space
and a means of experiencing the world

Runner Up in the
Outside Contest 2017


