

Introduction: Pipe Leg DIY Table - Build From Any Wood Table Top


Planning, Parts List, Tools, and Cost
About the only planning necessary is to decide how big you want your table to be, and this will normally be determined by two factors: the size of your tabletop, and the available space you have.As far as height goes, Most tables designed for writing or dining should be 28" to 30" high (29" is common). Be sure to take into account the thickness of your tabletop when determining the length of your legs.
Parts for Project
For our tabletop, we chose the Vika Amon from IKEA, so it's in our parts list:| Qty | Part |
|---|---|
| 4 | 61-7 - Flange |
| 4 | 133-7 - Plastic Plug |
| 4 | G125GS12GA - Size 7 Gator Tube Legs |
| 1 | Vika Amon from IKEA |
| 16 | Wood Screws |
Tools
Drill with drill bit and Phillips driver bitMeasuring Tape
Allen Wrench
Hammer or Mallet
Level
The level is so you can adjust your legs, but you could also just wait until you get the table into position, then adjust the legs up or down to eliminate any wobble. The Kee Klamp Flanges will allow you to adjust each leg about 1/2".
Cost
Depending on what you use for a tabletop, and how big or fancy you want to get, you can build this project for under $100.Once you have assembled your parts and tools, proceed to Step 1.
Step 1: Attach Flanges to Table Bottom

Really, this can be done by eye, but you could use a tape measure to determine how far from each of the four table corners you want your legs to be. One consideration is that the closer to the edge, the more legroom you will have. About 1-2" is good.
Make sure to use the appropriate length wood screw for the thickness of your tabletop... you don't want screws poking through the top of your table!
Pre-drill your holes and drive four wood screws into each Kee Klamp Flange, securing it to the underside of the table top.
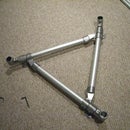
Step 2: Attach Table Legs


Just slide each Pipe Leg into the Kee Klamp Flange and tighten using the allen key wrench.
Step 3: Cap the Legs


Finally, tap the plastic plugs into the bottom of each leg using a hammer or mallet and a light touch. This will give your table a finished look and prevent any burrs or rough edges from damaging the floor under the table.
Step 4: The Finished Table - Bottom & Top

Here are a couple views of our completed project table, both inverted and right side up. Yours should look similar.
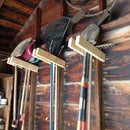
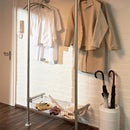
Step 5: OK... Now You Make One!
Kee Klamp fittings allow you to turn out amazing projects with so little effort, you could make something for every room of your home or apartment. After you build something, stop back and share it here, so the rest of the world will be inspired, too!


