

Introduction: Producing Various Colours in RGB Led Strip Using Arduino and Push Button


Playing with colours is always fun. Using this simple project anyone can produce variety of colours in RGB Led strip. By connecting the strip to arduino and Push buttons variety of colours can be produced.
Step 1: Components Required:


1. Arduino UNO and dedicated USB cable
2. 9V Battery
3. Jumper Cables (Male to Male)
4. RGB LED strip
5. Bread Board
6. 3Nos. Push Buttons
7. 3Nos. 220Ohm Resistor
Step 2: Connect Battery to the Bread Board As Shown

Connect the Positive and the Negative of the battery cap to the Bread board horizontal connection point.
Step 3: Position the Push Buttons Common Connect Side With One Resistor Each As Shown.

The resistor used in the push button act as Pull up resistor to create two stable states according to the controller. (i.e. 0 and 1)
Step 4: Position the LED Strip in the Bread Board As Shown.

Position the RGB LED strip in the Bread board in the Vertical connection side.
pin the +ve of the Battery to the VCC of the LED Strip.
Step 5: Complete the Connections

Connect the Cathodes of the LED strip to the arduino in the digital pins 2, 3 and 4. connect the other end of the push button to the arduino in the digital pins 5, 6 and 7. pin the +ve of the battery to the Anode of the LED strip and -ve to the arduino's GND pin. connect resistors in the push buttons to the 5V pin of the arduino and close the button through the GND pin of the arduino.
Schematic of this same project is provided at the end, refer it for more clear connections
Step 6: Program the Microcontroller

connect the microcontroller to the computer using the USB. open the arduino sketch provided below in .txt file in the Arduino IDE. Run the code to make sure there is no error and upload the sketch to the board and that's it. press each button and enjoy the colours.
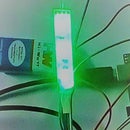
Step 7: Enjoy the Colours


according to the sketch provided the colours are mapped to the button accordingly.
button 1: Blue
button 2: Red
button 3: Green
button 1 & 2: Violet
button 2 & 3: Yellow
button 1 & 3: Sky Blue
button 1 & 2 & 3: White
Step 8: Refer This Schematic for More Easier Connections.

download the sketch provided as program.txt file and upload it to your arduino through Arduino IDE, have fun.
Feel free to give your suggestions in the comments below.


