

Introduction: Quick and Simple Blinking Animation for Beginners


((WARNING: The below animating was done in Photoshop Elements 5. If your eyes bleed during this instructable, I am in no way responsible))
The key to becoming a good animator is to first begin simply and work your way up, correct? And whats the simplest thing you could do? Why, that's would be blinking of course! Whether you're animating a more complex eye or a simple dot eye as will be show here in this instructable, blinking is quite easy. That being so as its movement regime is rather restricted and the only really varying factor would be speed. So, buckle in kiddies. We're going on an adventure.
Step 1: Making the Base for the Animating
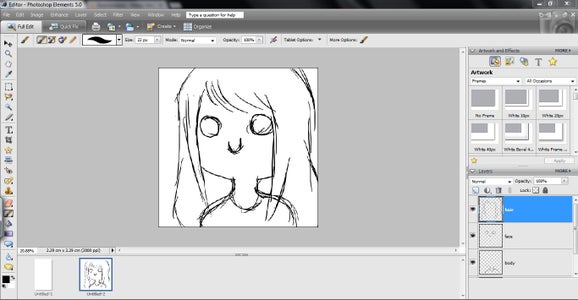
Firstly, you need to sketch out what it is you want to animate. This step is simple. Just rough out the character in whatever program you are animating in. Easy enough, right? Well, after you have accomplished that, then start to define the shape more. Clean the lines up, get it ready for colour and all that jazz. This stage is rather important as this is the drawing of which your animation will be made of. The angles and shapes used in this drawing will be using. If its your first time animating eyes blinking, then perhaps you should pick a angle that you are comfortable with and a style that will be very easy to animate (such as the one displayed in this instructable) while you are still learning the gist and feeling of doing animation.
Step 2: Getting Started


Well now, that drawing is looking mighty fine and dandy, now isn't it? Now, the next step is to get started. This can sometimes be one of the hardest things to do for those just starting out. Choosing where to begin and how is difficult and confusing for those who have never done this before. I suggest to just start to make the next frame of the animation, like shown. If you're using a program this should be really easy to do because if you don't like how it looks after, then you can simply undo what you did and do it again until you get a result that you are happy with and proud of. And after you have found a way to do this that works well with yourself then it'll be just peachy from here.
Step 3: How Much the Eye Should Be Closing


The more frames you have and the less the eye should be closing, the more smooth the animation will be. Choose a rate at which you think will be best for what you want. Keep in mind though, you never really want to move the eyes too much in one frame or else it will be jumpy and choppy and not look as nice as it could. Looking at the examples below, you will see how minimally the eyes move between each. These pictures are frames for a much choppier animation, mind you, so that gives you a bit of an idea about the maximum they should move. Another thing, you can always make the frame rate a bit quicker after the animation is completed if you want a smooth, but quick animation.
Step 4: Checking the Animation
No one is perfect the first time. Trial and error is usually how things work. Animation is no exception to this rule. Go through the frames and double- heck even triple- check them and make sure your happy with them. Check for any flaws or mistakes you might have made. Or even just clean the lines up a tad or add a bit of detail that you excluded firstly as it would be to hard to keep track of whilst you were trying to make the eye move. Add your own flare to your creation. This is one of the most fun parts about animating, so enjoy it.
Step 5: Finish and Export That Animation

You did it. You made something blink. Remember folks, practice makes perfect. Just keep at it any soon you'll be doing blinking animations in your sleep.


