

Introduction: Real Flying Back to the Future Delorean


I decided to make an actual flying Delorean from Back to the Future II. If you like this please vote for me using the link above.
Materials:
Plastic Delorean Model
Millennium Falcon Quadcopter
12v LED flexible strips (automotive)
Small wooden skewers
Model Glue
Model Paints
Epoxy (5 minute)
wire cutters/ strippers
electrical tape
razor knife
Step 1: Building the Car


Building the model was the fun part of this project. I glued the things that I thought needed to be reinforced and painted everything I could to make it look as authentic as I could.
When this was finished I put the wheels on to make it look complete. Late I needed to remove the wheels and brackets to make room for the Quadcopter under the car.
Step 2: Adding the Lights


The lights were purchased at an automotive parts store (Advanced Auto Parts). I like these because they are the small LEDs, flexible, and you can cut them to whatever length you want.
I used the 12v battery that came with the lights for 2 reasons. The Quadcopter does not use 12v to run it and I didn't want to run the batteries down any faster than I had to on the Quad.
I glued the battery down in the front of the car because there was plenty of room as this is the trunk of the car. Also this helped with the balance of the weight of the car since there is a lot of weight with the back end components.
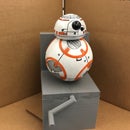
I then wired up the lights as shown on the sticky note above. I then used the adhesive on the back of the LEDs and stuck them onto the front bumper and around the back window. I did remove the plastic model piece for the back before I put the back lights on. On the front I left it and I think it turned out real nice.
Step 3: Opening the Quadcopter


This next step might be a little hard for some of you to watch. SPOILER ALERT!! I tear apart a
Melinnium falcon.
With that said, and if you are still with me, here is what I did. I chose this Quad because it was small and almost the perfect scale to fit the wheelbase of the car.
This part was probably the hardest part of the project. This was because of being careful not to harm any electronics. The glue that held the 2 halves together was tough and stringy. I finally got it open though and spent quite awhile cleaning the foam off of the parts.
Step 4: Attaching the Quad


The size of the Quad was not quite right so I had to do some modifications.
There are square black rods that hold all 4 fans together. I needed to make 2 of these longer. So I removed the pins and cut down some small wooden skewers to the length that I needed then epoxied them in place.
Then I needed to support the circuit board and the battery so I used 2 more skewer pieces and made a bridge for the parts to sit on. I epoxied these into place.
To mount the quad to the body I first used double sided tape then flew the quad. Many times it was off balance and I had to move the body and try again. Finally I go it balanced and made 2 small holes in the bottom of the plastic car body and ran a zip tie around the battery and attached it all to the car. The car did not sit right after this as the nose was facing up, so I made 2 more small holes near the front of the car and used another zip tie to attach the front nose to the front of the Quad.
Step 5: Final Looks


After everything is attached I was finished. I think it turned out really good. At night you can barley see the quad underneath the car and looks amazing.
If you like this please vote for me with the link above. I appreciate it!

First Prize in the
Back to the Future Contest

Participated in the
Make It Glow! Contest

Participated in the
Epilog Contest VII


