

Introduction: Rendering Beeswax


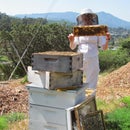

If your beekeeping efforts resulted in a honey harvest, then chances are you have wax to process. Most of my beekeeping friends give me the wax simply because they don't want to deal with it after all the effort to harvest the honey.
But have no fear, it can be really easy to process wax even if you're exhausted from the honey work.
Step 1: What Do I Do With All That Wax?

Once you've harvested your honey, the next step is to deal with all that wax.
It may seem like you have a lot, but trust me- its mostly honey.
Back in ancient times (before centrifugal force extractors, that is) after the wax was crushed, it was rinsed with water. That honey water was then used to make mead. (This method for making mead can sometimes be unpredictable, and so in my own mead Instructable I stuck with clean, strained honey, but if you try it let me know!)
I rinse my wax in a wide dish strainer. You DO NOT want to get wax or honey in your drain, as it will require a plumber to unclog that drain. (Trust me). Best to rinse the wax out in the garden with a hose on a hot day.
Or- you can just do what I do, the lazy way.
Step 2: Supplies Needed

You'll need a crappy old crock pot, since it will look crappy and old by the time you finish this project. In fact, all tools for this project will become wax tools, since there isn't an easy, safe way to remove wax and still use these tools for food.
Spatula
Tea strainer- one without a hook on the lip. I sawed mine off, but if you can find one without then I'd love to brand name so I can recommend it.
Measuring cup or ladle
Silicone ice cube trays
Old bowl, cup or container you'll trow away when finished.
Plastic sheet, paper, etc to cover your work surface
Step 3: Melt the Wax

As I said before, most of the wax is debris and honey.
Melt the wax on the lowest temperature your crock pot will allow while still being hot enough to work on the wax. Once the entire pot is full and melted, simply turn it off. When the wax begins to congeal and turn yellow, its beginning to cool.
Wait until the wax is solid and has begun to shrink from the sides of the crockpot. At this point I scrape off the gunk into a container and throw it into the compost or garbage. The remaining thickened honey and gunk can be washed off in the sink, provided there isn't too much of it that it will clog the drain. Set the wax chunk aside and repeat these steps until all your ugly wax/honey goo is processed. Resist the urge to purge all that gunk in the sink- it WILL clog. Just rinse.
Please keep in mind that hot wax retains its heat longer than water, so if it splatters is will burn badly. Wax is also pretty flammable, so if you aren't sure on the safety of your crockpot, then don't use it. Using a crockpot should be safer than processing wax over the stove, which is ill-advised for a number of reasons.
Step 4: Remelt the Wax


Once you have a pile of mostly solid, beautiful yellow wax with a few bits in it, you'll melt it all over again so you can strain it.
This is where a tea strainer comes in handy. All the tea strainers I've found have a loop on the edge that gets in the way when you're stirring it in the pot, so I cut mine off. If you can find a strainer without, even better.
Use the strainer to filter out the solids from the wax. Just stir and dump, stir and dump, until its all clean.
Then I pour the hot wax through the strainer into the silicone icecube trays and let cool.
Step 5: Beautiful Wax

Having wax in cubes makes it easy to store, weigh, measure, and later- use.
Beeswax can be used for so many purposes I couldn't list them all, but I can tell you that I use it in wood sealers, to paint, for skin care products, to make candles, to draw and for other art purposes.


