

Introduction: Robotics Outreach for Elementary School Students


Hello, world! We are a high school robotics team from Madison, NJ. Our members range in age from 13 to 18 (judges, take note!). We compete in the annual First Tech Challenge. Every year, our school holds a Day of Service, which lets students participate in various community service programs or design their own. Last year was our first as a team, but we decided to create our own outreach program for elementary school students to introduce them to robotics and get them interested in hands-on learning. The fourth grade classes we visited enjoyed it so much that we expanded and improved it for this year's Day of Service. The kids loved it, and we can't wait to do it again next year. We thought other robotics groups, and the instructables community in general, might be interested in what we did, so we made this instructable. Since every program of this kind will differ based on the available materials and the intended audience, this will be mostly a description of what we did and how we did it. We hope it inspires other groups to adapt it and make their own outreach programs.
P.S. This is entered in the robotics contest, so votes would be appreciated. Thanks!
Step 1: The Game

We decided to put our introduction to robotics into the form of a game, played on a square field made of foam tiles. The team members designed the field and the game's rules together. There were many versions, but the final one involved moving small plastic balls into goals to score points. The field included several fun elements (see the diagram and pictures below) to make the game engaging and interesting.
The game was played with six robots at a time—three on the red team and three on the blue team. We'll get to the robots themselves in few steps, but they all had the ability to move the plastic balls around. The teams could score points by placing the balls in their color-coded goals—regular white balls were worth one point, special red and blue balls were worth two points. Only a few balls started out on the field, but the robots could get more by knocking over wooden blocks with balls on top of them, driving up one of two ramps onto a raised platform, or pressing a button that caused a ball to be spit out from a ball launcher in one corner of the field. All of this required teamwork: if only one robot drive up a ramp to the raised platform, the ramp would tip and the robot would get stuck. For one robot to make it to the top, another had to hold down the bottom of the ramp. The robots could also coordinate launching the balls with positioning a pivoting wall in the center of the field so that the balls would be deflected directly into their goals. There were only three two-point bonus balls: one on top of the raised platform, one trapped under a crate on the field, and one at the end of the ball launcher's magazine.
Step 2: Building the Field


We built the field with some of the parts that we use for our competition robots and a few outside materials. Although other designs will probably be very different from ours, these pictures and descriptions may provide a few ideas about what's possible.
We use a building system called Tetrix, which includes various aluminum pieces, motors, gears, and wheels, to make our competition robots. Tetrix parts made up most of the ball launcher, as the pictures show. We also used parts from the Lego Mindstorms NXT kit: the NXT brick (a microcontroller) controlled the motors and received input from two Mindstorms touch sensors (switches). The actuator that pushed the balls forward was also made from Mindstorms parts. We programmed the ball launcher so that when either sensor was pressed, two wheels (padded so that they fit better) would start spinning and an x-shaped actuator would push one ball forward to launch it. There was a small delay added after each shot so that the kids couldn't just hold the button down. The ball launcher was programmed using the ROBOTC language.
The off-balance ramps were made with Tetrix parts and foam poster board. Their pivot points were off-center so that they would lean one way by default.
The raised platform was made from a cardboard box, as were the red and blue goals.
For the floor of the field, we used foam tiles (the same ones that are used in FTC competitions). The walls of the field were made from PVC pipe and wood.
This all took a few months to design and build, and we went through many versions before settling on this one. For each design, we tested it with actual robots to see how well it would work. (We didn't have any actual fourth graders on hand to drive them, so we had to use freshmen instead.)
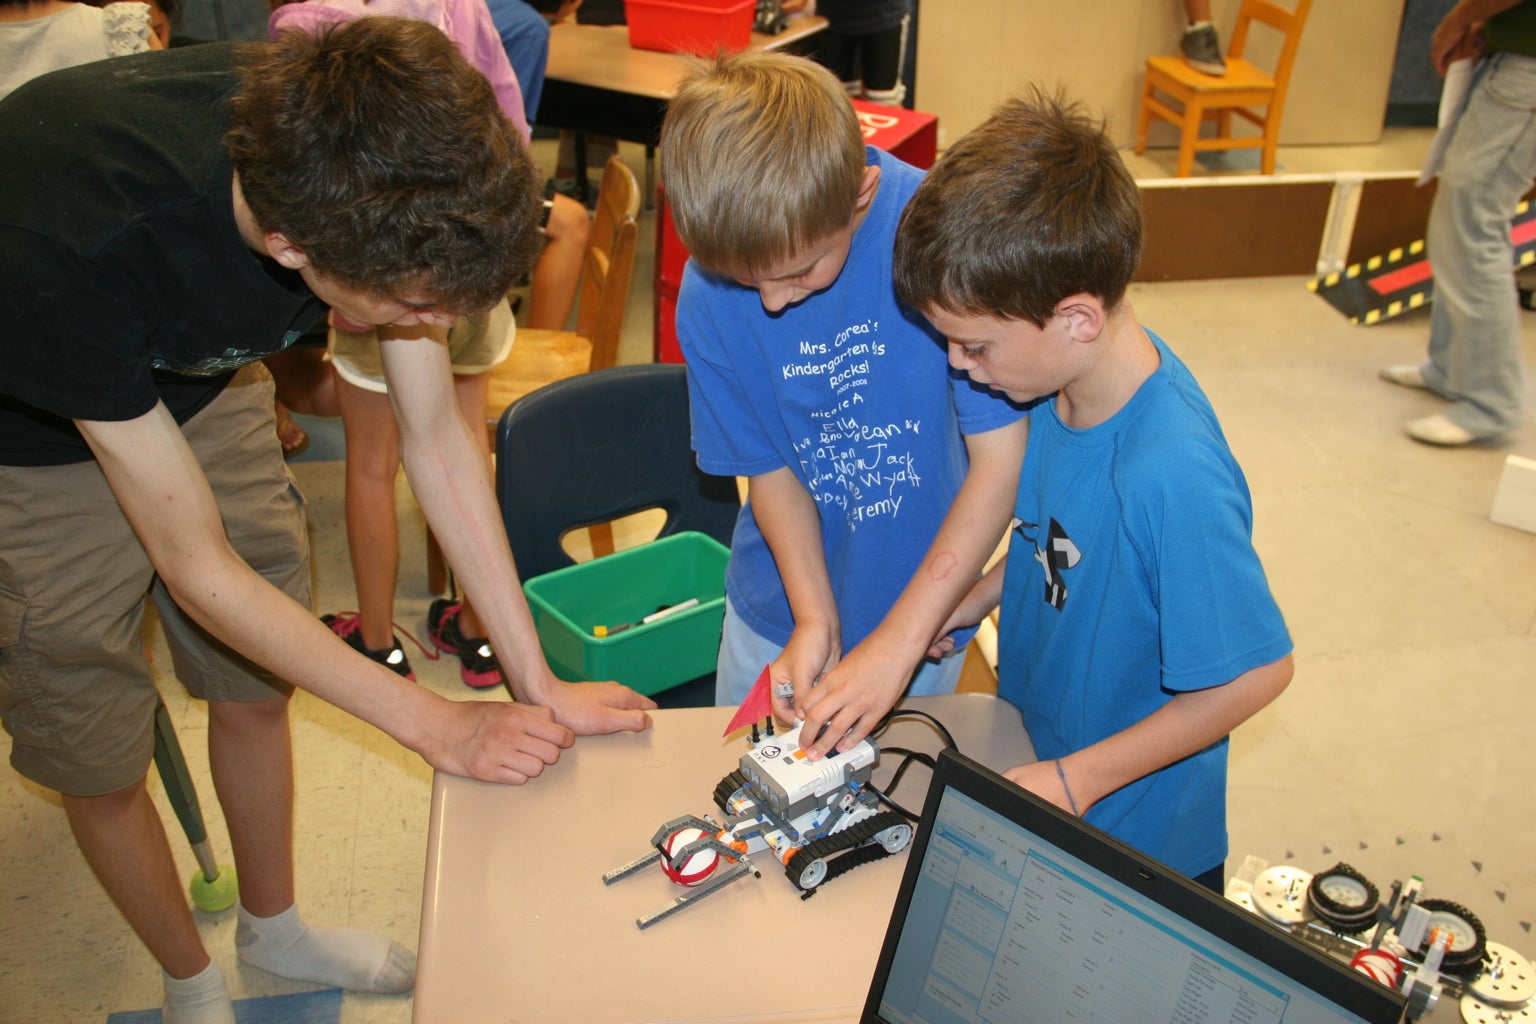
Step 3: The Robots


The robots were built entirely with Lego Mindstorms. Keeping in mind that we were working with fourth graders, we did most of the boring and/or difficult parts ourselves. The team built six tank-style robots that could drive around and spin a motor mounted on the front of each bot (the design was based mostly on instructions found in the NXT 2.0 user guide, available for download on this page).
The students' job was to build a "claw" for their robots that could be used to move the plastic balls around. The student groups were each given a bin of interesting parts and a high school mentor to help them. This let them do something that didn't take too much time, but made each robot unique and gave them a sense of accomplishment. After the kids had driven their robots around for a while, we let them make improvements to their designs. This helped them learn the value of an iterative design process.
The robots were controlled via bluetooth from laptops using this software. They were driven using the arrow keys. While it is possible to connect multiple robots to one laptop via bluetooth, we encountered stability issues when we tried it. Since we had enough school laptops available, we used one per robot.
Step 4: Letting the Kids Build


One of our main goals with this project was to make sure the fourth graders really felt like they had accomplished something. To that end, we let them build fairly independently. The kids were split into groups of three or four, with one high school "mentor" accompanying each group. The mentors were given instructions never to touch the parts themselves and let the elementary school students direct their own building processes. The result was a lot of variation in claw designs. The pictures below show some of the many different approaches they came up with.
After they had each gotten a chance to drive, we told them to take their robots back and improve them. They discussed what had worked and what hadn't and made changes accordingly.
Step 5: Playing the Game


Once their robots were finished, the kids were eager to drive. We had them rotate in two-minute shifts so that everyone was able to drive several times. They mastered the simple controls quickly, and soon were using the field exactly as we had intended: they worked in teams to get each other up and down the unbalanced bridges or direct balls from the ball launcher into their goals. They got really excited about the game and appeared to be having a lot of fun. A few days after the outreach, we set up the field at the high school and played the game as a robotics team. We had almost as much fun as they had.
Looking back on our day of service project, we're pretty proud. We introduced hundreds of kids to the ideas behind DIY and got many of them interested specifically in robotics. We hope that other people can take what we did and make something even better.
P.S. If you want to know more about the team, visit madisonrobotics.org.
We'll have a video of the game up here very soon.

Finalist in the
Wheels Challenge

Participated in the
Remote Control Challenge

Participated in the
Robot Challenge


![Tim's Mechanical Spider Leg [LU9685-20CU]](https://content.instructables.com/FFB/5R4I/LVKZ6G6R/FFB5R4ILVKZ6G6R.png?auto=webp&crop=1.2%3A1&frame=1&width=306)


