

Introduction: Room Automation Using Arduino (Easiest)


Hi there i am Aditya and this is my instructable about room automation using ir reciever and Arduino The code is by me once again nothing is copied from anybody this is the hardest and most time consuming code i have ever written although this is a cool and easy project or in my case i used it to impress my cousins and parents -_- (if this instructable gets 100 views i will upload another one with 8 channel relay board or 8 L.E.Ds) The autodesk circuit link is -:
https://circuits.io/circuits/4353959-room-automation-using-arduino-and-ir-reciever
The Parts Needed Are
1. Arduino uno
2. Ir reciever (any one)
3. 4 channel relay board or 4 L.E.Ds
The code is at the bottom or somewhere
Attachments

Step 1: Setup


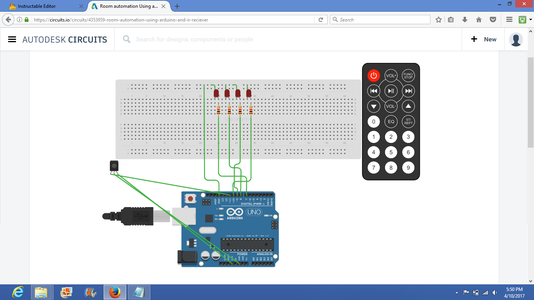
1. Wire everything , see the image for connections
2. Choose four buttons of your ir remote
3. Run the code and write the hex digits of your remote buttons
4. Insert the hex digits in the code (you will find something like "//write the hex digits here" in the code)
5. Run the code and the circuit is done
Disclaimer : I did not use the relays in the circuit but you can find tutorials on how to use a relay board on internet and connect the relay pins where the L.E.Ds were connected
if you have any questions ask them in the comments below
Step 2: How It Works
To the more curious people on how the code works
The ir library was pretty hard for me to understand too i cannot explain it too good so check out the tutorials in internet on how to use the ir library i will only explain the code
1. First we declare all the integers which represent the ir recieverpin , and the led pins
2. Then we set all the pinmodes
3. The loop contains an if statement that if the reciever shows any value then show it on the serial monitor
4. Then we get to the switch statement which is simpler than writing many if statements
5. The switch statement represent that if we get this value (which is the hex digits of the button you press) the ledpin will go low and if we get the value we recieved before then the ledpin will go high
6. Same goes for other lines of code
And this is how the code works -_-


