

Introduction: Simple Clap On/Off Circuit Using LabVIEW & Raspberry Pi 2


In this instructable I'll take you through how to program the Raspberry Pi 2 and the Pmod MIC3 with LabVIEW 2014 to turn an LED on and off with a simple hand clap.
Step 1: Materials

Required Hardware:
LED
Required Software:
Before you start, make sure you are able to target your Raspberry Pi 2 with LabVIEW 2014 using LINX 3.0. If you haven't done this yet, go here for an awesome step-by-step guide on how to get started. You also need LINX 3.0 to access the Pmod .VI libraries I mention later in step 3.
Step 2: Wiring
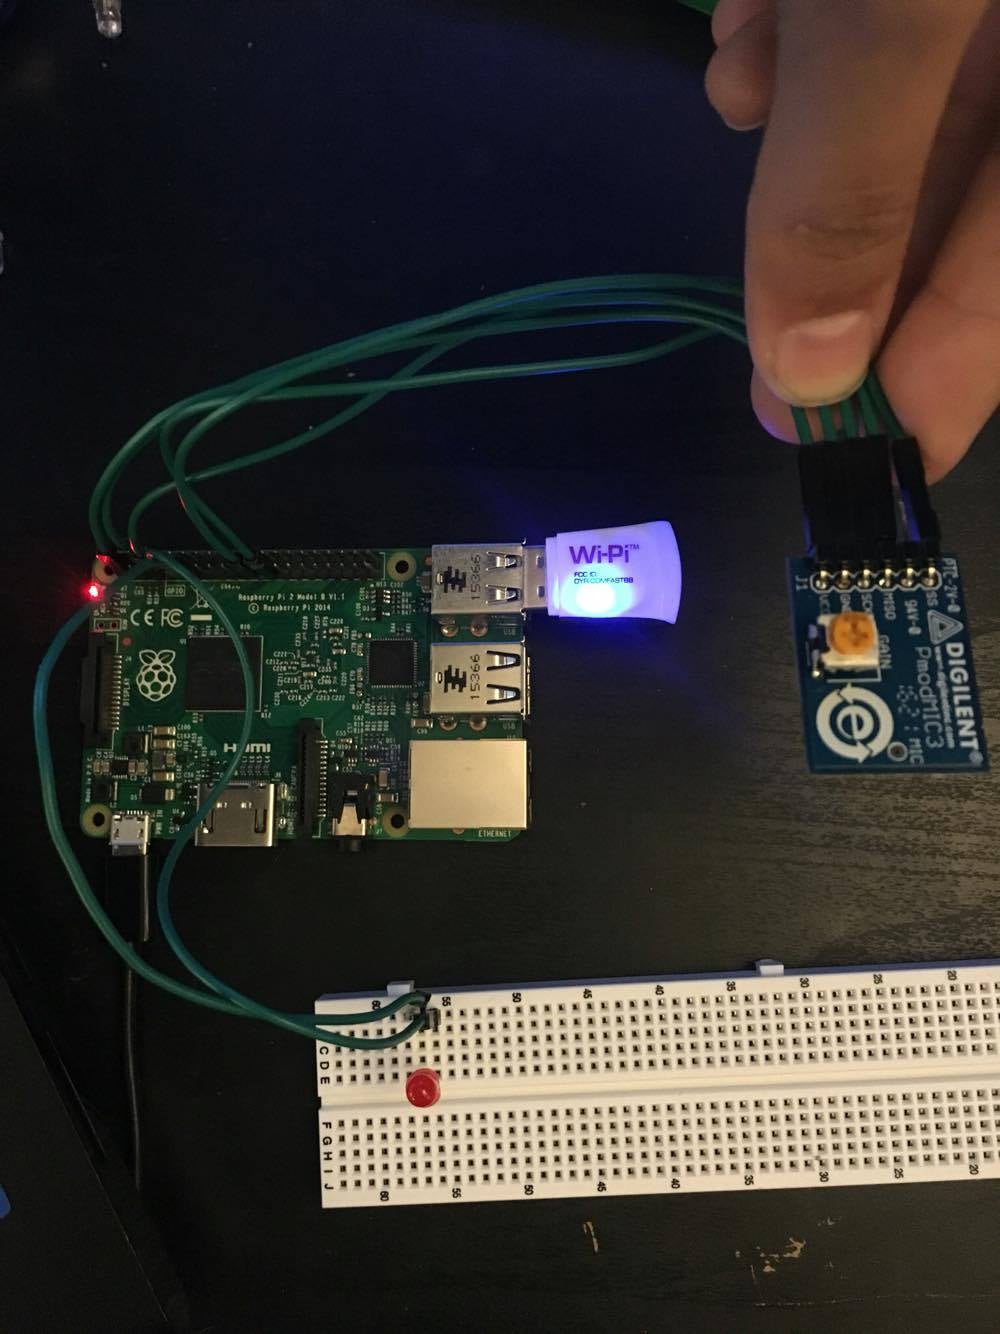
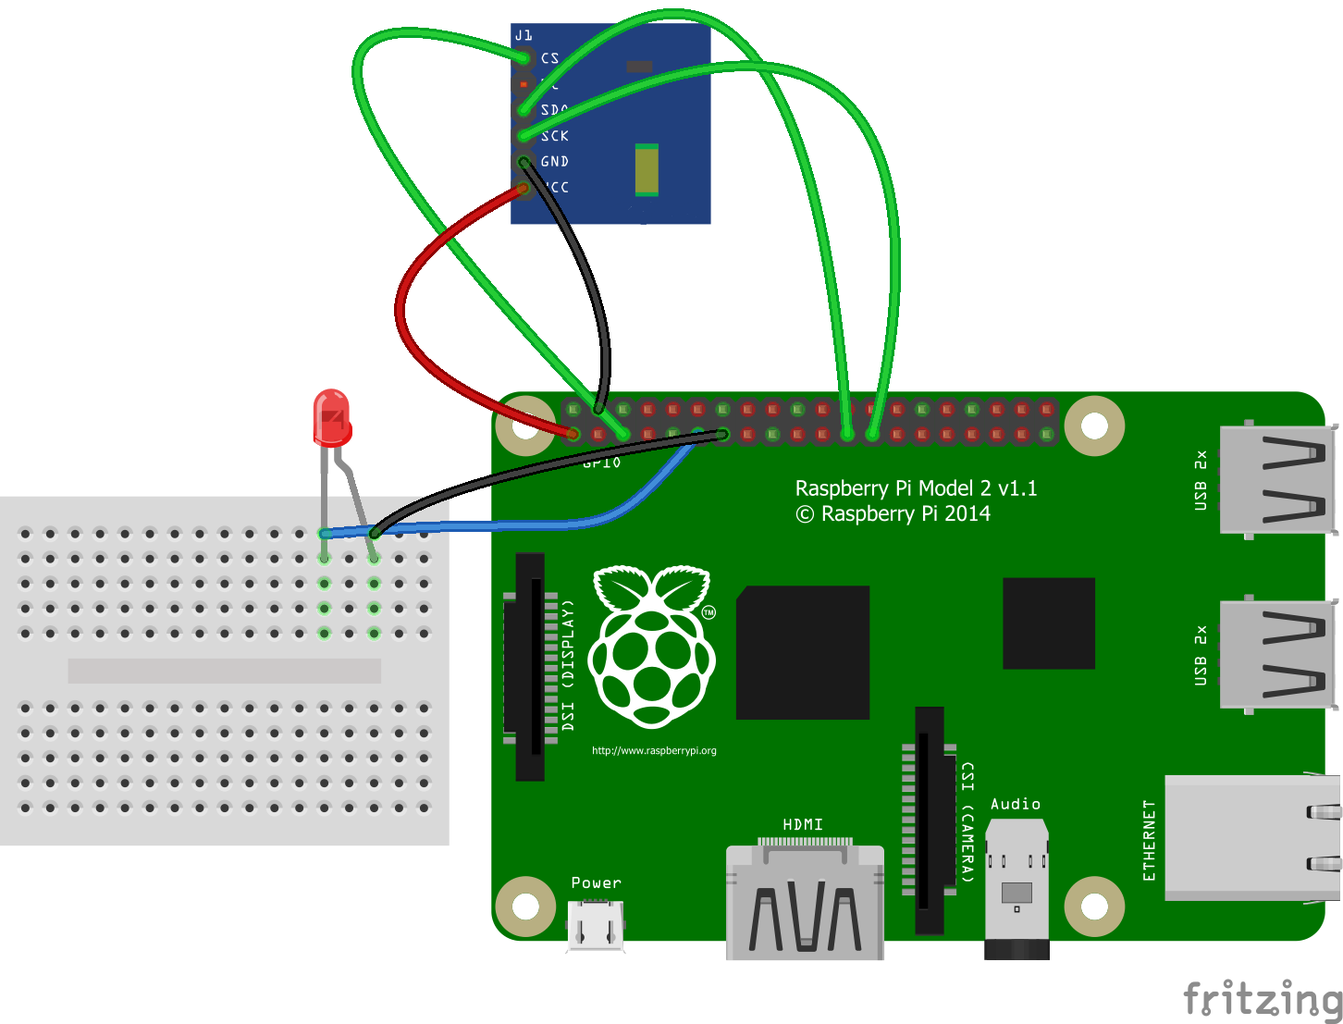
For demonstration purposes, I just have a simple LED in the breadboard. The Pmod MIC3 requires a voltage of 3.3 V.
The wiring outline is below with the corresponding pin numbers on the Raspberry Pi:
MIC3 CS: Pin 7
MIC3 MISO: Pin 21
MIC3 SLK: Pin 23
MIC3 GND: Pin 6
MIC3 VCC: Pin 1
LED GND: Pin 9
LED VCC: Pin 11
Step 3: LabVIEW Code


The front panel and block diagram are pictured above, and I provide the actual code in this instructable.
The Pmod MIC3 converts sound into voltage. That voltage is read out on the front panel and a boo-lean clap LED that turns on when the Pmod registered a clap.
The set of controls on the front diagram are the important part. The D/O Channel is what pin you have the LED plugged into and CS Channel is the Pmod CS pin number. The delay is how long the Pmod waits until it's ready to listen again. Our threshold value is how high of a voltage you want the Pmod to recognize as a clap.
The Pmod MIC3 also allows you to adjust the gain on the Pmod itself, and I went ahead and adjusted it so talking and other noises aren't mistaken for that tell-tale clap sound. I did this by trial and error. Run the VI and keep adjusting the gain until its right where you want it, its as easy as that.
Now just deploy the code onto the Raspberry Pi, and there you have it! You can take this simple guide and run with it - go from a simple LED to a lamp, Christmas lights, or really anything. The only limiting factor is the 5 V max output on the board.
Attachments

Step 4: Finishing Up

Thank you for viewing my project - if you have any questions please feel free to send me a message or comment on this instructable.
If you're looking for materials, you can head to Digilent's website. The physical computing kit comes with LabVIEW 2014 as well as the Raspberry Pi 2, and we have an entire line of Pmods and circuit stuff if you need help getting started.

![Tim's Mechanical Spider Leg [LU9685-20CU]](https://content.instructables.com/FFB/5R4I/LVKZ6G6R/FFB5R4ILVKZ6G6R.png?auto=webp&crop=1.2%3A1&frame=1&width=306)


