

Introduction: SpaceX Merlin Engine Launch Lamp


I wanted to make a lamp/ interactive model that showcased the Merlin engine from SpaceX. I used a replica of the falcon 9 launching up from a cloud plume. I removed the falcon 9 rocket and created a platform on Fusion 360 so that the Merlin engine can be removable from the lamp.
If you want to find just the exhaust plume and rocket, here is the link:
https://www.thingiverse.com/thing:3262427
Supplies
3D printer - I used a Ender 3 Pro
Clear Filament
Momentary push button
https://www.amazon.com/API-ELE-warranty-Momentary-...
Simple tactile switch
https://www.amazon.com/QTEATAK-Momentary-Tactile-B...
Wire/ jumper cables
Soldering iron
Adafruit Itsy Bitsy - M4 (or similar microcontroller, I used python for my code, but Arduino would work too, I didn’t make the code for it though)
https://www.adafruit.com/product/3800
Neopixel ring - 24 neopixels
https://www.amazon.com/DIYmall-WS2812-WS2812B-Ardu...
Paint
Computer for programming
Tri-color Led bulb (or alternatively a single Neopixel that you can wire to your microcontroller
Step 1: Print Out Your Parts

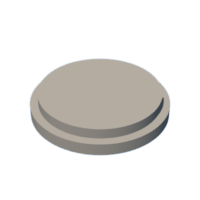
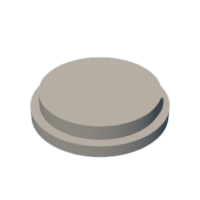
you will need to print out the engine, the smoke plume, and the platform.
For the tactile button, I wanted it to light up as well, So I used Tinkercad to build a bulky light box button that wasn’t as effective as I would have hoped. If I was to do it again, I would use a single neopixel LED instead of the tri-color LED.
Files are attached for the smoke plume, platform, LED light box, and Merlin engine
You will need the clear filament for the plume, platform, and light box at least.
All of the G-code produced in the files were the final versions, the stl files were produced on fusion 360 and can be used for your own fine tuning.
Attachments
 Assembly_Pin.gcode
- Fuel_Flange.gcode
- Fuel_Intake_Line.gcode
- Fuel_Intake_Plate.gcode
- Gas_Generator.gcode
- Gimble_Lower.gcode
- Gimble_LowerMirror_1.gcode
- Gimble_Pivot.gcode
- Gimble_pivot_and_upper_plate.gcode
- Gimble_Upper.gcode
- Gimble_UpperMirror.gcode
- Gimble_Upper_Plate.gcode
- Injector_Assy_Pin.gcode
- Injector_Plate.gcode
- LOX_Flange.gcode
- LOX_Intake_Valve.gcode
- LOX_Main_Intake_Line.gcode
- LOX_Pump.gcode
- merlin engine exhaust plume.stl
- merlin engine exhaust v2.stl
- merlin engine nozzle plate.stl
- merlin engine plate v2.stl
- merlin exhaust v3.stl
- merlin exhaust v4.gcode
- merlin plate v3.stl
- Mounting_Plate.gcode
- Pins.gcode
- RingNozzle.gcode
- Shipping_Ring.gcode
- Turbin.gcode
- TVC.gcode
- merlin plate v3.gcode
- merlin exhaust v4.gcode

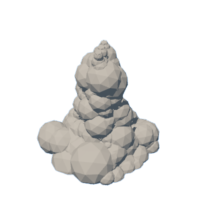


Step 2: Assemble the Engine, Glue the Platform and Plume Together
there are a few parts to the Merlin engine. It was designed to be easily assembled together, but I had difficulty with it and used glue for all the parts. The platform and plume are not an exact fit, so you will need to make sure the platform is level on top of the plume as it dries.
Step 3: Assemble the Electronics


To are sure the solders were correct, I used a Perma-Proto board from Adafruit, You can solder directly to the microcontroller if you are comfortable, or if you are sure that the wires wont fall out, you can use jumper cables and pins.
Everything attached to this microcontroller is powered from 5V1A power supply.
Step 4: Build Your Box to Hold the Electronics and Install Them


I used a few pieces of walnut wood and a laser cutter to cut out the proper holes for the buttons, a hole for the USB cable, and a hole for the wires to go form the light ring to the microcontroller inside.
I glued down the light ring and light box, I also glued down the perma-Proto board in the inside
Step 5: Code Your Microcontroller

attached is the code and files I used for the Adafruit Itsy Bitsy M4. It’s very simple code (I am still new to coding), I wanted it to be able to switch between several colors and when the main button is pushed it will activate the launch sequence.
You will need to go to adafruit.com and download the latest version of circuitpython for your device as well as the bundle that matches the version of circuitpython. I cannot attach the files, but you will need :
neopixel.mpy
adafruit_rgbled.mpy
simpleio.mpy
create a file in the storage of your device titled:
lib
place those .mpy files inside of there
Step 6: Paint the Engine and Add an Oil to the Box


I used teak oil on the walnut box, waited till it dried and glued the smoke plume on top of the light ring. I hand painted parts of the engine after gluing and spray painted the main exhaust beforehand.

Runner Up in the
Space Contest


