

Introduction: StopIt! LED Game (powered by Arduino)


This project was inspired by this video from YouTube and the Pendulum Challenge Kit (Broken link. Try this one.) from Makershed.com. Its a simple game consisting of five LED lights and one pushbutton switch. The LEDs flash in a sequence and the player must press the button when the middle LED light is lit. The speed at which the lights flash increases until the player presses the button at the wrong time.
Don't forget to rate this 'ible!
Ok, lets go!
Step 1: Materials and Tools


These are the parts you'll need to build your own StopIt! game.
-Arduino Uno (This controls the LEDs and detects when the button is pressed.) -Can be purchased form makershed.com
-USB A-B cable (Sometimes called a printer cable.) -Should come with your arduino.
-Solderless breadboard (half sized)-Can be purchased from makershed.com
-5 Leds (Four of one color, and one of another.)
-Pushbutton switch -I bought mine at Radioshack
-small resistor (more if you are worried about burning your LEDs.)
-At least 15 or so breadboard jumper wires -Can be purchased from makershed.com
-A small amount of thin cardboard. I used empty cereal box.
Tools:
-Soldering Iron
-Electrical solder
-Computer
Step 2: Solder Jumper Wires to the Button

Use your soldering iron to attach jumper wires to the button. Make sure you have strong connections that are not touching.
Step 3: Program the Arduino Board

if you have not set up and configured the Arduino software on your computer, you need to do that first. This is a good guide.
Download the attached Arduino Sketch file.
Plugin you Arduino to your computer.
Open the sketch in the Arduino software.
Upload the sketch to your Arduino.
Attachments

Step 4: Build the Circuit


Now it's time to build the circuit. Make sure to unplug your Arduino board before wiring it up.
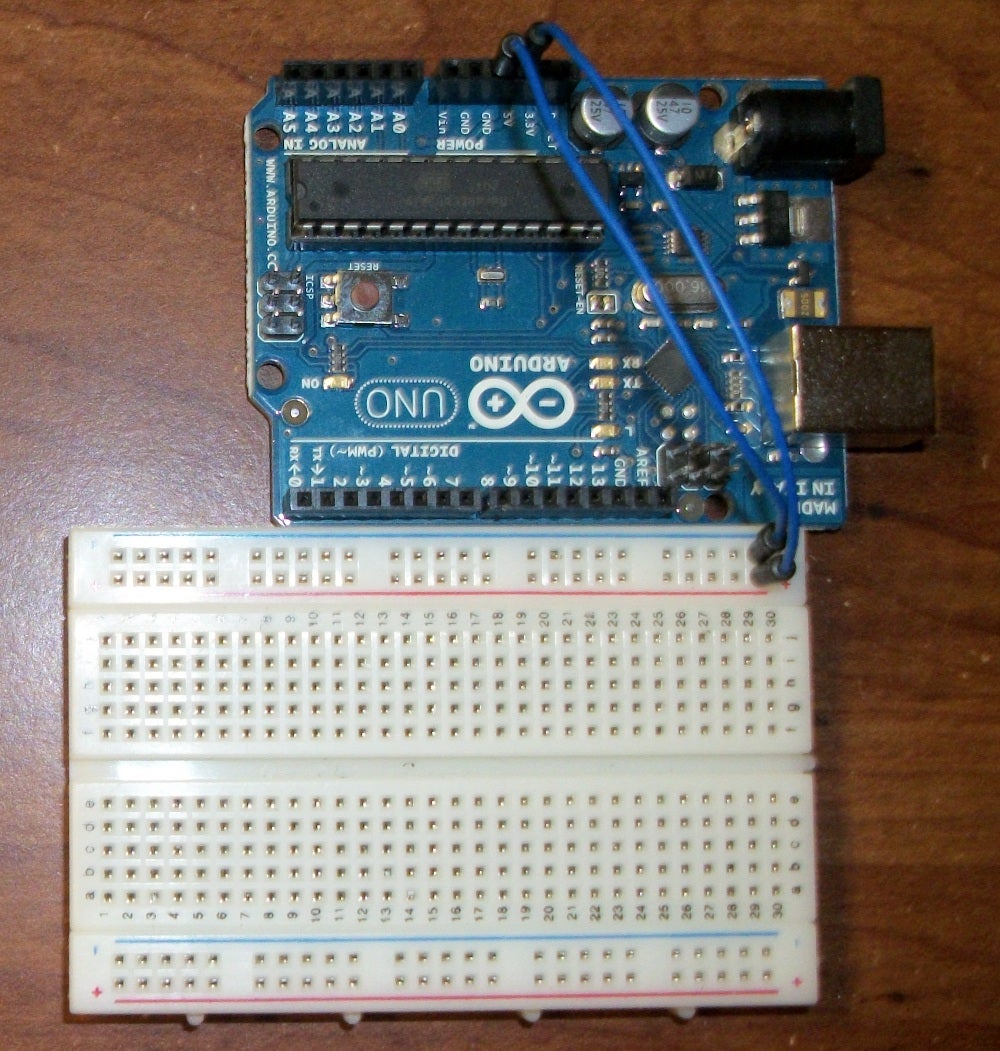
Power and ground:
-Run a jumper wire from arduino "5V" pin to breadboard "+" rail.
-Run a jumper wire from arduino "GND" pin to breadboard "-" rail.
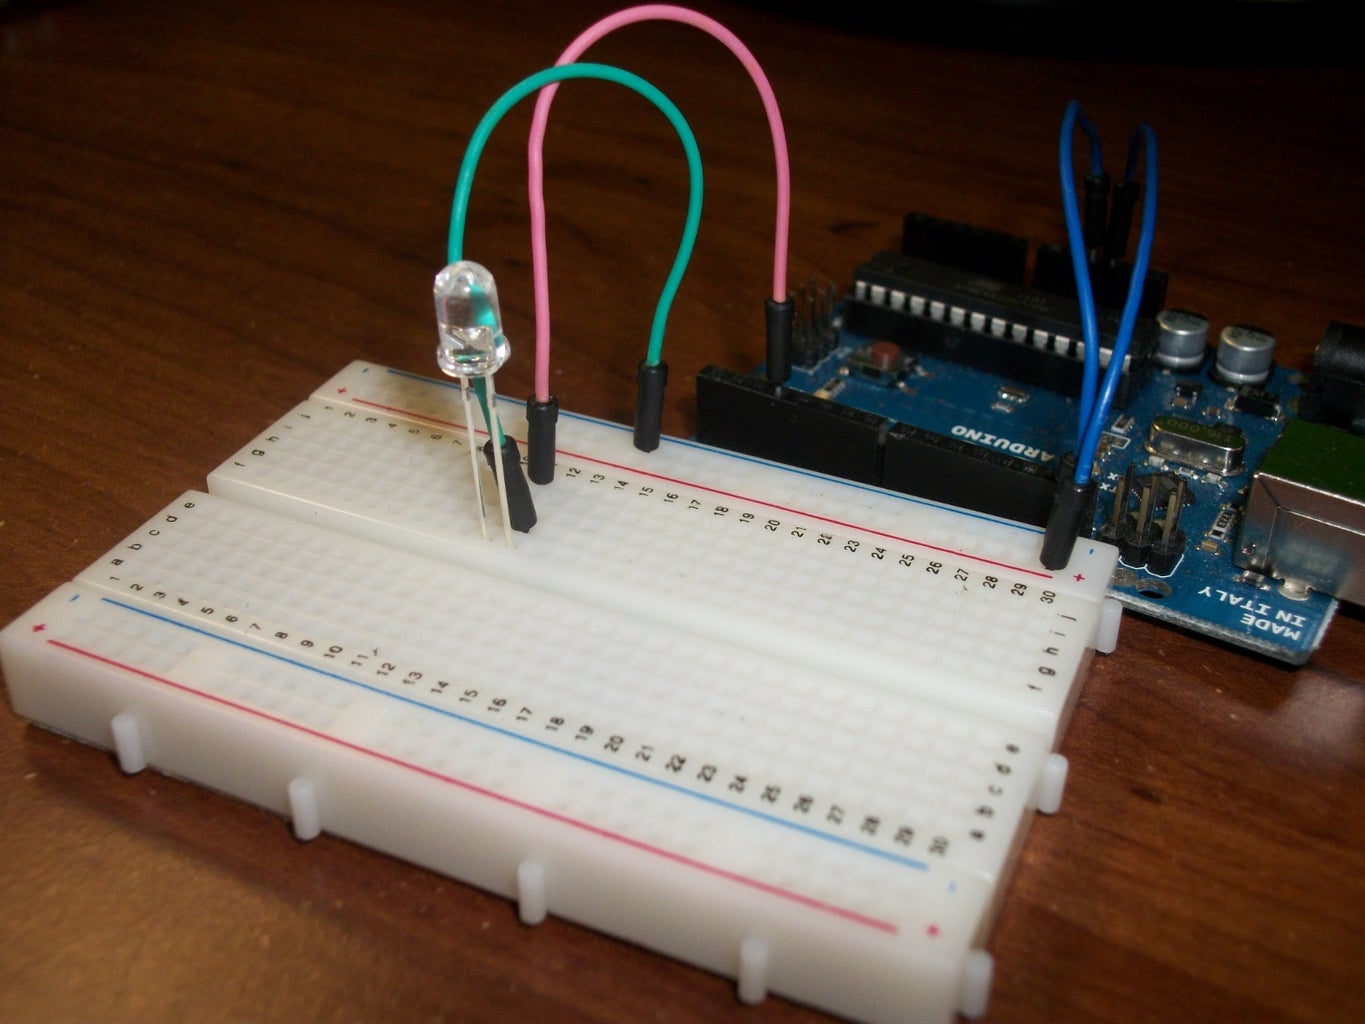
LEDs:
-Insert the LEDs into your breadboard as shown, with the longer leads farthest to the left. The red LED goes in the middle.
-Run wires from the each breadboard row with a short LED lead in it to the "-" breadboard rail.
-Run wires from the each breadboard row with a long LED lead to arduino pins 2 through 6.
Button:
-Run one of the buttons wires to the breadboard's "+" rail.
-Run the second wire from the button to an empty breadboard row.
-Run a wire from the same row on the breadboard to arduino pin 8.
-Run a resistor from that row to the breadboard's "-" rail.
Make sure your setup matches the pictures.
Step 5: Hide the Wires


Now, lets make something to hide those ugly wires! I cut out a small rectangle out of cardboard and slid it between the LEDs and the wires. It worked, but it still didn't look great, so I printed "Stop it!" on a piece of paper and glued it to the cardboard. Now it looks like something! You can do what I did or use your imagination and be creative! If you choose to go the route I did, you can get download and print the picture.
Step 6: Test It Out!


Okay, now comes the fun part! Using it!
Connect you Arduino to your computer. The LEDs should begin flashing. If not, you may have them inserted wrong. Try putting them in the opposite way. The long leads need to be on the left. Once they are flashing, you need to watch for when the middle (red) LED comes on, that is when you press the button. If you were successful, the middle light should blink on and off quickly. Now the game speeds up and the LEDs blink faster. Keep playing until you accidentally press the button when a LED other than the one in the middle is lit. The game stops. Watch and count how many LEDs light up to see your how well you did. With 5 being the best and 1 being the worst. Congratulations! You just made an Arduino game!
If you open a serial monitor from the Arduino software, you will be able to see more detailed information about your score.
Thanks for reading this Instructable all the way through! And don't forget to leave a comment if you have any questions or ideas!

Participated in the
Make It Glow Challenge


