

Introduction: T-Rex Dinosaur Game on Arduino With Tinkercad


In this project, we'll see how to make the famous Running T-Rex Dinosaur Game that we all enjoy on Google Chrome when there is no Internet Connection available.
Find on my website:
https://aeroarduino.com/uncategorized/t-rex-dinosaur-game-on-arduino-with-tinkercad/
Supplies

Step 1: Circuit Connection:

We connect Arduino UNO to the LCD using 4 Pins of Data and the control Pins R/W, E and RS.
We connect LCD power pins VCC and GND to Arduino 5V and GND.
The contrast V0 pin connected to GND.
The Backlight LED +ve connected to 5v and the -ve connected to GND through 1K ohm Resistor.
We use pushbuttons to control the game.
Find more on my Website:
https://aeroarduino.com/uncategorized/t-rex-dinosaur-game-on-arduino-with-tinkercad/
Step 2: Arduino Code
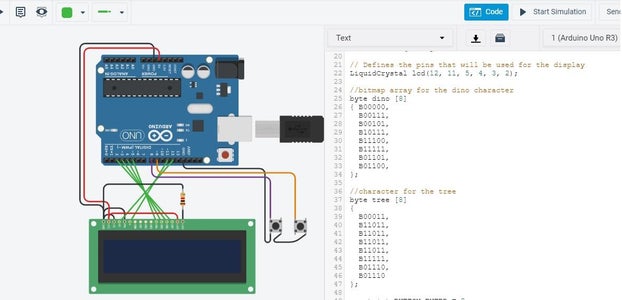
Here we start by including the LCD library and the LCD definition and the bitmap array for the dinosaur character.
Then we define the character for the tree.
The definition for buttons Enter and Select.
Constants
String for alphabet to write your name.
Variables
Start by initializing the LCD. Then create special characters the dinosaur character and the tree character.
The main loop function, start by clearing the LCD.
The handle menu function
reads from the two push buttons. The pin mode as internal pull up using the internal pull up resistor.
Menus and Functions
The menu Start and Score.
Then we print the menu and we read the buttons using digital read function.
The print score function prints the score on the LCD.
The start game function
Now, we need to program Arduino UNO board inside Tinkercad environment with this code to start executing it.
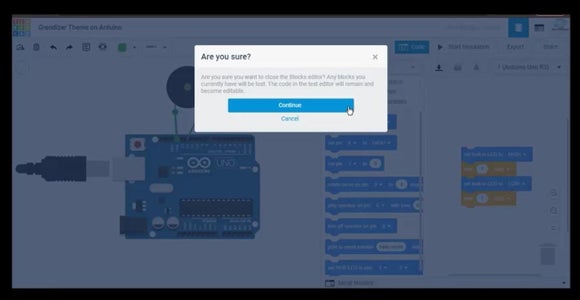
On the upper right Code tab, click the dropdown menu and select the text only. When you’re prompted to the caution that you are going to deleted all the Blocks , you click Continue.
Then you paste the above code in the software sheet.
Now, you’re ready to start the circuit execution.
Find more on my Website:
https://aeroarduino.com/uncategorized/t-rex-dinosaur-game-on-arduino-with-tinkercad/
Attachments

Step 3: Tinkercad Simulation
Now, click the Start Simulation button to start the simulation.
You see that Arduino is connected to the USB port on the screen and it indicates that it’s powered and started software execution.
If all the steps are correctly followed, the LCD is illuminated and the game is started.
Congratulations, you’ve just built Arduino circuit that plays tones of your favorite Animation on Tinkercad.
Then you can start the game simulation in action and you can play that game as in the real circuit.
Now you can build the circuit using real components.
Here you can find the Tinkercad Simulation where you can see the circuit connection and code. You can also edit all the connection and the code.
Project on Tinkercad
https://www.tinkercad.com/things/5PvUeEYt8Oe
Find more on my Website:
https://aeroarduino.com/uncategorized/t-rex-dinosaur-game-on-arduino-with-tinkercad/

Participated in the
Anything Goes Contest 2021


