

Introduction: Is This the Ultimate Dreamcast Controller? - StrikerDC With Internal Rumble!


I really like the StrikerDC controller made by Retro Fighters & in many ways, I prefer it to the official DC controller. However, the controller does feel top-heavy, especially with a VMU & even more so when a vibration pack is installed.
To alleviate this issue & bring the controller more in line with current controllers, I wanted to incorporate internal rumble.
Supplies
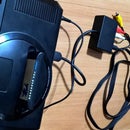
StrikerDC controller
Official DC vibration pack
3D printed case parts & three 8x2mm screws
Xbox 360 rumble motors
Light hook-up wire
Heat shrink tubing or insulation tape
Hot glue
Soldering equipment & other general tools
Step 1: Prepare Vibration Pack


I used an official Dreamcast vibration pack for this project. Before starting, 3D print the new case from my Thingiverse https://www.thingiverse.com/thing:5211728 & have it ready.
Disassemble the case by removing the 4 screws & unsolder the rumble motor.
Solder on new wires of a decent length then feed through the old screw holes in the beige connector at the bottom.
Feed the wires through the centre hole in the back of the 3D printed case & screw together using a few 8x2mm screws, or whatever screws you have that fit.
Step 2: Prepare Rumble Motors


I used the rumble motors from an old Xbox 360 controller, two motors can run quite fine off the board even though it originally only had one. It just means both motors run at the same time.
3D print the left & right brackets & fit the motors, it's a good idea to use a little hot glue to ensure the motor doesn't come loose.
Step 3: Fit Into Controller


Disassemble the controller & test fit the vibration pack board in new case.
Feed the wires down the middle & secure with some hot glue, ensure there is a little slack as the controller case will close here. If it's too tight, it will pinch the wires, or just use thinner wires than what I used.
Splice the wires & solder in the first motor, then the second. You want to hook the motors up in parallel as I've done in the photos. Insulate with a little heat shrink tubing.
Step 4: Finishing Up

Reassemble the controller making sure no wires are pinched & that's it!
Another great thing about this mod is that it's completely reversible & everything can be restored the way it was if so desired.
UPDATE: Since using the controller with a few games, I have discovered a slight issue which may deter someone from doing this mod. It seems when there is also a VMU inserted in the modded controller, the Dreamcast and/or controller has trouble powering both. A message pops up on the screen in certain games that a VMU has been removed & will keep popping up basically making the game unplayable. Whether this is due to the extra rumble motor or some other issue, I'm not sure & I will have to do some more testing.
Currently, a way around it is to either not use a VMU, move it to another spare controller plugged into the second port or disable vibration support.
If someone knows a fix, I'd be happy to hear from you otherwise I will update again if I discover a fix for the issue.


![Tim's Mechanical Spider Leg [LU9685-20CU]](https://content.instructables.com/FFB/5R4I/LVKZ6G6R/FFB5R4ILVKZ6G6R.png?auto=webp&crop=1.2%3A1&frame=1&width=306)


