

Introduction: Topographic Map Table


I designed a topographic map end table made of walnut, maple and plywood. The layers of the plywood make the topographic map look awesome and provide elevation lines. You will need access to a CNC for this but apart from that, you could do everything with a table saw or even a circular saw.
Supplies
Materials:
- plywood
- maple
- walnut
- 24"x24" glass top
- wood glue
tools used:
- table saw
- CNC router
- clamps
Step 1: Getting the Topographic Map
- Using touch terrain's website: https://touchterrain.geol.iastate.edu/ turn the transparency slider all the way up so you only see the map.
- Find the area you want to make and click "re-center box on map"
- Change width and nozzle diameter to CNC (medium or large). Note that this will make your width 100 units, adjust the box to get the height to 100 for a square. Make sure the DEM resolution is at least 10 m
- Change base thickness to 0mm
- You can scale the Z here if you want but it's easier to do in your CNC software usually.
- Export the selected area and download file as a STL file
Step 2: Cutting the Map


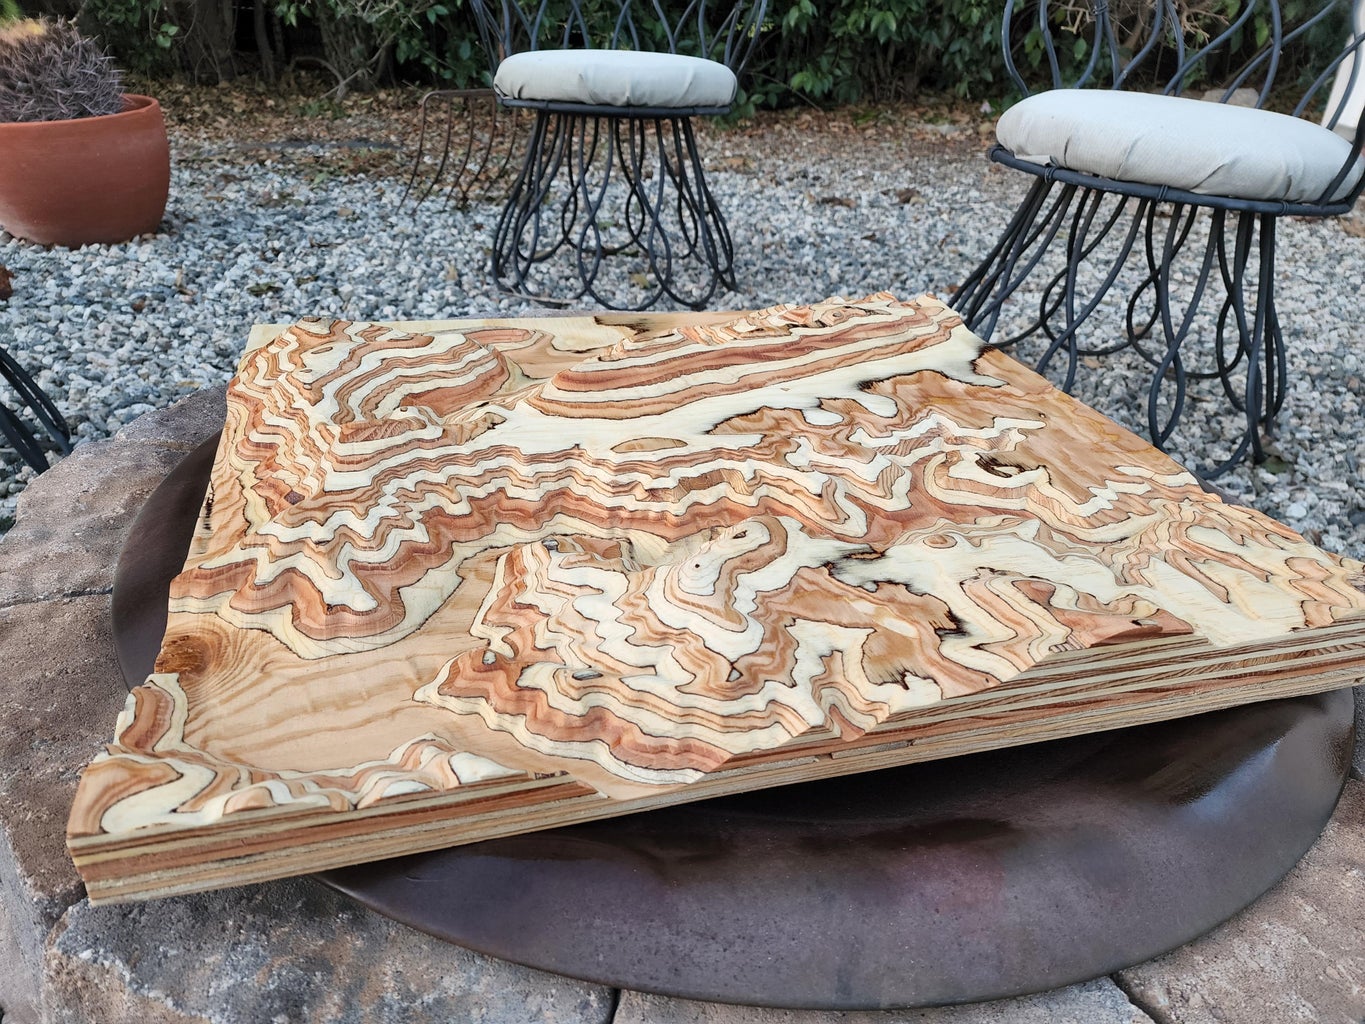
Now that we have our STL file of the area we'd like we can start cutting. I got a full 4'x8' sheet of 3/4 plywood and cut it into 8 equal pieces that are 2'x2' (okay, really they're just under 2' due to the kerf on my table saw). I glued 4 of the squares together to get a 2'x2'x3" block of plywood that we can now carve.
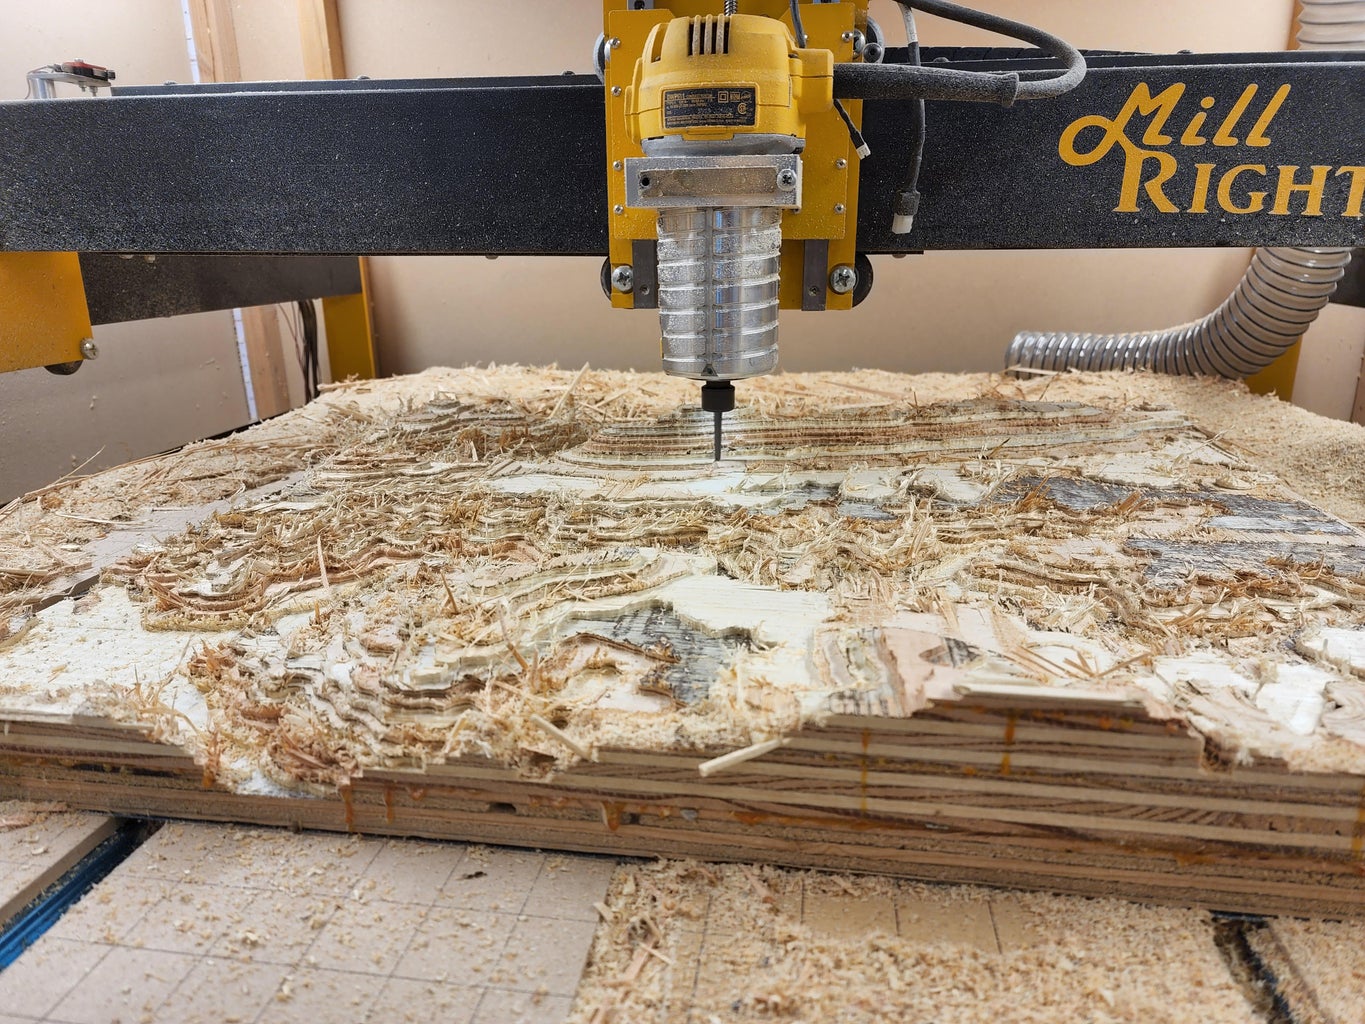
The next step is to program your cuts. This is when you can stretch your Z axis to fit your stock. I personally use Aspire V-Carve and import my STL and make it 24"x24"x2.75", the max depth of cut on my CNC and also this makes the thinnest parts at least .25" thick (since my stock is 3"), most will be much thicker of course. I do a roughing pass with a .25" flat end mill and a finishing pass with a 2mm radius ball nose bit.
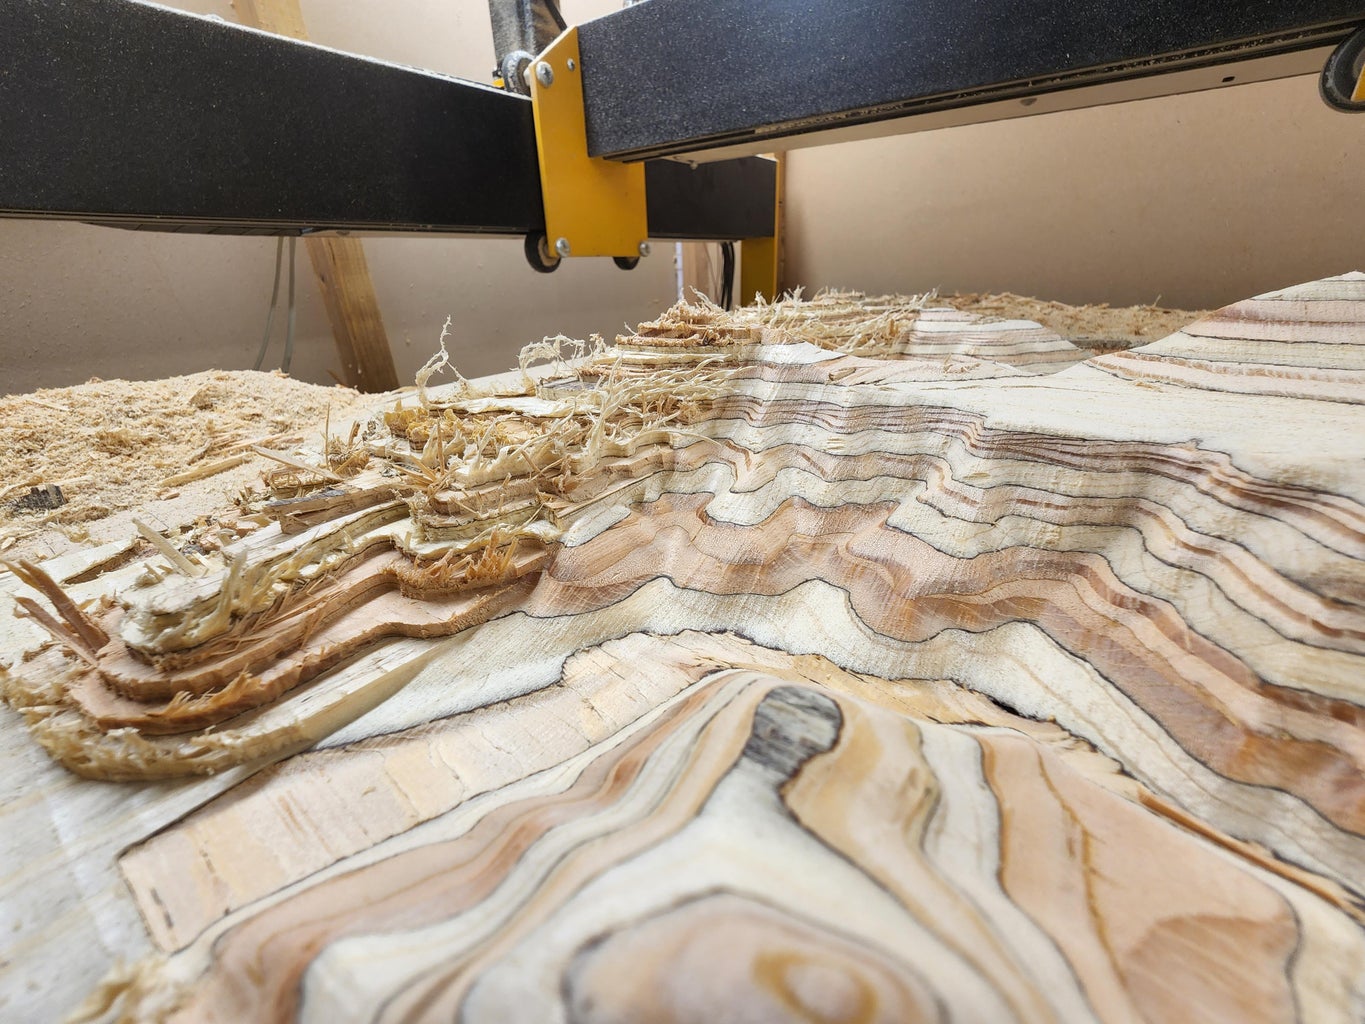
I start with a .25" flat end mill to do a roughing pass, this will make it look VERY topographic as it will have heights of layers at whatever depth you've set your roughing passes to. This could look cool if you set your pass depths to the same height as the different plies of the wood but I personally want a smoother finish and I'll allow the plies of the wood to create the elevation lines for me. This roughing pass will take a LONG time if you're using a .25" bit. I think mine took about 10-12 hours.
Without moving the stock, change out to your finishing bit and keep the same X and Y 0's, you may need to adjust the Z axis as well if your bits aren't the same length and bottomed out in the router collet. I used a 2mm radius ball nose bit. I have many other bits (.25mm, .5mm, .75mm, 1mm, 1.5mm) but for something this size, 2mm ball nose was my best option so it would only take another 10-12 hours, a finer bit would be slightly more detailed but at the cost of time. My 2mm ball nose bit steps over about 40% of the bit diameter so it steps over 1.6mm each pass, if I did it with my finest bit it would only move over 0.2mm at a time. Since out stock is 24" or a little over 600mm that's the difference between 305 passes vs 3000 passes. I ended up making mine over 2 days, Saturday I did the roughing pass and Sunday I did the finishing pass. All in all the CNC machine time is somewhere around 20-24 hours of cutting. After that, the best part of the project is done but we still need to build the rest of the table.
Step 3: Building the Table


The next step is to make the table itself that the map will sit in. Since the map itself is 3" thick you'll need to make sides that are larger than that, I ended up making mine with 5.5" walnut. I cut my pieces to be 24.75" long and made 4 of them. I mitered the sides of each so they'd fit together nicely and I also cut a rabbet into the thin edge that will be the top so that I can place the glass top in there and it will sit flush with the wood. I've included a picture of the corner of the frame so you can see the mitered corner and the rabbet that the glass sits in. Once you've cut them to length, mitered and cut a rabbet into each of the 4 side pieces you can glue that together.
The next step is the legs. I wanted the legs to flow right into the sides so I cut them to my desired height (over all height minus the sides we just made, so in my case the overall height is 30", so 30-5.5 = 24.5" legs. I cut them out of 5.5" walnut and then split those into 2 pieces that are 3" and 2.25" (and then a little tiny piece that we won't use). I glued the two pieces together in an L that has equal sides of 3"(because 2.25" plus the .75" side of the other piece equals 3"). Once you've made 4 of those we're ready to attach the legs to the frame.
I used another square piece of walnut that was 1.5"x1.5"x6" tall to attach the legs to the frame, I glued the piece into the legs with about 2 inches protruding out the top of the leg that will then be glued into the frame. The 2" over hang will be what out map sits on, so it will be another 3" on top of that, so that's 5" of our 5.5" side wall, and then out glass is recessed into that .25" so there will be a .25" gap between the tallest mountain in your map and the glass. Check out the picture included of the inside of the leg so you can see how it connects the leg and the frame and holds the map.
You can also glue in pieces at the bottom of the legs for a shelf, which I made out of maple because I really like the contract of maple and walnut. The shelf ends up being something around 23-23.5" square and sits on those pieces we glued at the bottom. Once you have the legs attached to the frame and the shelf in the bottom, cut your topographic map on your table saw to be the right size to fit in the frame. The inside of the frame will be 24" minus half the width of the frame wall (because your glass is recessed into that) and then 2 of those, so your map should be 23.25"x23.25" to fit. Apply lacquer and you're done!
Congrats, you've made a totally custom topographic table!

Runner Up in the
Plywood Contest


