

Introduction: Touchscreen MP3 Player


This Instructable is one of my few which will not target the "Microcontroller" channel. This project is a very simple music box built with off-the-shelf boards only. It's supposed to make my boys' life easier by allowing them to play their favorite songs even if they can't read. Yeah, there's YouTube for that but many don't like the idea of their kids spending too much time staring at tablets or phones, and to do a search you need to be able to read/write. This little box is the result of some previous work both with the Nextion display and the MP3 player module. Read through my Instructable to find out how easy it is nowadays to build an MP3 player.
Supplies
The BOM itself is short, but there are some hand tools you will need to be able to assemble this.
Bill of materials
- 2.4" Nextion display
- UART MP3 player module
- Wall adapter or battery pack for power supply (I used a 10400 mAh PowerZilla)
- Enclosure (printed or other DIY enclosure), PLA filament
Tools and equipment
- PC/Laptop with Nextion Editor, Hercules and InkScape installed
- Soldering iron, solder
- Wires, and wire stripping/crimping tools
- 3D printer (if you decide to print an enclosure) and filament
- Hot Glue Gun
- Hand tools
- Benchtop PSU until the battery powered feature is solved
Step 1: Nextion Display


Nextion displays are "intelligent" displays intended for use in applications where memory and/or CPU time is a scarce resource. These displays are designed to be user-friendly and super easy to program, they come in many different shapes, sizes and resolutions, and are very easy to interface. While smaller microcontrollers don't have a lot resources available to refresh the screen fast enough they usually have a HW UART built-in. Nextion takes care of the rest.
The thing has on-board display management and the communication between the host and display goes over UART. Display projects are organized into pages, and the user can drag and drop different indicators, controls, images and fonts to create a user interface for a project.
The great thing about this project is that there is no need for a "middleman", the display can drive the MP3 module directly. To achieve this, we will need their development tool and luckily it is free for download. I downloaded it and created a new project.
I wanted twelve songs initially, but later decided to have volume buttons on the display. This left me with ten songs for starters so I colored the background to green and began adding the pictures. When all pictures were on the canvas, I resized and assigned them by entering the ID of the images from the "Picture" toolbar (on the left side of the screen) to the pic parameter of the picture (right side of the screen). To assign pictures you will need to select the image object first!
I named my image objects suggestively: "Song" + row number + column number. I did this to allow future enhancements like programmatically change the pictures if navigation arrows are added and pressed. Future revisions will come out if my kids ask for them :)
The attachment of this step is not actually a PDF, it's a HMI file you can open with the Nextion Editor, but the Instructables editor wouldn't let me attach it. If you have trouble opening it, let me know and I will send you the HMI file somehow.
Attachments

Step 2: UART - MP3 Player Module


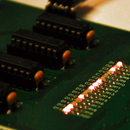
This module is responsible of turning our MP3s into sounds. I have used this board before for a gift so it was an easy pick for this project. The board has several digital interfaces and one of these is UART - this is what I used. To do this, I set the DIP switch to the right configuration, then soldered an old PC speaker to its output. Take a look at the images to see what I am talking about.
For this first revision I decided to take the easiest road and trigger the MP3 module with the "specified song" command over and over. The Nextion seems quite an overkill in terms of what its UART and script engine could do, but I need the display and that kind of settles it. The structure of this "specified song" command can be seen in the datasheet but I cropped it to the image section so it is easier to take a quick look.
The AA 07 02 sequence at the start is fixed and it needs to be followed by the SNH and SNL (song number high and song number low) bytes. At the very end there is a checksum which is the 8 bit sum of the previous bytes. All numbers are in hexadecimal format so grab your programmer calculators to make sure you don't have errors.
- song 00001.mp3 = AA 07 02 00 01 B4
- song 00002.mp3 = AA 07 02 00 02 B5
- ....
You can increment the checksum byte from the end by one for each song (if you start your songs from 00001.mp3 and increment by one with each new mp3 added), or you can just calculate it each time you have a new song added. I am sure this can be done programmatically but hey, there are ten songs - not the end of the world to do this manually.
So, to play these songs we simply need to send hexadecimal sequences down on UART when a button is pressed or released. This is easy job as all images have a "Touch Release Event" tab where you can enter exactly this. For example, if you were to play the song with the blue bird, you would need to click on the image, then select the "Touch Release Event" tab from the bottom right and enter this into the text field:
printh aa 07 02 00 01 b4
Exactly what we see in the previous list, right? Only in small caps. The "printh" command is the one that sends the data onto the UART TX of the Nextion display and on UART RX of the MP3 module. Read more about Nextion instructions here.
Step 3: Graphical Design


This and the previous Nextion-related steps actually go hand in hand, I used InkScape to create the images I uploaded to the display. I learned to use InkScape a bit when I made the GoldFish project, it proved to be a great tool for amateurs if you ask me and it is FREE.
As said before, I wanted to have pictures instead of words on the displays since my boys can't read yet. I used InkScape to shrink images to size and obtain images of equal sizes I could later list in an array-like structure. For this first revision there will only be ten songs but I am sure there will be a requirement for update and the SD can fit a lot of stuff anyway.
I chose images to represent the songs as much as one image could. I looked on the web for the images then began cropping and resizing to make everything look a bit nicer. I also downloaded a lot of SVGs because I am not very good at this kind of artistic drawing and SVGs can shrink/grow without looking fuzzy at the end.
My main screen can be seen on the first image. These are all Hungarian songs so I won't really try to explain what's going on in them but to give you an idea, the first song is about a blue bird, the second is about a witch... and so on. I thought that these pictures were quite easy to associate with the songs - we will find out soon enough if they were or were not.
My image processing procedure for the witch hat for example was this:
- I went to this webpage and did a search for "witch"
- I decided to pick this image out of the many available and downloaded the SVG
- Open the file with InkScape and size it to the desired width/height (65)
- Press R to draw a rectangle, hold CTRL while drawing to make it a square.
- Press CTRL + SHIFT + F. Enter this color on the right side panel: 217821FF
- Draw another square, press N then grab the circular marker from the top right to round the square a bit
- Press CTRL + SHIFT + F and enter this to the RGBA field: 1A1A1AFF
- Select all objects and center them by pressing CTRL + SHIFT + A and selecting both center axes
- Adjust the layers if needed, green rectangle should go behind, then comes the rounded rectangle, then the SVG
- Group objects by selecting all objects and clicking Group from the right-click menu
- Press CTRL + SHIFT + E and export the drawing to a PNG then import it into Nextion Editor
It's important to have the rectangle from the back match the background color of the Nextion page so the buttons will appear to be rounded - gives a little extra touch to the list.
These steps must be repeated until you have twelve images, search for whatever SVG-s you'd like then create the images. I assume there won't be any copyright problems if the SVG is listed as free or you don't start selling MP3 players by the thousands. I doubt that, to be honest, as these are a bit expensive for an MP3. Anyway, back to ours: I have a 320 x 240 display, a good common denominator is 80. If the buttons are all 70x70 I can leave a clearance of 10 pixels between them and 5 pixels on the edges. This sounds good enough and it looks neat - this short math gave me the 70x70 icon size for the buttons.
Step 4: Enclosure


The enclosure design was done in Tinkercad and it is actually a collection of STLs that were somewhat available . I am not much of a 3D designer, the biggest thing yet was a Fusion 360 course I bought on Udemy - barely had a chance to take a good look at it. I downloaded a couple of items from Thingiverse/Nextion Wiki (Nextion is nice enough to give 3D designs for bezels of their LCDs. I downloaded a speaker grid from Thingiverse, I cropped and resized everything then printed it on my Flashforge Dreamer 3D printer.
I found that a hot glue gun binds PLA prints very very good, this is what I used to glue one assembly to the other. The side panel was meant to give some color to the design but it turns out that the red filament I had in stock was ABS and simply drove me crazy with the bends and peels. I printed it in black to see if it worked, but that needs a bit of adjustment to snap and hold everything together nicely.
The side panels are there to hold the thing together - unfortunately the hot glue turned cold by the time I pressed the two assemblies together so one side is a bit lifted. I wanted to solve this issue by having these side panels squeeze the two units together. These are still a bit experimental, but you can try to see what you can get out of this with it nonetheless.


Step 5: Test!

Well, everything is built and assembled, the only thing left for us to do is to try it! Mine worked at first try and I think this is the first time I didn't had to swap the RX/TX lines of the UART communication to make it work. Enhancements will come, my kids are already using this and asked for more songs - navigation bar, here we come. But for now this is it - if you liked this small project, give me a vote and/or check out my other projects, especially the 8-bit microcontroller build. A lot of work is going into that series and it is about the exact thing this Instructable didn't need: a standalone microcontroller. It will be great, I promise.
Attachments

Participated in the
Battery-Powered Contest


