

Introduction: Treo 650 IR Mod


This will show you how to mod your treo 650 to greatly increase it's IR transmitting range.
Disclaimer:
This is a rather difficult mod involving soldering directly to an expensive phone and using very small surface mount components. This tutorial assumes moderate soldering skills and the ability to read schematic diagrams. I take no responsibility for broken phones, burned fingers, popped eyeballs, wasted money, bar fights, lost time, gained time, pissed off girlfriends, pissed off parents, or your death... alone at your mom's house.
Parts:
1 NPN transistor
1 infared phototransistor
1 infared led
tape
small gauge wire
Tools:
soldering iron
wire strippers
fingers
camera
teeth
hex screwdriver
breadboard
drill
Step 1: Test the Components

Once you gather the components, wire up the circuit on a breadboard to make sure they all work.
Step 2: Open the Case


This can be tricky. First off, it has hex screws, so you'll need a funky screwdriver, or a tiny flat-head screw driver, secondly, be careful of the ribbon cables, they are as delicate as they are thin.
Step 3: Remove the Transciever Cover

Heat the little tab with your soldering iron and use a jewler's screwdriver to pry the cover off. This step is necessary.
Step 4: Make Room for the New Sensor


You'll need to be creative on this one, just remember that the treo's ir led is the bump on the left side of the transciever, also remember that the transciever is encased in epoxy that is transparent to infared light, so you can put the sensor to the side.
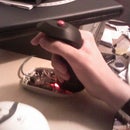
Step 5: Mount the Sensor and Find a Power Source.

Mount the sensor where you think it will fit, and connect a wire to the leftmost pin on the transciever. this will be your positive lead.
Step 6: Ground It!

Attatch a wire to any metal casing. this will be your ground (negative) lead.
Step 7: Wire Up the Circuit.

I leave this part up to you as well, as your particular treo and parts may vary. I freeformed it on mine. (for those who don't know, freeforming is soldering the circuit without a circuit board)
Step 8: Make Room for the Circuit

Trim the inner antenna to accommodate the new amplifier circuit.
Step 9: Put a Hole in the Outer Casing.

Using a drill, screwdriver or hot nail, put a hole in the antenna cover for the led.
Step 10: Put the Palm Back Together (except for the Antenna)
I hope you remember how it goes together! push the led through the hole and put the antenna cap back on. be careful of the ribbon wires, and make sure you align the LCD cable properly in it's socket or the color may be messed up, or your touchscreen may not work.
Step 11: Test It and Make Sure You Didn't Screw Up.


Put the battery back in and make sure it boots and the screen/touchscreen still works. Start a program that uses the IR port. Get out your digital camera and point your palm at it. it should be pretty much blinded by the light. if it isn't check for shorts, and make sure the sensor is in a good position. (and is still attatched ;)
Step 12: Mischief
Now that your palm has an infared blaster, you can put it to more productive use... sure you can send files across the room, but that's boring, what you need is a remote control program.
If you're broke, you can use Omniremote 1.171, as it's no longer supported by it's developer. (but it's a learning remote, so it needs training)
If you're not broke, i highly recommend novii remote as it comes with many codes for many devices.


