

Introduction: Uploading Sketches to Arduino Pro Mini Using Arduino UNO Board (without Removing Atmel Chip)
This outlines a procedure for making use of Arduino UNO's built-in USB to Serial(TTL) converter to upload sketches to Arduino Pro Mini board without the need for removing the UNO's Atmel micro-controller chip. This is useful for those starting out with Arduino UNO board (with soldered Atmel chip) and want to explore Pro Mini for a project with what they have.
The principle is simple and involves following steps:
1) Disable the serial communication port in UNO's onboard micro-controller by uploading the attached sketch(serial-diable.ino) to UNO board
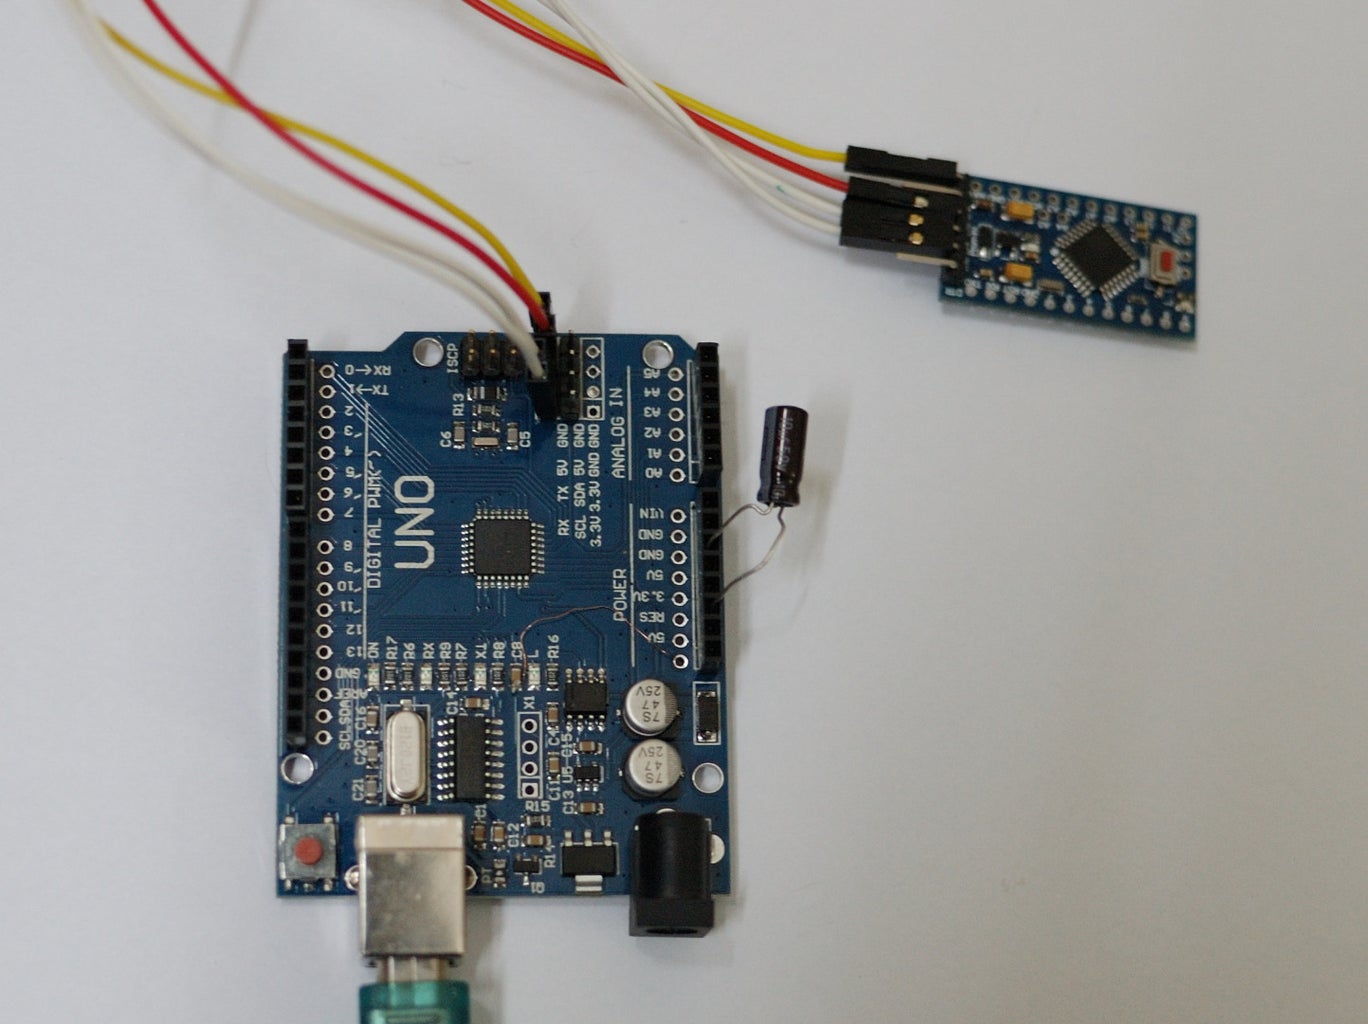
2) After the above step, disable the auto reset feature in UNO board (to avoid the serial port getting activated again) by connecting a 10 microfarad Electrolytic capacitor across UNO board's Reset pin and GND pin (refer to the attached image above). The positive terminal of the capacitor should be connected to reset pin and negative terminal to the GND pin. This is one of the options recommended to disable auto reset as outlined in this article
3) Connect TX, RX , VCC and GND pins of UNO board to the Pro Mini's TX , RX, VCC and GND pins in the usual way.
4) Choose the board as "Arduino Pro or Pro Mini" in Arduino IDE
5) You can start uploading sketches to Pro Mini now. Just press and release the Pro Mini's reset button just after choosing the upload from IDE.
After the first three steps are done, the USB to serial/TTL converter in the Uno board can freely communicate and upload sketches to the Pro Mini from a PC connected to the USB port of UNO board . Also you can continue to use the UNO board as a simple USB to serial converter as long as the 10 microfarad capacitor stays connected . (even after powering off and on) between its reset and ground pins.
For step 1 above, make use of the sketch listed below:( Also, attached as a file )
#define ledbrd 13
#define rxpin 0
#define txpin 1
void setup() { pinMode(ledbrd, OUTPUT); // initialize digital pin 13 as an output.
Serial.end(); // disable the serial port
pinMode(rxpin, INPUT); //set the serial rx pin as input for high impedance
pinMode(txpin,INPUT); // set the serial tx pin as input for high impedance
}
// Very low duty cycle blink to indicate idle mode of  UNO board
void loop() {
  digitalWrite(ledbrd, HIGH);   // turn the LED on
  delay(1);              // wait for a  very short (minimum) time
  digitalWrite(ledbrd, LOW);    // turn the LED off
  delay(4000);              // wait for many seconds

}
If you desire auto reset feature for Pro Mini(to avoid the manual press of reset button on Pro Mini every time) to be enabled before uploading the sketch every time, it can be done by following two steps:
I. Extend the DTR line track (from the USB to serial converter chip in UNO board) to the unused pin (left most pin in bottom connector) in the UNO connector by soldering an enamelled copper wire(after removing the insulation from the two tips). Refer to the attached image for details
II. Connect the above extended DTR pin of UNO board to the DTR pin of the Pro Mini board.
The above modification will not affect the normal functioning of the UNO board.
In order to make use of the UNO board normally, just remove the 10 microfarad capacitor connected across its reset and ground pins and remove all connections to the Pro mini board.
UPDATE 1: Just found that this works even without the second step i.e. without connecting the 10 microfarad capacitor as long as one chooses the target board as 'Arduino Pro or Pro mini" . So it might be that the UNO's bootloader is looking for a specific board type on the received data initially and if it is not received, the UNO board control will go to the sketch loaded (in this case the 'serial-disable' sketch which disables the serial port) without sending anything on the TX line
UPDATE 2: Also found that just connecting the reset pin of UNO board to Ground directly using jumper is sufficient to achieve this functionality.This would not need any sketch or capacitor !! But I am not very sure whether this can be recommended fully for use for long duration for debugging etc. (since it keeps the UNO Board on reset for a long duration)


![Tim's Mechanical Spider Leg [LU9685-20CU]](https://content.instructables.com/FFB/5R4I/LVKZ6G6R/FFB5R4ILVKZ6G6R.png?auto=webp&crop=1.2%3A1&frame=1&width=306)


