

Introduction: Vinyl Cut With Fabtotum


This tutorial will show how to achieve vinyl cut using a custom carriage for the Fabtotum (3D printer/CNC/3D scanner).
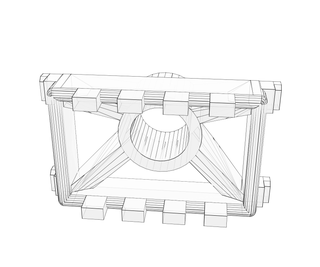
The custom carriage is made to support a Silhouette blade holder, made for dedicated desktop vinyl cut machine. Here, we just use the vinyl blade holder (+blade) to use it on a multi-purpose machine: the Fabtotum.
Step 1: 3D Print the Custom Carriage

I made my object using OpenSCAD.
It is composed of 2 files:
- the carriage itself
- the blade holder support that combines with it.
To make your life easier, I provided the STL file, ready to be printed.
No much thing to say about 3D print itself, I used 0.2mm Z resolution + support.
This carriage will position the blade holder tip a bit above the limit of the Z axis, so that it is not possible for the native platform of the Fabtotum to hit the blade directly.
Anyway, you will need to add a (wooden) plank (say 10-20mm), a cutting mat, and your vinyl sheet on the top of the platform. That will be more than enough to get the blade in touch with the vinyl.

Step 2: Install the Blade Holder

- Insert the blade holder into the main hole.
- The blade holder must be able to move freely inside the hole.
If not, do not force anything. You will have to use some thread to enlarge the hole a bit, try again,... until the blade holder slides well. - Then, add a rubber band (as in the picture) to add some pressure on the blade holder, and that it is maintained in place.
- The pressure might need some adjustment, not too loose, not to strong, just start with something sensible.
This will define the force applied on the blade while cutting the vinyl.
Step 3: Prepare Your Design
- Make your design to be cut using your preferred application. I do it with Inkscape.
- Make sure all your objects are "path".
- Important: make sure that your design is correctly positioned near the origin (0,0).
This will be used later on the machine.
Do NOT expect that the machine will do something clever, like magically set the origin at the bottom left corner of your drawing. - Save it as an SVG file, see "instructable.svg" file for an example.
- Use "Makercam" to transform SVG to Gcode that will be used with the Fabtotum:
- Open the file "makercam.swf" with an web browser, this application is also available here:
http://www.makercam.com/
Note that this is a Flash application that will not save any settings; you will have to re-set them every time you open the app. In the top right corner, select "mm" units
In the menu "Edit / Edit Preferences", set "SVG import resolution" to 90px/inch, if yo used Inkscape.
You'll have to find the right value for other software. This is only to make sure the scale of your design is conserved.- "File / Open" your SVG file
- Your whole design will be selected (orange color) per default. If not, click-drag a frame around to select it.
- "CAM / follow path operation":
tool diameter = 0mm, target depth = -2mm, safety height = 3mm, step down = 2mm
This will ask the machine to follow your SVG paths in one pass (2mm, in steps of 2mm). - "CAM / calculate all"
- "CAM / export gcode", just hit "Export selected toolpath"
That will create a ".nc" file containing Gcode, see "instructable.nc" file for an example.
- Open the file "makercam.swf" with an web browser, this application is also available here:
- Now we have to deal with the "drag knife" compensation.
If you do not know well vinyl cutter, here is how it works, and why we need to compensate. If you know already go to next point.
The vinyl blade holder contains a blade that is free to turn in any direction (it is mounted on a ball bearing). This is needed to have the blade orientation following the movement of the path and cut in the right direction. In order to have the blade follow this direction, it is slightly offset from the rotation axis so that it drags behind the holder position.
The machine only knows the holder position. We have to compensate this movement, to have the blade position right. - To compensate, open "drag_knife.html" in a web browser.
This is a page that uses an embedded Javascript code to compensate for the blade offset.- Open your ".nc" file with a text editor, and copy its content into "gcode input" area.
- Set the blade offset. I typically use 0.5 mm.
- Click "Transform"
- Your design is displayed, as well as the compensated path.
- Copy the content of "gcode output" into a new text file with ".nc" extension. See "instructable_compensated.nc" file for an example.
- (
Note for Fabtotum advanced users, you can skip to next point.
This script will also handle some fine tuning for Fabtotum, so that this produced gcode is ready to be used. For the record, it will:
- remove all comments
- add some Gcode to have a proper origin ("G92 X0 Y0 Z0", "G21", "G90")
- remove unneeded Gcodes ("T0 M6", "G17", "M5", "M30")
- append an ending Gcode "G27"
)

Step 4: Cut Your Design

- Remember to setup your blade to the appropriate cutting depth depending on the vinyl you use.
I use fairly thin vinyl sheet to make sticker, and usually 0.1mm is fine. - Install the custom carriage (+ blade holder) in place of the 3D print head of the Fabtotum.
Remember to place a working plate (wooden plank + cutting mat) on the platform of the Fabtotum, because Z axis will not go up to the blade.
Upload gcode (.nc file) to Fabtotum, and start subtractive manufacturing
- As requested by the Fabtotum interface, jog to origin (0,0,0).
The X,Y job must bring the blade above the "origin" on the vinyl surface to be cut. Remember that this corresponds the the (0,0) position of your design.
For Z, you can do your own trick but, I usually get the vinyl surface around 1cm from the blade, and adjust (go up) 1mm per 1mm until the blade holder gets lifted, then go down 1mm. - You can now proceed with care. If this is your first try, be ready to hit the power switch.
- Start
Voilà !


