

Introduction: Waterslide Eggs With Bonus Eggsplosions


- Waterslide labels are easily repositioned while wet. With "peel and stick" labels, you usually only get one chance to position the label perfectly. If you mess up, peeling up the label will often damage the target surface, or "crease", "kink" or otherwise damage the label. As long as you are gentle, and as long as the target surface and waterslide label remain wet, the label can be slid into perfect position.
- The extreme thinness of waterslide labels makes their edges all but disappear on the target surface. This makes the artwork look more like it was painted on and less like a label. If you paint over the image with transparent colors (aka "candy" colors) you can achieve amazing depth effects and cause the label edges to disappear completely. Airbrush artists love waterslide labels for this very reason.
- By coating the finished item with a clear coat (gloss, satin, or matte, your choice) the label and the target surface take on the same degree of "shine", further concealing the label. Peel and stick labels will often "shine" relative to the target surface, making them stick out like a sore thumb.
- The thinness of waterslide labels makes them conform better to curves than "peel and stick" labels. I will demonstrate this on some nice curvy, fragile eggs.
Although this Instructable focuses on eggs (it's my entry into the Egg-bot challenge), it's a great technique for automobile modders, computer case modders, steampunkers, haunted house makers,model makers, and instrument panel makers because of the slick "custom painted" results you can get with very little practice.
What you'll need:
- Your target surface, already painted with a "base coat" (clear or color) that is waterproof.
- Your desired artwork in an easily printable format (jpg, bmp, png, etc)
- A decent printer (inkjet or laser) to print your labels.
- Blank waterslide label paper. I got mine from http://www.decalpaper.com. I have no affiliation with the company other than as a customer. There are probably plenty of other places to get waterslide paper, this is just the one I happened to use. The paper comes in inkjet or laser varieties; choose the kind appropriate for your printer. I will be using the inkjet variety. The labels are available as "clear" or "white". I recommend getting both. The clear will potentially have lower contrast (depending on the color of your target background) but the edges will be all but invisible. The white will give better contrast on some surfaces, but the label edges will be more visible on anything but a white background. I'll show you examples of both.
- Clear acrylic spray. I tried Krylon Acrylic and Minwax water based acrylic. I got better results with the Krylon.
- Scissors, X-acto blades, or other means of trimming your labels
- A bowl of clean water
- Transparent ("candy") highlight paints (optional)
Ok then, let's look at a typical application of waterslide labels. You're more than halfway through your "Poultry in Contemporary Cinema" class when you figure out that you're allergic to chickens. Your final class project is going to have to involve eggs because chickens are out of the question. Pretty common situation I'm told. At any rate, the final project is worth most of your grade, so you have to do well. You need a way to draw a "death star" like pattern on one egg (the "EggStar") for your poultry interpretation of Star Wars;
you need a way to draw a world map on an egg for the final asteroid impact scene of your film "ArmaEggedon";
you need a way to draw RebEgga Black on an egg for the (final) performance of her song "Friedegg".
You don't have an Egg-bot (yet), so it's time to fire up the waterslide labels. Let's get cracking.
Step 1: Print Your Image


Select your images and size/crop/color adjust them as needed. What? You don't have Photoshop? No worries, there is a free/open source alternative to Photoshop called GIMP (GNU Image Manipulation Program). While not quite as powerful as Photoshop (yet), it is a tour de force of graphic awesomeness and is available for linux, mac, or windows. You can get it at www.gimp.org.
Run some test prints on plain paper to make sure that you are getting the image size/quality/color that you are looking for before you go and waste any waterslide paper. Once you're happy with your graphics, print them according to the label manufacturer's instructions. For the www.decalpaper.com inkjet paper I used, the recommended settings were "photo best" for quality and "photo glossy" for paper type.
Step 2: Seal in Your Artwork


If you are using inkjet waterslide labels, you will need to seal the surface with a clear acrylic. If you don't, the ink will simply dissolve away when you attempt to soak the label.
I used several (usually 3) light coats of Krylon spray acrylic available from stores like Walmart, Lowes, and Home Depot. Multiple light coats will give you a much better result than one heavy coat. If you apply a really heavy coat, you may even cause the ink in your label to run. Let the final coat of acrylic dry thoroughly before trying to use your labels.
Note: If you are using the laser version of the labels with a color laser printer or color copier, you can skip this step as the laser toner is not water soluble like inkjet ink is.
Step 3: Trim and Test-Fit Labels

Using sharp scissors, an X-acto blade, or other sharp thingy of your choosing, trim your labels. For best results, try and trim as close to the artwork as you are safely able to. Now is a great time to make sure that your labels are going to fit properly to your test surface. If the surface is curved (as it is in this case), you may find that cutting a large label into smaller segments allows it to be more accurately placed. Even with thin waterslide labels, you may have to make "relief cuts" in the label to get it to lie flat. While this can certainly be done with the label wet, it is much easier to do when the label is dry and still attached to its carrier paper.
For RebEgga, the image was applied as a single label. For the EggStar, it had to be divided into three sections. For the world map, it had to be divided into four or five segments and multiple relief cuts were needed.
Step 4: Soak and Slide


Dip your waterslide label into a bowl of clean, room-temperature water. The edges of the label will begin to curl slightly. Soak for 45 seconds to one minute (or according to manufacturers recommendations). Now (gently) try to slide the image off of the carrier paper. In general, you should be pulling such that you do not introduce wrinkles into the very thin label. If the image doesn't want to slide, don't force it, just soak it a little longer. When the image begins to slide, moisten your target surface with water, and slide the image onto your target surface and slide into position. If it's difficult to slide, try wetting the surface a little more. Once the image is where you want it, blot up the excess water with an absorbent lint-free cloth. Blot around the label and not on the label itself. With a lightly moistened finger, smooth down the label edges. This will be much more challenging on a curved surface than on a flat one.
Step 5: Half-dry, Smooth Down, and Full Dry


So your label is in position and the excess water has been removed. As the label itself dries, its glue will become progressively more tacky until it dries completely. When the label is "half-dry", it's a great time to check the edges of the label for crimps and wrinkles, particularly on curved surfaces. Edges that wouldn't lie flat when the label was wet may very well stick down nicely when the label is "half dry" and the glue is much more tacky. Smooth these edges down with a dry finger so as not to re-wet the label. When you're satisfied with your results, allow the label to dry completely.
Step 6: Apply Highlights (optional) and Seal (not Optional)


If you are going to add a "candy" color, now is a good time to do it. Some folks prefer to apply a light clear coat first, so if they mess up the candy color, they can wipe it away without damaging the label. For most applications, highlights and "candy" colors won't be necessary.
Now apply a clear coat (I used the same Krylon clear acrylic I used earlier) to coat your project. This will seal the label to the target surface and give the project a uniform finish.
Admire your work.
Step 7: Bonus EggSplosion #1
Let's see a few samples of your work:
For the climax of your film "ArmaEggedon", Captain Chicken Little and his crew look out the viewport of their spaceship as they escape from the doomed earth......as a "planet killer" asteroid approaches, this time the sky really is falling.
Step 8: Bonus EggSplosion #2
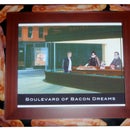
You wanted a different feel for your interpretation of Star Wars. As the dreaded EggStar is about to be destroyed by the heroic Luke Shellwalker, the commander of the rebel alliance sips a gin martini in a smoky bar on the command ship. He lights a cigar as he looks out the window at the final fate of the EggStar...and the band plays on.
Step 9: Bonus EggSplosion #3
PS: if you liked this Instructable, please vote for me in the Egg-bot challenge.
Participated in the
Egg-Bot Challenge


