

Introduction: Wearable Cyberpunk Gesture Pad


This sexy cyberpunk wristband puts a versatile trackpad on your arm, for the ultimate multi-touch control for your cybernetic augmentations. It's stable, comfortable, easy to assemble, hack-friendly, and looks ridiculously cool.
Under the hood, this is just an Adafruit PS/2 Trackpad in a custom 3D-printed shell. I like this trackpad because it has built-in multitouch, gesture detection, and can return trackpad-style (delta) and tablet-style (absolute) coordinates. Its enclosure is also invitingly flimsy, almost as if Ladyada wanted us to pull out the electronics and put them in a custom enclosure...
The trackpad is PS/2, which is really easy to use with Arduino. This can be used for BeagleBone, RasPi, etc, but you will need a PS/2-to-USB adapter. I won't help you troubleshoot connections and I will make fun of you if you ask.
This project involves 3D-printed parts. If you don't have access to a 3D printer, get in touch with me to buy pre-printed parts and learn how to make cooler friends who have 3D printers.
Most importantly, this project is complete. I will not add any features or improve the design. I will fix bugs if you find them, or clarify things in the instructions if you tell me, but that's it! You're welcome to fork the design, but read The Serious Part first.
The Serious Part: The 3D model is my [Zack Freedman's] property, released under Creative Commons Attribution-NonCommercial-ShareAlike 4.0. You can remix, redistribute, and share the model, as well as its derivatives like the pre-processed STL files, as long as you include my full name (Zack Freedman) and license it under Creative Commons Attribution-NonCommercial-ShareAlike 4.0.
You are not permitted to sell this model or stuff produced with this model (because I'm selling prints of the model!) If you make a substantial improvement to it, get in touch and I will give you a nontransferable commercial license so you can sell it. If you think you can run off prints and sell them, I will hunt you down and serve you a rather impressive-looking legal document.
Step 1: Equip Yourself!

Materials list:
- 1x set of 3D-printed parts (next step)
- 1x Adafruit Capacitive Trackpad
- 1x iKen Watch Buckle Strap
- 1x iKen Watch Sizing Strap
- 2x 1" 2-56 machine screws
- 4x 3/4" 2-56 machine screws
- 12x 2-56 hex nuts
Tools list:
- Flathead, Philips-head, and optionally sonic screwdrivers
- Small pliers or small hex socket driver set
- 3D printer and filament (or some Bitcoin/PayPal)
- Optional: Heat gun
You can buy a bag of screws and a bag of nuts from RadioShack, which will give you lots of little screws for lots of projects. The iKen bands are great for wrist-mounted wearables, and their 50mil sizing is really easy to model around.
Step 2: Print the Enclosure

Download the attached STL files, slice 'em up, and print 'em out. If you don't have a printer, contact me and I'll sell you a set of parts.
I recommend 0.2mm layer height, 8% infill, support material, rafted. The raft will ruin the texture, so if you have a heated chamber/bed, use it instead to prevent curling and warping. Increase the infill to 15% if you want a weightier, more substantial gesture pad. Be sure to lay the components flat against the build plate before slicing to save on support material.
This model will print fine with ABS or PLA. I printed with PLA, but ABS is probably smarter because it's more stable when wet and sticks harder to a heated bed.
I also attached the SketchUp file for your hacking pleasure..


Step 3: Prepare for Construction


Gut the trackpad, throw the enclosure on the floor, and stamp on it many, many times. Throw out the pieces of the enclosure.
Thread a nutall the way down each screw, for aesthetics.
Finish the piecesby removing support material and sags. Be extra-careful to thoroughly clear out the slots in the baseplate so the bands will smoothly slide in.
Slide the bands into the slots on the baseplate. The sizing band (the one without the buckle) goes into the slot on the notch side of the baseplate.
Optional: Apply heatshrink to the cable. I didn't do this, but I probably should have. Cut the wires where they're soldered into the button board, slide a 1" piece of ~3/16" heatshrink down, strip the wires, and solder them back in place. If you forgot to write the wires down, they're yellow, green, white, red when you're looking at the button side of the board with the ribbon cable facing up. Shrink the heatshrink before you place the board in the frame!
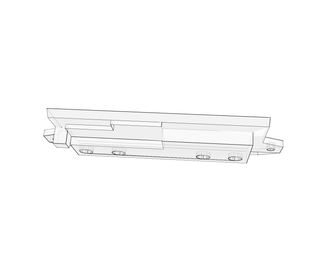
Place the trackpad electronics into the frame. You'll notice that mine is missing its ribbon cable because I didn't lock my workshop and the cleaner decided to throw it out. Learn from my mistakes.
Route the wires and cable as shown in the pic. Push the cable deep into the slots or the various plates won't sit flush.
Step 4: Bolt on the Baseplate


ATTACH THE BASEPLATE BEFORE ADDING THE BUTTON PLATES! The button retainer plate is designed to sit on top of the baseplate.
Insert the 3/4" screws into the four holes on top.
Flip it over and add the baseplate. The notch fits around the button enclosure. The baseplate should sit flush - if it doesn't, adjust the ribbon cable, PS/2 cable, or PCB's, or trim off any remaining bits of support material. Don't force it - I designed the model with generous tolerances, and it will fit flush.
Add nuts to the screws and tighten.
Step 5: Attach the Button Plates


Add the button retainer plate. You will need to lift up the sizing strap, push the plate in at kind of a weird angle, and swivel it into place.
Flip the model over, add the buttons plate, and push the 1" screws through. Test that the buttons click smoothly. If they don't, take off the buttons plate and add a dab of hot glue to the bottom of each button. The buttons should sit flush against the microswitches and have a hair trigger.
Flip the model over, add nuts, and tighten the screws. Your wearable gesture pad is now complete.
Step 6: Be a Bad-Ass Cyborg


Buckle up and wear the gesture pad like a watch - a cyberpunk open-source time-free project-controlling watch. Connect it to your wearable project for a discreet, versatile, and sexy input device.
Some project suggestions, perhaps?
- Implement gesture recognition Palm Graffiti style, to turn quick swipes into keystrokes or actions.
- Control a RC vehicle - for a copter, use the XY axes to move parallel to the ground and use multitouch scrolling to climb and descend. For a car, use the X axis for steering and the Y axis for throttle.
- Use it as a trackpad in a PowerPoint presentation if you don't like walking around very much... or are wearing the presentation computer!
- Combine it with my Point Shooter gesture mouse for a complete wearable control system.
- Control a synth, sequencer, or drum machineso you can strut across the stage with your guitarist
Whatever you do, be sure to let me know! Cyberpunx's not dead!

Participated in the
Gadget Hacking and Accessories Contest

Participated in the
Green Electronics Challenge

Participated in the
Sensors Contest


