

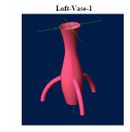
Introduction: 3D CAD Tutorial - Loft Feature - #1 - Loft-Tube-1


In this Tutorial, you will gain additional 3D CAD experience with Alibre Design, by using the Loft Feature to create a Lofted Tube.
If you would like to try this and don't yet have a copy of Alibre Design, you can get the Alibre Design Trial , or Alibre Design Express . Text Only versions of these tutorials are on my Alibre Design Tutorials Site .
In the next step, you will have a pdf file - open this to do the tutorial.
You will start out by being shown Launcing of Alibre Design, selecting Work Offline, opening and Maximizing the size of a New Part workspace, and setting up some Properties for elements of the work space, and also Options - including Grid selections, Color Scheme, and standard defaults.
I then show you creating a series of 3 sketches, each on a different plane (2 new ones created), Loft them, adding the Neck using Extrude, and Revolve Cut to show Simplified Threads, and hollow out the Neck. Finally adding simple colors and reflective properties, and saving the file.
Continue on to the next step for the Tutorial!
Step 1: 3D CAD Tutorial - Loft Feature - #1 - Loft-Tube-1 - Instructions
Follow the content in the pdf below for the complete Tutorial on this Lofted Tube Model.
Elements covered in the sketch include:
- Activate Sketch, Two Corner Rectangle, Symetric Constraint
- Select, Undo, & Redo, Dimensioning, Project to Sketch
- Circle, Referencing the Origin to constrain the Radius
- Linear Repeat - Objects, Path & Direction
- Move, Snap to Line-End
Elements covered in the Loft Feature Include:
- Selecting Sketchs (Cross Sections) to Loft
- Selecting Type of Surface Control (Tangent or Take-Off)
- Setting Depth values
- Draft Angles
- Feature Labeling
- Editing & Completing the Loft
Elements covered in the Extrude Feature Include:
- Sketch Selection
- Type (Depth) and Depth (Value)
Elements covered in the Revolve Cut Feature Include:
- Sketch, Angle, Axis selection, and Labeling.
Also covered is the creation of and inserting of New Planes, selecting Offset Values for Distance, Using the Mouse to control View.
Proceed on to the PDF file for the complete details and instructions.
Attachments

Step 2: 3D CAD Tutorial - Loft #1 - Completion - Feedback
Congratulations!
Please feel free to [mailto:alibre_rob@hotmail.com?subject=Instructables_Loft-Tube_Completed! send me an email] letting me know you completed this Tutorial.

![Tim's Mechanical Spider Leg [LU9685-20CU]](https://content.instructables.com/FFB/5R4I/LVKZ6G6R/FFB5R4ILVKZ6G6R.png?auto=webp&crop=1.2%3A1&frame=1&width=306)


