

Introduction: Acid-Etched Glass


Acid etching is a fantastic way to make beautiful, long lasting gifts. I used it to create two sets of custom anniversary wine glasses for under $10. Armour Etch cream is available at most craft stores or on Amazon for about $20 in a standalone bottle.
Be warned! Armour Etch is a very potent acid and can cause nasty chemical burns. Make sure to read each step thoroughly before starting!
Materials:
- Armour Etch Glass Engraving cream
- Glass Cleaner
- Paper Towels
- Gloves
- Large Basin
- Sink
- Newspaper
- X-acto knife
- Masking Tape
- Popsicle Sticks
Step 1: Make a Stencil


To use Armour Etch, you'll need to make a stencil either by hand or with a machine.
If you're creating a stencil with a machine, Inkscape is a great program for creating .svg files to cut out. For my file, I converted text to a path and used SCaL to cut the vinyl. When making an image, keep in mind the negative is what's going to be peeled, and having lots of small pieces will be a pain to handle.
To make a stencil by hand, use an X-Acto knife and adhesive-backed vinyl to carefully trace the negative of your image.
Once you have your stencil, remove the positive image. In my case, the positive would be the black lettering. Transfer tape isn't absolutely necessary, but is useful for alignment and preventing an image from getting warped.
Step 2: Prep the Workspace

Before any acid comes out of the bottle, ensure that the entire workspace that's going to be used is covered in newspaper and clear of debris. Make sure engraving is in a well-ventilated area and has a source of flowing water close by. Gloves are a must, and chemical goggles or some other form of eye protection is recommended.
Step 3: Clean the Glass and Apply Stencils


First, use glass cleaner to remove oils and fingerprints from the area. This will increase the effectiveness of the engraving cream.
If the engraving surface is flat, simply apply the stencil evenly, and remove the transfer tape. Add masking tape around the edges to ensure only desired areas get engraved.
If the engraving surface is curved, such as the wine glasses pictured, ensure that the vinyl makes contact with the center of the desired area first, then smooth it down starting at the center moving outward. The vinyl will inevitably crease. Remove the transfer tape carefully Find points in your image where an overlap would be unnoticeable, and slide the X-acto knife from the outside of the stencil to where the image has a gap. This takes a bit of practice to get right, and having duplicate stencils is always recommended. After finishing this process, let the stencil "settle" for a minute or two to see if any more bubbles appear, and take care of those in the same fashion. Afterward, add masking tape around the edge to cover any new gaps.
Step 4: Apply Etching Cream

Next, make sure your engraving surface is relatively stable, horizontal and won't roll. The cream is relatively viscous but will drip during the time it's left to engrave, so be mindful of the areas it may drip to. For the wine glasses pictured, bunched up paper towels and newspaper served to prevent motion.
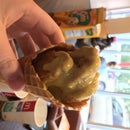
Make sure all PPE is in place before opening the cream. Chemical burns are no joke! Any skin contact should be put under running water. Using the popsicle sticks, apply a consistent coat of cream to all the exposed areas of glass. A small amount of cream goes a long way, as long as every area is covered. Allow the engraving to settle for ten minutes, then dunk the surface into a basin of water. Using gloved hands, remove as much white residue as possible, then use running water to remove the rest of the cream. The engraving will look very faint, this is normal.
Step 5: Clean Up

Once your surface has been rinsed, remove the masking tape and stencil, and rinse again to remove any residue. Congratulations! Once the glass is dry, the engraving will show up much clearer.
DO NOT dump the rinse basin directly down the drain or outside! Using a sink, add water to the bin and let it slowly spill over the edge. Other methods of dilution can be substituted, but don't forgo caution for convenience!

Participated in the
Makerspace Contest 2017


