

Introduction: Alternative Christmas Tree 2013


Continuing our family tradition here is the alternative Christmas tree for 2013. This year as all years everyone in the family comes up with the designs and we sort through them until we come to some conclusion of who had the best idea. Then we all work on that one design to make it even better. Also, with some minor exceptions, we try to free source the main parts of the tree. This year with the exception of the knitted throw we had everything.
Step 1: Materals & Tools


To make this years tree you will need:
-A knitted throw
-Christmas tree stand
-Long thin strips of hardwood (one should be able to get these for free from a wood shop, these scraps are usually floating around)
-8 foot 4 x 4 or 2 x 4, to use as the center mast
-Various size drywall screws
& these tools
-Tape measure (not totally necessary, but helpful)
-Drill with drillbits and screw tip
-Saw electric or hand
Although there may seem like a lot of instructions, this is a pretty straightforward simple to do tree, that is very freeform so there really is no wrong.
Step 2: Creating Your Base


Start by building your Stand/Armature. Your knitted throw determines the size of your Stand/Armature. First stretch your Throw lengthwise (not as tight as it will go but close) and measure. This is the length of your 3 vertical strips of hardwood. Second stretch your throw widthwise at the bottom (again not as tight as it will go but close) and measure. divide this number in half. That is the length of your 2 horizontal bottom strips of hardwood.
Cut these five pieces to start. I use random scratch my shop around 1" x 1", but the size is not really important as long as they're strong enough.
Take your three vertical strips and drive a screw through all three of them at the top (do not make it to tight as you will splay them out from that point). Place your 4 x 4 and your Christmas tree stand and plumb it up. Set your three vertical pieces that you get screwed apart on top of your 4 x 4 so that the center piece is coming from off the front of the 4" x 4" and each of the other two pieces are coming off of each side. Then screw your two pieces to the bottoms between those three pieces. I predrilled as to not split the wood. This may require you to slide the vertical pieces up-and-down to get the correct display at the bottom.
once you have these pieces attached i drove a screw at the top, and then cut appropriately sized horizontal pieces across the back of my strips to keep them from wiggling around and to stiffen up the body of the amateur.
To look down at this from above it would look like a triangle protruding away from the 4 x 4 on three sides, and flush with the back of the 4” x 4"
Step 3: Attaching the Fabric and the Lights


Start by attaching the fabric at the very top and then align it straight down the center and attach it again at the very bottom stretching it to its proper tention (we used a standard staple gun). Then work your way down from the top on each side, only go so far on each side as to not pull the center from one direction or the other. Get proper tension all the way down by pulling down and out as you attach it.
It was attached we ran our lights from the back and pushed them through the weaving so one would not see the wires and only the lights. BE SURE TO USE LIGHTS THAT DO NOT GET HOT!
Step 4: Finish

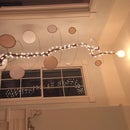
We decided to only to add a few ornaments to our tree after we were done, but of course all of that is up to you. Good luck, & I hope you enjoyed it, and have fun making whatever Christmas tree you decide to make this year.
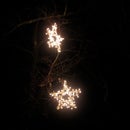
Here are a few of the other trees we've made.
https://www.instructables.com/id/Alternative-Christmas-Tree/
https://www.instructables.com/id/Alternative-Christmas-Tree-2011/
https://www.instructables.com/id/Alternative-Christmas-Tree-2012/

Participated in the
Holiday Contest


