

Introduction: Batman Costume


Nothing is cooler than having your very own Batman costume. I decided it was high time for me to make one. Unfortunately, I made this costume before the thought hit me to make an intructible on it. So it won't be as detailed as I would normally like.
Please vote for me for the Halloween Costume Contest.
Step 1: Materials
EVA foam - I used about 5-6 tiles. There is a good website that has these cheap and they do free shipping. Rubber Flooring Inc
Plasti-Dip Spray
Matte Black Spray paint
Heat Knife
Dremel Tool
Sand Paper
Velcro Strips (non adhesive)
Glue (I used these two brands with similar results: Allen's Super Fabric adhesive & Loctite Flexible Adhesive
Small - Medium sized clamps
Black Concrete gloves
Plastic Resin
Black Zentai Suit (headless)
Boots - (I got mine here)
Black Fabric for cape
An amazing wife (this came in really handy for me)
Step 2: Research


My favorite suit is the one from Batman Begins. So I spent some time researching different pictures to give me a good sense of what I would be building.
Step 3: Templates
This is a very important step in the process. After gathering my source materials I needed a template to cut out of foam. I have a friend who is very skilled with Adobe Illustrator. We used the source material to then draw the templates over the top of the pictures. This worked for the chest and abs, however, the ribs, arms and legs were difficult to do this way. So I scoured the internet and found some templates that others had made. That can be found here.
In order to make sure these fit me accurately, we measured by body and then made the adjustments on Illustrator. Then, we cut out paper patterns to see if they were indeed the right size for my body. We learned in most cases that they weren't and needed to make a few more adjustments. I am 6'0" and of somewhat slender build. The documents attached fit me specifically.
Keep in mind that you will be cutting out of foam and will need to factor this into the process. This is especially true of the cuffs.


Step 4: Cut Out Shapes

I wish I had more pictures of this process. This is where the heat knife comes in really handy. When cutting the foam, precision is very important. While you can use scissors, I had much more success with the heat knife.
The pieces shown in the picture show a couple of the things that I needed to do. The brown foam is craft foam and worked well for the batman symbol. You can also see that I had to do some extra stuff to make the chest piece give me some extra pectoral power. I had to fold and form the form to fit to my chest and add extra bulk. I used what I learned in this instructable to do that.
The leg/thigh pieces were a bit more complicated. Once cut out, the designs need to be cut into them. I used a cutting wheel on my dremel to cut about 1/8" into the foam. This has to be done before the shaping as it will look much better. This process was done on the ribs, legs, and cuffs.
Step 5: Carve Foam

This is where some artistic ability is required. Beyond cutting lines into the foam, there are several pieces (especially the abs) that need to be shaped in order improve overall look and believe-ability. Again I used my dremel for this. Take it slowly as the dremel can quickly dig into the foam and really mess up your piece. Seriously... very frustrating.
On the obliques I shaved down the front and back of the foam. You can only see the front carving in the pictures. I did this so it could be form fitting without big ridges. The biceps had to be smoothed down around the edges for the same reason.
I also did a neck piece later on. This was done without any template and totally free hand. Sorry I don't have a template for you. I carved the foam after heating it to make it look like the muscles of the neck.
Step 6: Spray Coat of Plasi-dip

If you spray the EVA foam directly with spray paint, the paint will crack and look bad fairly quickly. Plasti-Dip prevents this from happening. Make sure to get a solid coat of Plasti-Dip sprayed onto each of pieces of armor. It doesn't need to be on the back of the armor. Let this dry fully as outlined on the spray can.
Step 7: Heat Fit Foam to Body


Again, I don't have any pictures of this process. It is kind of hands on (literally). Also, the pictures here are shown a year after completing the project. I just wanted to show what they look like after they are formed.
To heat fit the foam, I heated my oven to 300 degrees. I then placed the piece of foam to be formed into the oven from anywhere from a minute to 2 minutes. Watch it carefully. Too long and the foam begins to shrink. I had to make a few pieces again because they shrunk. When they are ready, they are quite flexible.
Take the foam out and then hold it into place of where it belongs. I had my wife help me with this because with several pieces needed more than just my hands. Hold them there for a minimum of a minute, until they have cooled enough to keep it's form.
A heat gun can be used to make any corrections.
Step 8: Spray Paint

It is important to get matte black spray paint. Batman's costume isn't shiny.
Now spray all the pieces with a black coat. I did about 3 coats for each part. This takes some time with the bigger, curved pieces (legs and arms).
Step 9: Foam to Zentai

This was the biggest challenge of the project. I got on many different costuming websites to see what others had done to attach foam to the fabric. Many people were saying to glue it directly to the suit, though there wasn't a lot of agreement on which type of glue was best. As Halloween approached I got more and more worried that I wasn't going to be able to make this project work. I tried the glue approach. As can be seen in the picture, it didn't really work. The setting time for most fabric glues is at least an hour, usually more like 4. In order to really have the pieces glued in the right place, I would need to be wearing it and waiting. I tried it with my chest piece. Strapped it on with belts to keep it tight. Watched a movie... and it stuck... to me. I even had two layers of shirts under it and it went through it all. Then, when I went to take the suit off, the foam started peeling off.
Back to the drawing board I went. Next was velcro. I tried double sided sticky velcro... it didn't really stick. This is where the tough decisions came. The only other option I had would take a lot more time to make work, but it WOULD work. It required an amazing wife. We decided to sew each little piece of velcro to the suit and glue the opposing piece to the foam.
Step 10: Velcro Madness


This process took many hours. My wife and I were up very late many nights in a row to make sure this was done by Halloween. We finished 2 days before.
The first step is to cut the strips of velcro to sizes that will fit for each piece of armor. I suggest at least 2 pieces for each armor part, sometimes more. Then, sand down the back of the foam where the velcro will be glued. This is really important. I didn't do that on a few spots and the velcro comes off with minimal effort. You have to sand through the plastic coating. Then wipe it down so you have a clean surface. Next, put glue on the foam and the velcro and let sit for at least 30 sec. to get a little tacky. Then put them together. I left the pieces together for this. Clamp the velcro and the foam. I used cardboard as a buffer to not dent the foam. Let sit the appropriate amount of hours. After this is secure, you are ready for the next step.
I drew chalk onto the back of the velcro and then placed the armor in the correct location while wearing the suit. This will mark the spot the opposing piece of velcro needs to be sewn on. This is also why the adhesive velcro won't work... it just gums up the sewing machine.
I had to do this step by step, especially with the chest and abs and ribs. I started with the chest and worked down to make sure each piece worked together. The velcro does give a little flexiblity in the placement, but not much. Placement is really important to make this look good. Make sure there is good placement before sewing.
In all, we ended up having somewhere between 80 & 100 individual pieces of velcro sewn to the suit... Again, amazing wife!
Step 11: Cape


I am no professional here, but I just made up this pattern. It was a slow process of adjustments and checking to see how it looked. When I finally got the right shape (with some help from my amazing wife) we sewed up the hems to keep it from fraying. Then, I made some foam caps to attach the cape to the suit. I put velcro on each of these as well. It goes on great!
Step 12: Gloves and Cuffs

These were fun to make, but took a little more effort than just cutting and gluing.
Hot glue the spikes into place in the cuffs. Hot glue works really well for this.
The thing to keep in mind with these is that you have to be able to get them on and off. However, you don't want them to slip off while wearing them. That means the wrist portion needs to be smaller than the fist, which also makes in more difficult to get the fist through the opening. My answer? Elastic. This gave me a little more flex. I used the fabric glue for this ad it worked ok, but then I reinforced it with superglue. The superglue worked really well.
The spikes, being made out of foam, were rather soft and flexible and not Batmanish. Therefore, they needed some reinforcements as well. This is where the liquid resin came in. I mixed up a batch as described in the packaging and applied two coats to the spikes (make sure they have already been hot glued into the cuff first). This gave them a ton more strength. Granted, they are no metal spikes and will break. (One of mine did when a friend of mine who had dressed as Bane decided to come attack me. Instinctively raising my arm to block his attack yielded the spike break)
I sprayed my cuffs and spikes with a glossy black as they are supposed to be metal. I liked the way they turned out.
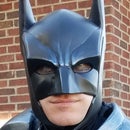
Step 13: Cowl

I did a full instructable for this step. Please visit that instructable for instructions on how to make it.
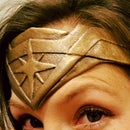
Step 14: Make-up

Easy step, but important. Everyone knows that Batman's eyes are shrouded in black. This really takes the cowl to the next step. Just get some black face paint and make sure you get the areas that skin show.
Step 15: Put It on and Look Awesome!


It is so much fun to wear this costume. People really start geeking out. Especially kids. The first picture was a charity event that I attended for Intermountain Healing Hearts foundation. There were loads of kids with health problems that were just over the moon to meet Batman in person. This totally made the many hours of work worth it.
I hope you enjoy this "ible.

Runner Up in the
Halloween Costume Contest

Participated in the
Wear It! Contest


