

Introduction: Black & Decker Mower Wheel Repair


I'm not sure how old my Black & Decker CM600 Cordless mower is, but it was old enough that when I went online to look for the part I needed, it was obsolete. I wanted to keep the mower working because I had just replaced the battery earlier in the season and I wasn't going to let a little wheel problem make me purchase a brand new mower. So, time to break out some tools and create a DIY fix.
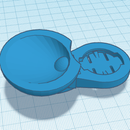
The original part that broke, was a piece of plastic that covered the right rear wheel arm and provided a bushing for the wheel (over a steel axle).
In the two pictures (with the wheel removed), you can see how the bushing was supposed to work. The bushing was molded to the part of that assembly that's closest to the mower deck. And the retaining ring would have been pushed up close to the wheel hub over the bushing to hold the wheel on. The second picture shows the metal axle that's under the bushing (it was taken after I drilled and tapped the hole in the end).
Step 1: Parts and Tools

With the bushing section broken, the retaining ring would no longer hold the wheel on, so my idea is to drill and tap a hole in the end of the axle and use a screw and washers to hold the wheel on. The next few sections assume that you're already familiar with the use of all the tools listed.
Tools:
- Power drill
- 5/32" drill bit
- 10-32 NF tap
- Hack saw
- Screw driver
- Center punch
- Hammer
Parts:
- Flat washer #10
- Lock washer
- 3/8" 10-32 NF Screw
Step 2: Drill and Tap the Hole


First you'll need to drill a hole in the end of the axle. I used the center punch to make sure that I started the drilling accurately. Then I drilled the hole to a depth of ~1/2" (being careful to keep it as straight as possible). Then I tapped the hole to create the 10-32 NF threads inside.
Step 3: Cut the Bushing to Size

Next you'll need to cut the piece of bushing that broke away, to be flush with the wheel. This will allow the wheel so spin freely when the washers are secured. I slipped the bushing into the wheel and marked it on the broken end, that way I had a good section to use as the bushing in the wheel hub for my DIY fix.
Step 4: Install the Wheel


Now that the bushing is cut to size, it can be placed over the axle. Then slide the wheel over the bushing and axle and use two of the #10 flat washers (they were a little thin to use just one), the #10 internal star lock washer and the 3/8" 10-32 NF screw to secure the wheel to the mower. The drawing shows the basic arrangement of the parts in a cross section.
If you still have your "hub cap", it can be secured back over the hub to keep the axle end covered.
That's it, you're all ready to get the summer mowing done again.


