patio19m.JPG
Build your own brick barbecue! With few skills and tools this is something anyone can do!
This is the fourth brick barbeque I have built. They are fun to build and cook on.
This time I wanted a large firepit with a smoker on the right side.
I went in thinking this was the last one lol
The grilling side is about 45 inches long by 30 inches deep. The smoker is 30' deep, 28 wide 30 tall.

Step 1: Good excuse to build a new BBQ! (pouring the concrete walk)

patio6.JPG
Seeing how we wanted to pour some concrete for a new patio/walk, why not build a new BBQ from brick. Soooo we got to work and included some rebar where the BBQ would go.

Step 2: Concrete walk poured

P1010079.JPG
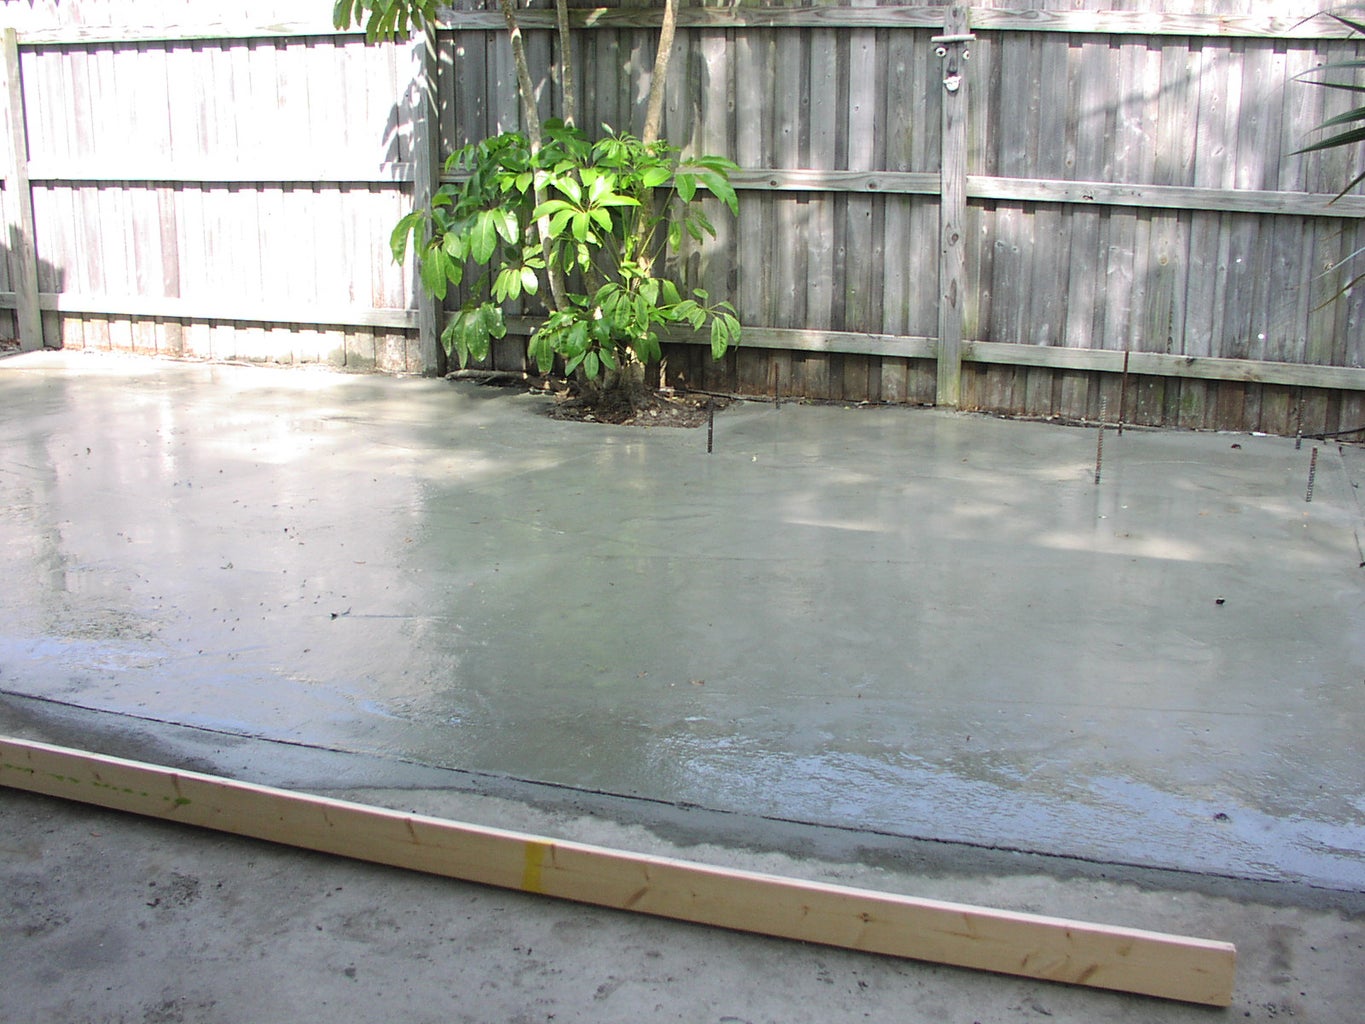
Even though I measured the location of the rebar time and time again, I still got a little nervous lol
Too late now!

Step 3: The next day after the pour

P1010080a.JPG
Showing again the locations of the rebar. I wanted to make sure I had reenforcement in certain areas.

Step 4: First course

patio8.JPG
Using 4" partition block, I set the first course trying to keep things straight, plumb and level as I could.

Step 5: 2nd course

patio9b.JPG
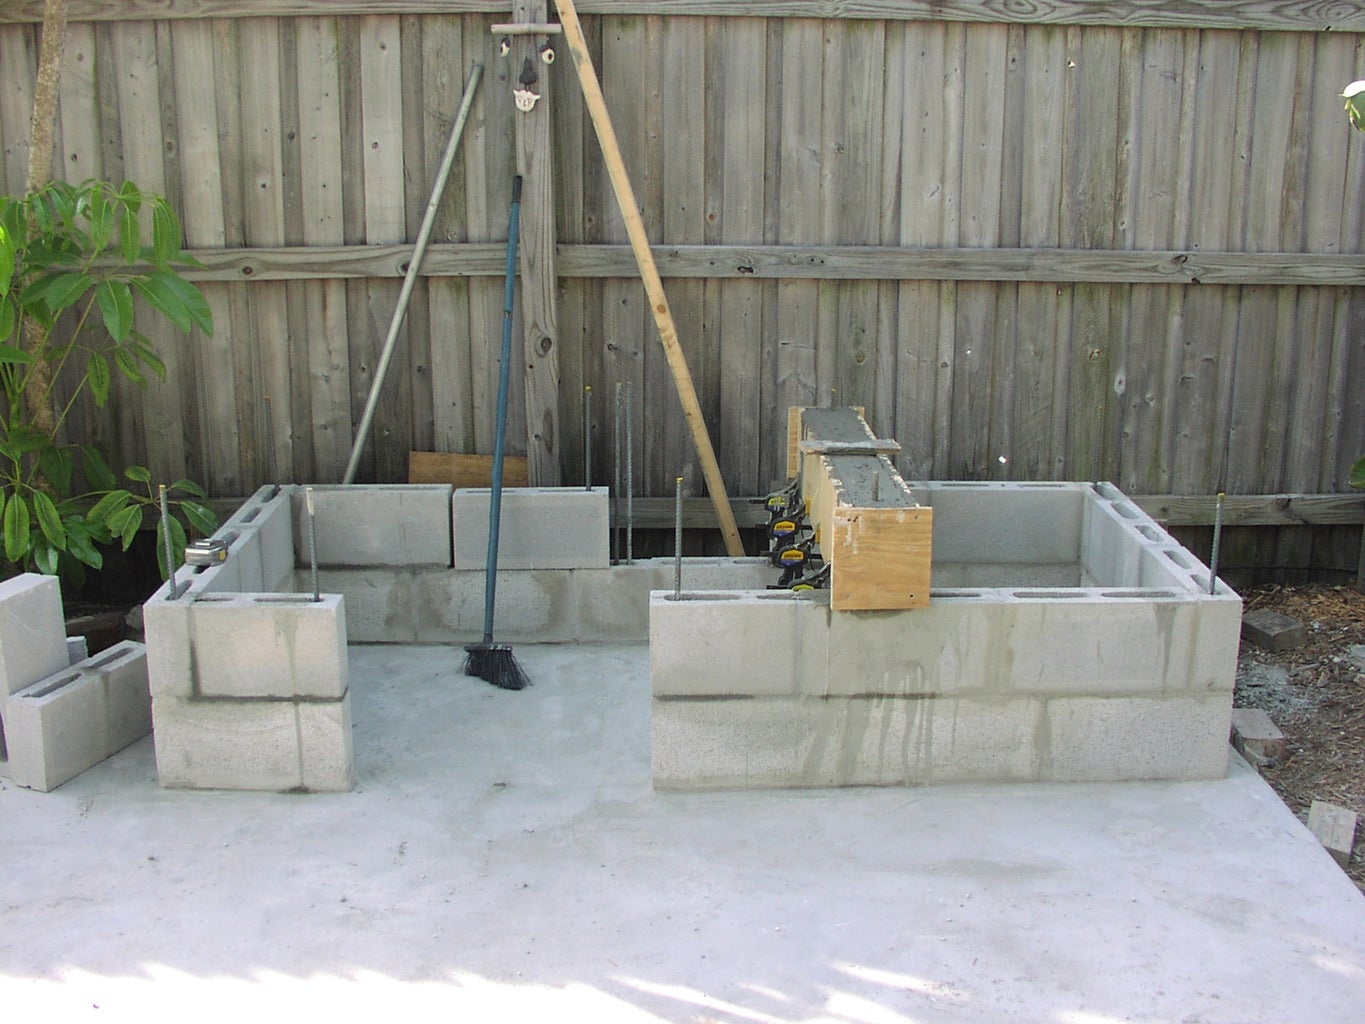
With the 2nd course almost finished and my son wanting to contribute to the project, we made up a form for the lentil. I constructed the lentil with two pieces of 1 1/2" angle that suported and cradled firebrick. We then made the plywood form and hung 1/2" rebar length wise and tied that into the vertical rebar. We then poured it using hydraulic cement until the cavities of the first and second course were filled and the form as well, making sure all the air bubbles were out.

Step 6: 3rd course

patio10a.JPG
The lentel looked like it turned out fine, we ended up with a rock solid structure that included the first and second course of block.
Note: All rebar locations were filled with hydraulic cement every second course.
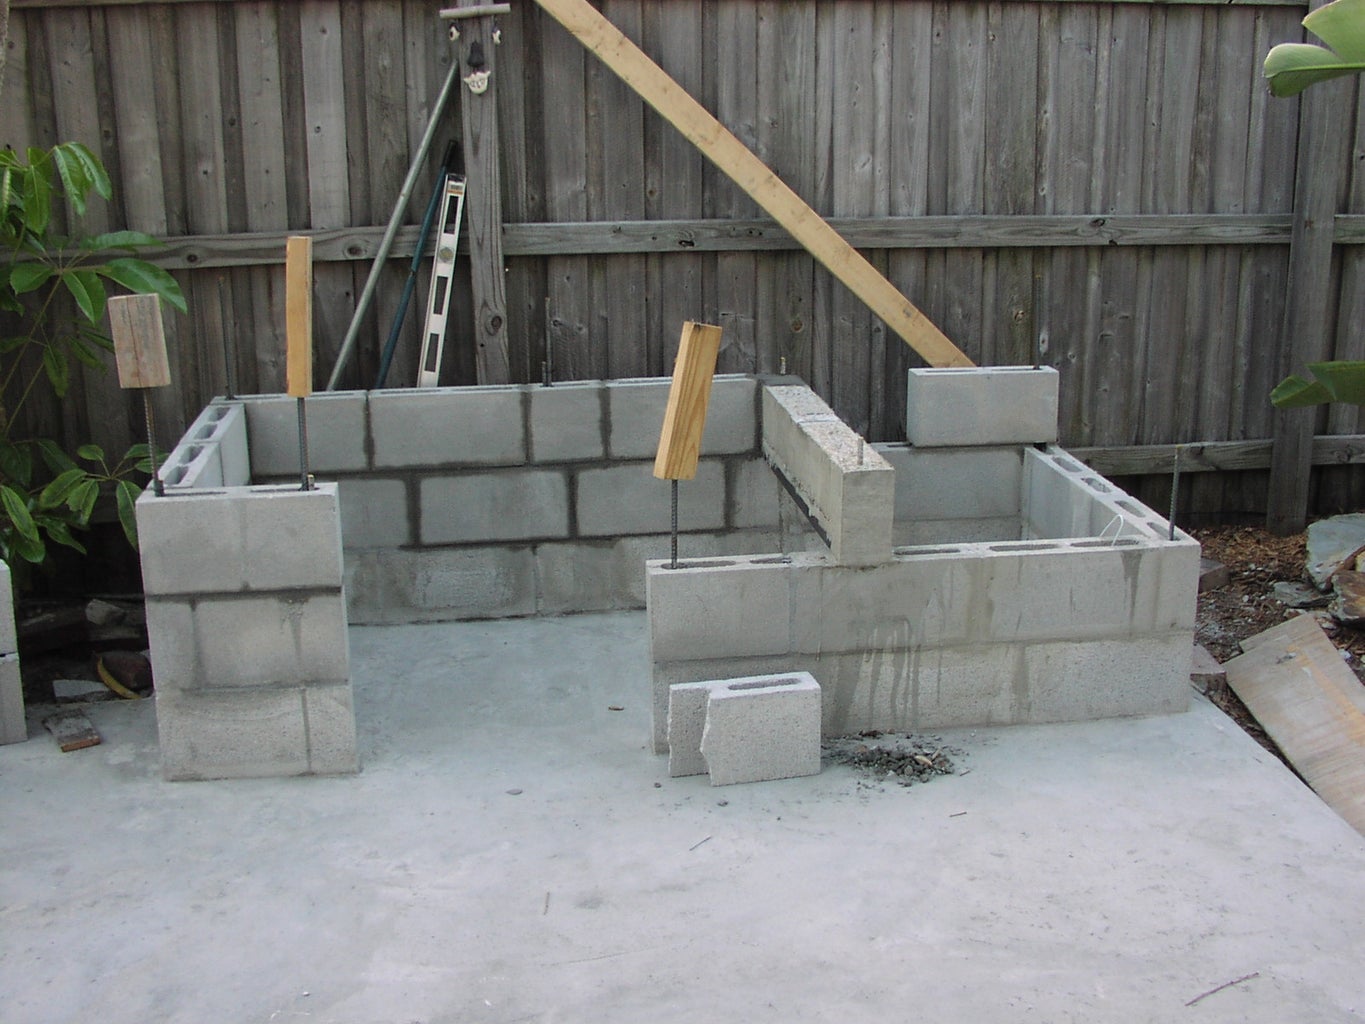
Step 7: 4th course

patio11c.JPG
4th course set for the most part, still trying to keep things straight level and plumb.
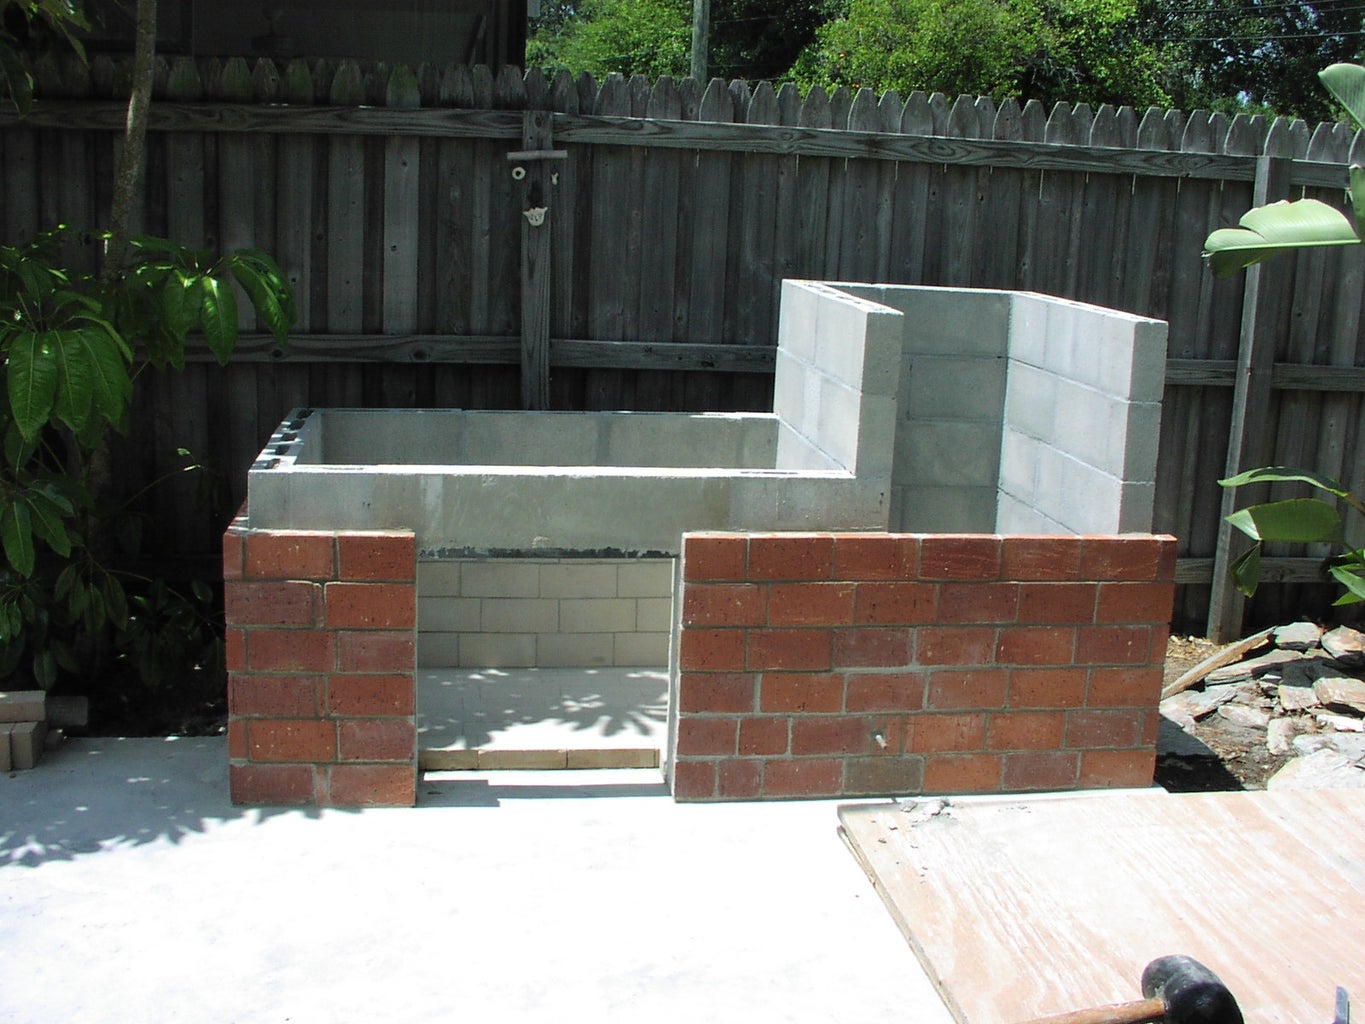
Step 8: Building the smoker

patio12a.JPG
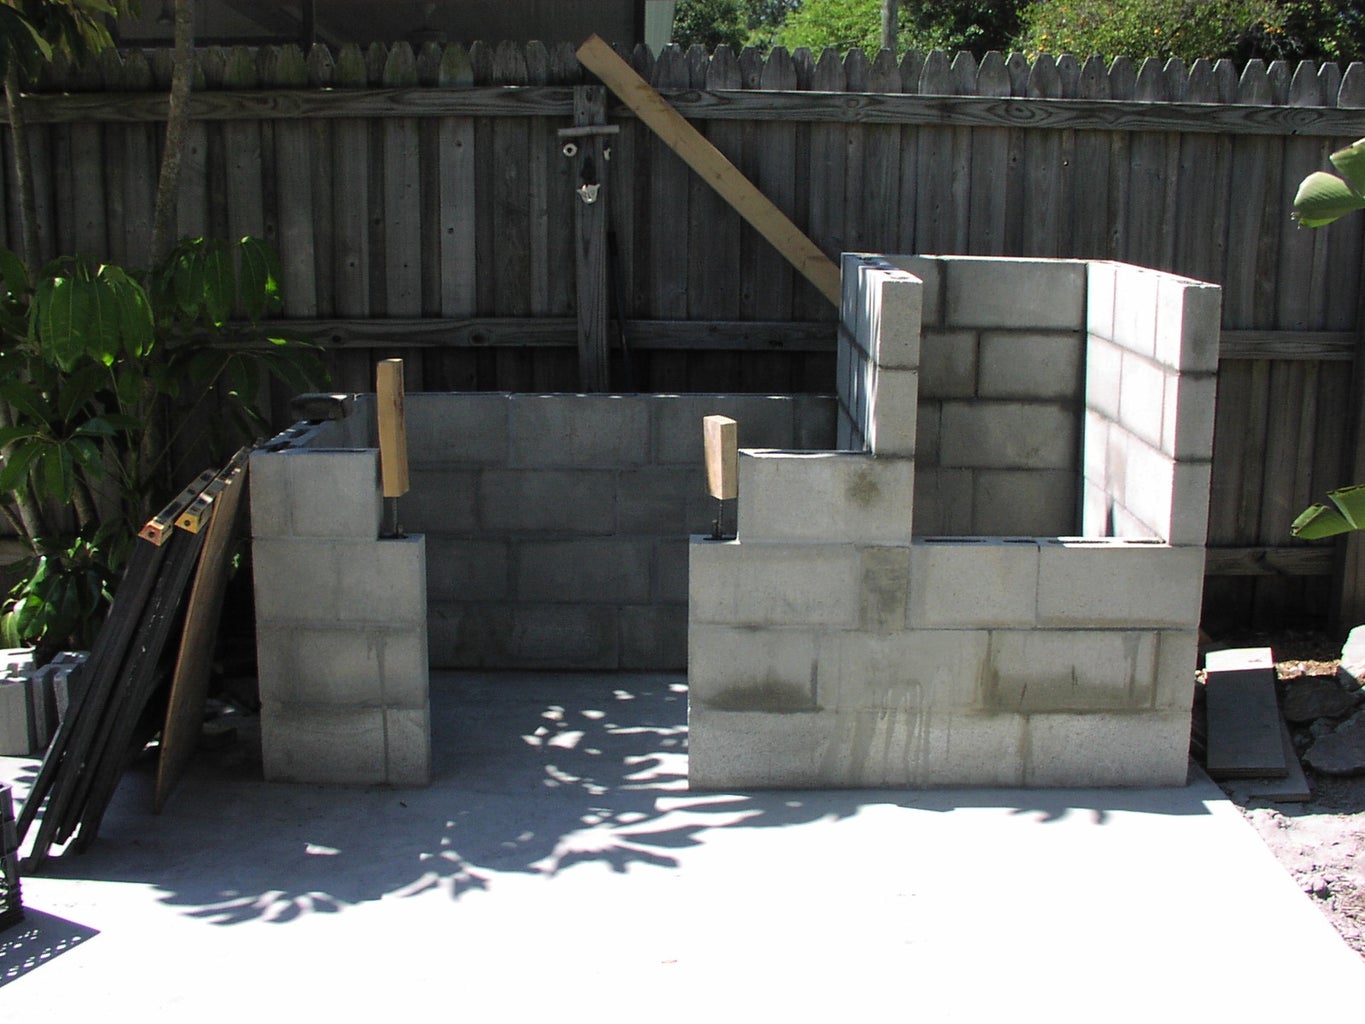
The next 2 course have been set, completing the side for the smoker. Again, every 2 course of block laid, the cavities were poured using hydraulic cement at all the rebar locations. I will wait to install the second lentel until after I have set all the firebrick inside.

Step 9: Firebrick set

patio13c.JPG
I went to my local building supplier and purchased standerd size firebrick and used those for the floor of the firepit. Then I purchased 1 1/4" thick firebrick for the walls of the firepit. Here's a view showing the opening to the smoker. you can also see that I installed a solid 1/2" rod through the block as well. I then welded a solid steel plate to the rod to act as a damper for the opening to the smoker.
Note: I used 3 lbs of FireClay to an 80 lbs bag of premix mortar to set the firebrick. I dry mixed the fireclay and premixed in a mixing tub and then dumped it all in a clean plastic garbage can that had a good fitting lid.

Step 10: Lentil for the opening over the firepit door

patio14.JPG
Same as the other lentel, using to pieces of 1 1/4" angle, firebrick sandwiched between them at the bottom with wire mesh and rebar hung in the form.

Step 11: Laying up the first red brick

patio15a.JPG
Feeling really good this day I managed to lay up a good deal of the red brick I had purchased at my local building supplier.
The days have been rather hot and the old dude is showing his age lol
Not bad for an old fart at this stage of the game lol

Step 12: More brick!

patio16a.JPG
With some more brick, more angle to support the firepit opening and another rather hot day I manage to set a few more brick.

Step 13: Concrete lid

patio17a.JPG
I made a concrete lid 2" thick with an opening for the chimney. I used wire mesh and 1/2" rebar for the renforcement, then with the helps of my son and a friend of his, we installed the lid, mortaring it in place with a slight drain to the back.
Note: I made a wooden box 2 inches deep, tied the wire mesh and rebar together making sure it stayed supported in the center of the form. I then mixed up three 50 lbs bags of hydraulic cement and pour the form. After screeding the form I then covered it with plastic and let cure for 3 days before removing anything.

Step 14: Finshing up the top

patio18a.JPG
patio18b.JPG
Laying more brick getting the top finished

Step 15: Whats concrete without some steel? hmm?

Visiting my local metal supply paid off. They had everything I wanted and more lol
The grill and smoker door I cut to size after making the frames. The top pieces for the grill and the chimney hood were cut to size from the kind folks at my local metal supply. I found someone to bend the chimney hood through my metal suppy as well.

My friend next door had some nice 8" tile just the right color, why not use those to finish the top of the smoker with hmm? Makes a real nice surface to put a plate on :)
I bought my stainless steel spring handles and my weld-on hinges on-line.
Everything else came from the hardware store.

Step 16: Car Jacks and a steel drum?

patio19i.JPG
patio19h.JPG
patio19t.JPG
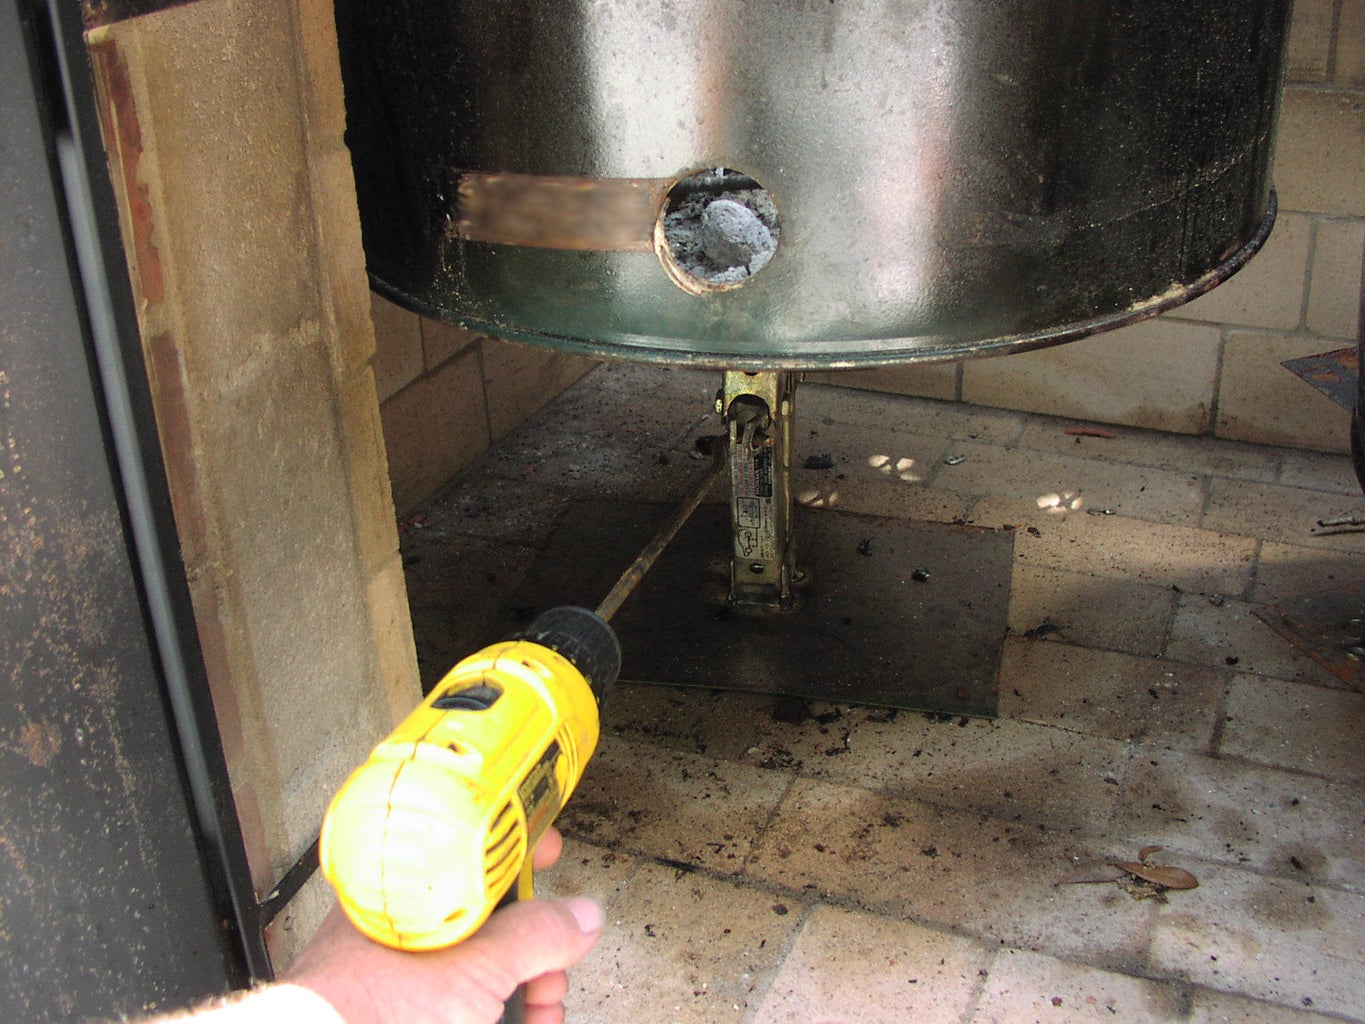
They are cheap lol pleantiful and I get to do a little recycling lol
Two car scissor jacks and one clean used 55 gal drum.
Some flat thin metal welded to the top and bottom of the jacks for more stabilty. The drum cut to size with a sawsall for fire baskets.
I raise and lower my fire baskets as needed. Has been real usefull.

Step 17: Grilling Racks

patio19f.JPG
patio19g.JPG
patio19q.JPG
3/4" square tubing and some expaned metal. 1/8" steel rod for small handles.
I made the top frame to include the hangers for my racks.
I wanted two levels and I wanted them to slide back and fourth as well.
I can have to differant fires going and also have the option at which level.
Knowing that I would want to cook most anything (even hotdogs without having to start a fire) I found a guy online that described how to construct a pipe burner in full detail.
Back to the metal supply I went for some 1 1/4" black pipe lol

Here's a link showing how to make a pipe burner.
http://www.hobartwelders.com/weldtalk/showthread.php?t=28224

Step 18: Smokin'

patio19d.JPG
patio19u.JPG
patio19l.JPG
With a visit to a local use appliance joint, I picked up two racks for free! Little farther down the road to another used joint and got two more racks for 5 bucks lol
I welded them together to make one large rack each. I also had to weld up some small flat metal to make them fit my needs for width.
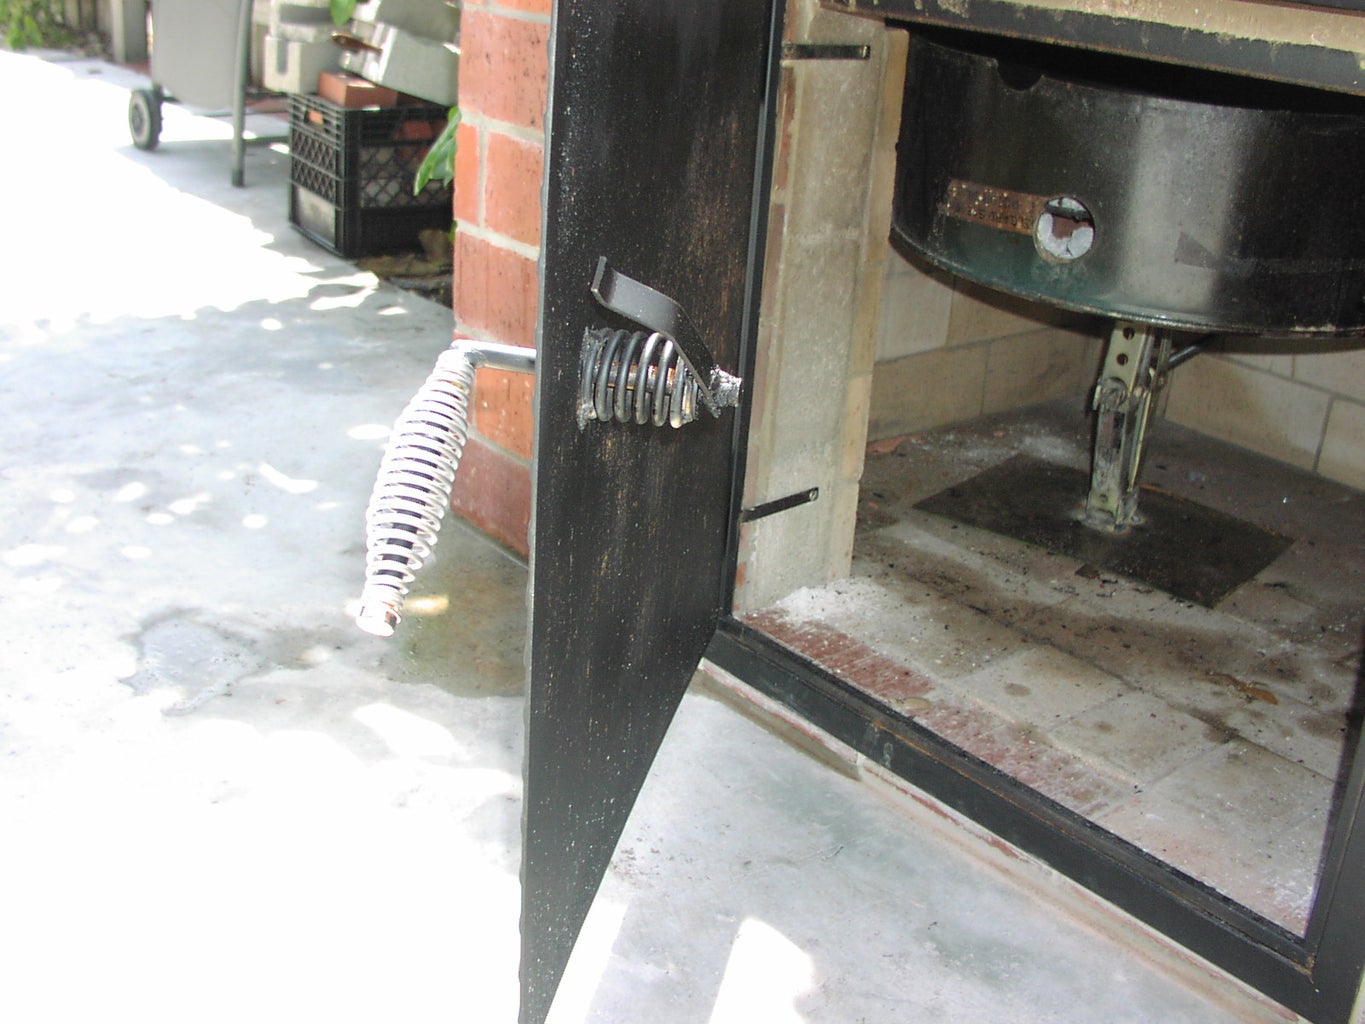
The springs for the handles on the back of smoker and grill doors are from the seat of a riding lawnmower (the riding lawn mower is now a racing mower of sorts lol no use for these springs any longer lol) I used these to keep the tension on the handle to make them operate properly. Some flat steel bent to act as a latch on the inside of the door frame keeps the doors closed rather nice.
Finished off with a nice large easy to read temp gauge.

Step 19: Damper Setup

patio19x.JPG
patio19y.JPG
A photo and some crude drawings to help illustrate how I setup the intake damper.

The exhaust damper is nothing more the a flat piece of steel slid over the chimney to regulate heat flow.

Step 20: Sole's Pit Master Barbeque

patio19m.JPG
patio19n.JPG
patio19p.JPG
Among other names lol
I have kept my fires small so far. Only some light grilling and short test runs with the smoker.
Making sure it dries out slowly.

One cheap Gas Grill on its way out the door lol needs a gas bottle, first come takes it lol

Step 21: Sole's Pit Master Barbecue (Update)

What a great summer of outdoor grilling it has been!
The smoker keeps a nice even temp once warmed up which does not take long!
I have smoked several pork shoulders and ribs, including beef ribs and a brisket and more yard bird then I can remember lol
The fire pit has been awesome as well!
Appetizers like bacon wrapped shrimp to grilled stuffed jalopenos, grilled fruit, veggies, corn, taters, you name it! All turns out great!
I have two nice turkeys to put in the smoker for Thanksgiving. The large one is 17 pounds and the other one is 12 pounds.
Looks like I will be up early!
Mmmmmmhmmmmm I can almost taste it now!
Happy Thanksgiving everyone!

PS  here's some  more photos!
1-40 of 76Next »
jwright44 says: Jun 15, 2013. 3:48 PM
if you were to do it over, would you use a thicker steel barrel? This is awesome! I might just use like a pulley system with steel wire instead of the jacks.
srsnipes2007 says: Jun 6, 2013. 5:50 PM
That's really nice! do you have more pics of the inside?
Yard Sale Dale says: Jun 6, 2013. 12:56 PM
That's deluxe!
carlo$ says: Mar 5, 2013. 1:09 AM
damn! go longhorns
diamondpaul says: Aug 11, 2012. 6:47 AM
This is great ! Thanks for sharing I've been looking for a good design. Just one question. I don't have any suppliers near me . Do you know of a site that sells all the parts ?
rikerz says: Jul 10, 2012. 6:38 PM
Sweet job on the smoker/bbq! You have inspired me to start a smoker project. Is there anything in the firepit area that you would have done differently?
lonleyjew says: Jul 3, 2012. 11:05 AM

@Duval Vol: And...... Balls are "COJONES". Exactly what it takes a man to start and finish such a wonderful project under a 90 degree plus scorching sun. More power to you Solelord, great sharing!
Dubai Vol says: May 16, 2012. 2:32 AM
Lintel. Lentils are beans.
darr64 says: May 13, 2012. 7:18 PM
I think that it is awesome, I'm starting mine in a few weeks. can you tell me why you put bricks in the inside walls and floor? and can you be more specific as to how you build the lentil, I'm sorry but I have never done any mason work, but I am going to try
solelord (author) says: Apr 8, 2012. 11:38 AM
I am happy to say that the smoker has two pork shoulders in it right now. I will grill up some quail and veggie kabobs later.

Happy Easter!

jbwargel says: Aug 1, 2011. 6:27 PM
So there is fire brick on the bottom of the lentels? How are the door frames mounted into the brick?
solelord (author) in reply to jbwargelApr 8, 2012. 11:34 AM
Yes there is fire brick on the bottoms of the lentils. The door frames are bolted in to the block
fire-is-fun says: Aug 8, 2011. 12:49 AM
Looks great!!!!

DO you have any problems when barbequing and smoking at the same time
solelord (author) in reply to fire-is-funApr 8, 2012. 11:32 AM
No problems at all. I have done that many times.
titos1997 says: Nov 10, 2011. 10:02 AM
I was wondering if there was a reason you were using hydraulic cement to fill the voids in the cinder blocks and to make the lentel instead of regular concrete
solelord (author) in reply to titos1997Apr 8, 2012. 11:31 AM
I felt that using hydraulic cement was easier. I could quickly mix the mud and it be loose enough to pour in and fill all the voids.
Brickhandz says: Feb 25, 2012. 4:55 PM
I will say that this is a great idea that could have been improved on slightly.i am a professional mason/bricklayer. The block work could have been installed with rebar to the slab better. I see that the planning was done right to a degree. The rebar that was set in the concrete slab wasn't installed in the right position.
The brickwork was very poorly done. Maybe a certified mason should have been hired to do the work. I guess if it is a home project it wasn't necessary . I can see it would have given you a great deal of grief!(the small slices of brick to keep it level). I don't want the average diy'er to think they can do this with ease.
Cuddles to you for the project overall.

solelord (author) in reply to BrickhandzApr 8, 2012. 11:26 AM
Yes I agree there could have been improvements.
I am a professional shoe repairman. Not a mason/bricklayer.
I am sure the entire job could have been done better. Better construction in all areas(rebar install,the very poor brickwork, the degree of planning).

The entire build was a pleasure, there was no grief at all.
The small slices of brick was to adjust the height, not to keep it level.

hydeluke says: Mar 5, 2012. 4:44 PM
I was just wondering what the outside dimensions are and do the brick on the outside get very hot i'd like to build one of these and the only spot i got to put it might be to close to the fence thanks
solelord (author) in reply to hydelukeApr 8, 2012. 11:09 AM
It measures about 43" deep 93" long and about 36" tall at the grill, 60" at the smoker. It sits about a foot from my fence. The fence doesn't get hot at all.
ckblack007 says: Apr 6, 2012. 11:56 AM
I gotta say that has to be one of the nicest outdoor brick smokers I have ever reviewed online. Thank you for sharing. If I get so lucky, I'd love one of these for myself.
solelord (author) in reply to ckblack007Apr 8, 2012. 11:05 AM
Thank you 007!
dnepomuceno says: Mar 29, 2012. 7:52 PM
cojonc iv been reading your harassing comments for the past few slides and you seriously do not know what the car jack is or that he is using the hand-held drill to raise the car jack???? and on the car jack is a bottom or top 1/3 of the 55 gal drum cut and used to hold the charcoal. he is raising the 1/3 drum piece to move the heat closer to the grill.....think about it dude.
falmund says: Jun 30, 2011. 7:32 PM
All I can say is.....EPIC
kenrober says: Jun 22, 2011. 6:00 PM
How does the fire box get air? Is the a material list with this project?
solelord (author) in reply to kenroberJun 27, 2011. 6:17 PM
Simply prop the grill door open about a 1/2 inch and you have plenty of air to provide enough draft for the smoker.
The list of materials are all much the same for building most mason walls. Brick, block, re-bar and mortar.
I am not a mason by trade. I spent may hours here on the net researching before setting my first block.
ppaavolainen says: Jun 22, 2011. 9:47 AM
Hi!
Looking fab! Have you tried baking in the oven part?
:c)
solelord (author) in reply to ppaavolainenJun 27, 2011. 6:09 PM
I have done a few pizza. That's will need more practice for me and I will keep trying!
madmaxjr says: Sep 12, 2010. 12:39 PM
What are the dimensions of this? and how much brick, cinder-block, and fire bricks did you have to use to make this?
solelord (author) in reply to madmaxjrJun 16, 2011. 5:21 PM
The grilling area is about 48"x 30"
The smoker is about 24"x24"
How many brick, block.... lots!
stuart_horton says: Feb 4, 2010. 11:48 AM
nice pit!!!!
Is their anything that you would do different, if you were to build this pit again?
solelord (author) in reply to stuart_hortonJun 16, 2011. 5:12 PM
Given more funds and a whole lot more skills.... Stainless Everything!!
Labyrinth says: Jul 1, 2010. 3:39 PM
This is an excellent job, you should be very proud of your work. I'm inspired.
solelord (author) in reply to LabyrinthJun 16, 2011. 5:11 PM
Thank you and I wish you luck!
medic2b says: May 10, 2011. 7:15 PM
How long did it take you in total to build it? Also, what do you think it cost you in total? I want to make this a project for me and some family members. This looks awesome.
solelord (author) in reply to medic2bJun 16, 2011. 5:10 PM
It took me about a month working the weekends and after work.
It cost me about 1k in materials and some tools.
captain Jack says: Nov 15, 2010. 3:28 PM
absolutely GORGEOUS!
I'm green with envy, and the meat looks delicious.

but if you use one more 'LOL' in your description, so help me....
2leftthumbs2010 says: Nov 15, 2010. 2:33 PM
wow just like in my minds eye, do I need a pro memebership to get building plans, I really have been thinking about this project and you have built the very closest to what i have been envisioning, allowing grillling, baking, smoking ...awesomely fine pretty work
cojonc says: Aug 6, 2009. 9:37 PM
What is a lentel? Could you explain it's derivation, structure and use please?
kill-a-watt in reply to cojoncDec 25, 2009. 8:03 AM
I think he means lintel

http://images.google.com/images?q=lintel+brick
1-40 of 76Next »
Pro

Get More Out of Instructables

Already have an Account?

close

PDF Downloads
As a Pro member, you will gain access to download any Instructable in the PDF format. You also have the ability to customize your PDF download.

Upgrade to Pro today!