

Introduction: CNC Milling a Pink Himalayan Salt Block


Continuing with the series I've been working on in aluminum, marble, and coal, I decided to create a panel in salt as well. This piece was directly machined on the ShopBot at Pier 9 during my residency there. Because there are already so many resources about ShopBot projects, for this Instructable I will focus primarily on acquiring, processing, and preparing the salt block, as well as the specific tooling and settings that I found were adequate for machining it. Here are a few goodresources if you need more information regarding CAM and toolpathing for a ShopBot CNC router.
WARNING: Salt rapidly accelerates the corrosion of metal tools. Consider dust collection and cleanup procedures carefully before attempting. No matter what, spend adequate time in the cleanup steps of any machining you undertake in a similar project to prevent rust from setting in.
Step 1: Sourcing


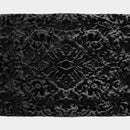
One of the challenges to milling salt is simply finding the right material. After spending a significant portion of two days searching, I finally settled on The Meadow where I was able to buy a 9" x 18" x 2" block. They offer two grades of block, cookware and professional grades. For my needs - mostly based on appearance - I wanted the cookware grade, as it contained more veining and streaks of color than the more uniform professional grade (for maximum durability). Taryn, one of the representatives at The Meadow, was kind enough to photograph a series (see above images) of salt blocks fitting a brief description that I gave her over the phone - mostly translucent, with highest contrast possible in streaks of color. Both Taryn and I agreed that the block in the first image would work best for my project. Be prepared for some hefty shipping costs, though. When you receive your block, you'll understand why - heavy stuff!
Step 2: Bookmatching

My apologies for the lack of documentation of the cutting process here - it required me to pay a visit to a friend's shop and I neglected to bring along tools for capturing the moment.
Bookmatching my block required some careful consideration to avoid destroying it. There was a visible crack running the length and apparent depth of the block and I was concerned that while I was sawing the block it might fracture unexpectedly, potentially ruining the piece and endangering me in the process. To avoid this, I decided to sandwich the block between two pieces of acrylic. This would provide a backing for both sides of the bookmatch, and if the piece were to fracture, at least it would have the backing to support it.
To adhere the acrylic to the block, I first scuffed the surface of the acrylic that would be in contact with the salt with 120 grit sandpaper. I then liberally applied a basic two-part epoxy to the first piece of acrylic, placed the block of salt, applied epoxy to the top of the salt, then clamped the entire assembly up and allowed the epoxy to cure.
To actually perform the cut, I needed to pay close attention to the setup of the bandsaw I was using. I was careful to ensure that the blade was as square to the table as possible, and that the saw's fence had been properly set to the drift of the saw. You can see an in-depth explanation of drift adjustment here. The blade I was using was also quite deep - 1.5" - which helped keep the cut as straight as possible.
Once preparations were complete, sawing was fairly straightforward. I needed to push the material tight to the fence and pay attention to the speed at which I was feeding the block through the saw. Be aware that there will be a great deal of very fine dust. If you haven't got dust collection set up for your bandsaw, I'd recommend rigging up a shop vac and some clamps to catch the bulk of the cloud.
While the cut took only about 2-3 minutes, cleanup took up the better part of an hour, scouring the saw for salt that had been deposited and doing my best to ensure that no traces remained. Clean off as much salt as you can reach manually or with a hand broom. Switch to compressed air only when you can no longer reach the remaining dust.
Step 3: Stock Preparation

Once I had the two halves of my block bookmatched, it was time to glue up what would be the final stock material. Before I could do so, however, it was necessary to clean up the edges of the two halves that would be in contact. There are many ways that you could do this (a tablesaw comes to mind), though I just ran a simple profiling pass on the ShopBot CNC router and produced two clean faces. For reference, these were the values I used:
Salt Profiling
- 1/2" Flat End Mill
- 10,500 RPM
- 0.250" Stepdown
- 0.125" Stepover
- Feed: 60 in./min.
The salt turns to powder almost immediately upon tool contact, so it's very hard to judge the cut by examining chips. You might have luck with other settings, but I found that these produced a very nice finished surface.
Edge gluing the two halves was similar to the acrylic lamination process I described earlier. Clamp your material up and wait for the epoxy to cure completely before proceeding to machining.
Step 4: Roughing

While unusual as a material for milling, the salt required nothing exotic with regard to setup or machining settings. I found the following settings to be effective, though I haven't experimented enough to say that they are optimal. I was very impressed at the degree of finish to the cut - the salt block felt glassy smooth where roughing had occurred. Feel free to base any of your own projects on these settings and let me know what you find in the comments. I'd love to hear of others' results.
Roughing Settings:
- 3/8" Flat End Mill
- 10,500 RPM
- Stepover: 0.100"
- Stepdown: 0.250"
- Feed Rate: 75 in./min.
Step 5: Finishing

As with the roughing pass, I don't know if the settings I ended up using are truly the 'best', but they produced results that satisfied me. In fact, while I had concerns that the salt would chip out excessively, this turned out not to be the case. Feel free to use as a starting point for your own experimentation. As I mentioned, I'm always interested to hear how things could be improved.
Finishing Settings:
- 1/8" Ball End Mill
- 10,500 RPM
- Stepover: 0.03125"
- Feed: 100 in./min.


