

Introduction: Creating Custom 3D Cribbage Boards With a Laser Cutter!


Hey there people!
Today I'm going to try and show you how to make a cribbage board using a Laser Cutter!
At least point you in the right direction to getting started.
* I just recently started making cribbage boards for friends and family this year, and have started to make it into a small business while finishing up college. So I thought I would share my process with you all and hope it inspires you to create something, or try something you've been wanting to. There are lots of ways to accomplish any goal.*
Come and 'like' my Facebook, and have a look at my etsy shop for all my designs! :)
www.etsy.com/shop/MainelyIdeas
First of all, some of you might have seen my previous instructables, the iTorch and WiiTorch(iTorch v2):
raspberryPi based flashlight projectors
https://www.instructables.com/id/iTorch-raspberry-p...
https://www.instructables.com/id/ITorch2-WiiTorch/
If not you should check them out ;)
In order to make use of this instructable you will need the following:
**DESIGN & FABRICATION**
+ Access to a laser cutter ( I pay to use my school's - http://www.ulsinc.com/products/vls460/ )
+ Access to an AutoCad program or a graphic design program that can save in AutoCad .dxf for the laser
+ Sheets of plywood, choose good quality or you might regret it. ( depends on the project / use scrap for testing )
( I typically use birch around 5mm thick )
**ASSEMBLY**
+ Lots & lots of clamps!
+ Wood glue ( I use Gorilla wood glue)
+ Sand paper
+ Felt pads
+ Various colors of wood stain
+ Distilled white vinegar
+ Clean rags
+ Paintbrushes
Step 1: Design


So for my designs I usually use adobe illustrator just because it's so easy and basic, as well as being able to save and export into .dxf/autocad for the Laser.
The first thing you want to do is make sure all your lines and measurements are in inches. Second, make sure the color mode is RGB for the document. And when choosing colors/swatches to use Basic RGB, this makes it easy to export and be read/manipulated by the laser software. All lines including text strokes need to be 0.001 .in. in order to be read by the laser. Depending on the laser and the laser program you use it may not recognize a wide palette of colors. *Get to know your Laser*
The first images here are to illustrate how to set up your cuts, once you have a design in mind you will need to build it layer by layer, thinking of the final product in 5mm slices ( or how ever thick your material is).
In pic#3: Example I show the Lobster Trap cribbage board. It contains 7 layers total, 6 full cuts and a top layer of accents. pic#4 Shows how the layers look all stacked together.
Picture #5: Shows how you can line up holes for an elliptical style path. For each cribbage player there need to be 120 peg holes, with 1 'finish' hole or 121 hole. 2 players = (120 x 2) + 1 , 3 players = (120 x 3) +1. and so on. And most people like to have a starting area, so that's 2-3 holes before the game holes. :)
The remaining photos are the basic illustrator files taken into photoshop and made into preview renders of how they 'could' look when finished. This is done by simply dropping in a wood backdrop and adding some fills and effects.
Step 2: Cutting


Once you have your design down, now it's time to cut!
So what you need to do is get the file ready for the laser. To do that we need to export it as a DXF, which is as easy as selecting file > export. and choosing .dxf from the export menu. Then make sure if to use the setting in the photo if you're using the Universal Laser like I am.
Once the file is saved and exported, you can transfer it over to the Laser Cutter software. Here you can make changes to the POWER and SPEED of the laser. You can choose these settings for each vector line by Color. This is really something you should test and try yourself to find which settings work best for the look you're going for.
You can then download the file onto the Laser for cutting, and place your wood material into the cutting bed.
Basic rules:
+ Slow speed & High Power = Cut
+ Slow speed & Low Power = Etch/Cut
+ High speed & High Power = Engrave
* Always measure distance of laser from material to ensure good cuts and clean engravings* - Tool provided with Laser Cutter - Or automatic measurement thru machine.
*Always make sure vents are open and ventilation fans are on / If you have cooling fans or liquid cooling make sure they are on as well!*
*If you have air-assist (air blower) turn that on as well - this keeps debris away from laser head and prevents flareups/burns*
*Video - Cutting out peg holes for MDI topographic*
Step 3: Assembly


*Needed*
+Clamps
+Wood glue
+Distilled White Vinegar
+ (twine if you want)
+Stain & Brushes & Rags
+Patience & Time
First things first, there's going to be some light charring and sugar deposited onto your recently cut wood pieces. I've found the best way to get rid of this mess is with White Distilled Vinegar and a clean rag. Simply soak the rag in the vinegar and wipe clean with the grain of the wood. Let the vinegar dry out.
Once dry you can begin glueing the layers together. Make sure to cover every exposed area, use your finger if necessary. Don't worry about if it gets in the holes, you can clear them out when it hardens with a small screwdriver or the pegs themselves. Use a nice liberal amount of glue, you can wipe the excess away.
Each layer needs to be glued, set and clamped one at a time otherwise you risk shifting layers. Allow time for each layer to dry.
Make sure when clamped you cover every inch, you can use weights for larger pieces if you have scrap to protect your work. Be very careful all edges line up and peg holes are flush. This can be tricky.
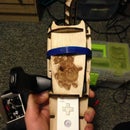
Once all layers are attached and glue has dried, you can start on finishing touches. I like to use a glue wash on the outer edge to help longevity. It also helps when adding a hemp twine border. The twine adds a layer of protection and strength.
I like to start by tying a loop around the bottom as shown in the last photo. Then securing it with a small amount of glue to dry. Once dry you can glue wash the outer border and being wrapping the twine. Once the border is completely and tightly covered in twine give it a nice glue wash/ basically cover it in wood glue and wipe away the excess, and allow to dry.
Step 4: Finishing


For finishing touches all thats left is staining and adding any accessories like peg hatches.
I like to use Cabot wood stains because I can get them tinted to the colors i need, and they mix well with other colors.
I find that staining with a brush is more precise and less wasteful. Also if doing water, you can apply different techniques to make the stain resemble water.
If you decide to use a rag, be careful and make sure to wipe away the excess stain.
Once dried, you can choose to add a shellac or an oil for added protection from fading.
Lastly, add some stick on felt pads to the bottom of the board. And for the bottom hatches I usually use the button hooks from the back of photo frames from the dollar store. When you're on a budget and can't find anything locally you make due.
Step 5: Grab Some Cards and a Friend and Play Some Cribbage!


Thanks for looking, if you have any questions send me an email! ;)

Participated in the
Homemade Gifts Contest

Participated in the
3D Design Contest

Participated in the
Wood Contest

![Tim's Mechanical Spider Leg [LU9685-20CU]](https://content.instructables.com/FFB/5R4I/LVKZ6G6R/FFB5R4ILVKZ6G6R.png?auto=webp&crop=1.2%3A1&frame=1&width=306)


