

Introduction: Creator Ci40 LED Switch


Creator Ci40 is the new IoT plaform developed by Imagination Technologies for a successful Kickstarter campaign. Ci40 uses a dual core 550Mhz MIPS processor, 2 Gb of RAM and runs OpenWRT as operating system. In terms of connectivity the board provides: WiFi, Ethernet, Bluetooth and 6LoWPAN. In this project we will toggle the board's LEDs on and off with the switches on the board using the wrappers for LEDs and switches in the LetMeCreate library.
Step 1: Requirements

- Creator Ci40
- Ubuntu 14.04 (either a full installation or running on a virtual machine)
- MicroUSB to USB cable
- Ethernet Cable
- USB drive
Step 2: Setting Up the Board


Initial setup:
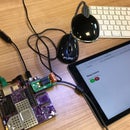
- Connect the board to a power source as shown
- Connect the board to the network using the Ethernet cable as shown
- Connect the board to your computer using the USB to micro USB cable as shown
- Install the openwrt packages and LetMeCreate library by following these steps
- Then, to transfer openwrt to your USB:
Plug the USB into the computer.
$ df
The USB appears as /dev/sdb[x]. If necessary, unplug the USB and run df again to see which device disappears
$ umount /dev/sdb[x] (replace x with the number given by the df command)
$ sudo mkfs.ext4 /dev/sdb[x]
This formats the USB as ext4 format, which is used by the CreatorBoard. Check the USB is empty. If not, re-enter these commands.
$ sudo nautilus
This opens a root file explorer. Copy the contents of /path/to/openwrt/bin/pistachio/openwrt-pistachio-marduk-marduk-cc2520-rootfs to the root folder of the USB
$ sync
Connect the USB drive containing openwrt to the board using the USB to micro USB cable as shown
Step 3: Establishing a Serial Connection


- To establish a serial connection with the board, open a terminal:
- $ ls /dev/ttyU*
- Will list all of the serial devices connected to the computer. If there are multiple serial devices found by this command, unplug the Ci40 and run the command again to see which has disappeared - this is the board.
- $ sudo miniterm.py /dev/ttyUSB1 -b 115200
- Will establish a serial connection with the board (where you replace /dev/ttyUSB1 with the result of the previous command)
- When a connection has been established, press enter. Then,
- # run usbboot
- openwrt should now boot. If the error "ERROR: can't get kernel image!" appears, unplug the USB containing openwrt and plug it in again. Alternatively, press the reset button on the edge of the board. Then, press any key to prevent autoboot and attempt the previous step again
- Now openwrt will boot. Once the timestamps have stopped appearing (usually around 35 seconds), press enter to activate the console
Step 4: Downloading the Code

- To install git on the computer:
- $ sudo apt-get install git
- Now, clone into the project:
- $ git clone https://github.com/MatthewRFennell/ci40_led_switc...
- Follow the steps on GitHub regarding the CMakeLists.txt file
Step 5: Compiling the Code


- On the computer, transfer test_led_switch.c to custom/letmecreate/LetMeCreate/tests/
- Now recompile the LeMeCreate library:
- openwrt$ make package/letmecreate/compile V=s
- Now you can copy this over to the board over the network using scp. Ensure the board is connected to the network via the ethernet cable. Then, on the board:
- # ifconfig
- This will show the inet address of the board in the eth0 section. This will change every time the board is reconnected to the network. Copy this address. Now, on the computer,
- openwrt $ scp /path/to/openwrt/bin/pistachio/packages/custom/letmecreate_0.1_pistachio.ipk root@PASTE THE IP ADDRESS HERE:~/
- Replace the path to the letmecreate_0.1_pistachio.ipk package and the IP address of the board as required. If prompted, type yes to transfer the files.
- To ensure the file has been copied over to the board, on the board:
- # ls ~/
- If the package appears: # opkg install ~/letmecreate_0.1_pistachio.ipk
Step 6: Running the Program
- On the board, run
- # /usr/bin/letmecreate_tests/test_led_switch
- Whilst the program is running, clicking the outermost switch on the board will toggle all of the LEDs on the board. Pressing the innermost switch will end the program.


