

Introduction: DIY Battery Spot Welder!


While I'm working on a future project which involves dozens of 18650 Li-ion cells for which I need a Battery Spot Welder. Which is expensive and not really difficult to build one so in this tutorial I will show you how you can make a DIY Battery Spot Welder which is a great tool to have so let's make this stuff for making stuff.
So let's get Started!
Warning!
If you have no Idea about transformers and mains wiring do not attempt to even try this.
Step 1: Pre-Requisite & Watch the Video Tutorial
In my previous project, I tried to Arc weld using Modified Microwave Transformer but it was not possible because I needed much higher input voltage than 240V AC so I failed but anyways that modified Hight current transformer was capable of the spot weld. So it is highly recommended to watch that video first!
Arc Welding Video -
DIY Battery Spot welder! -
Step 2: Everything We Need!


Step 3: Working, Schematic, PCB and Gerber Files!


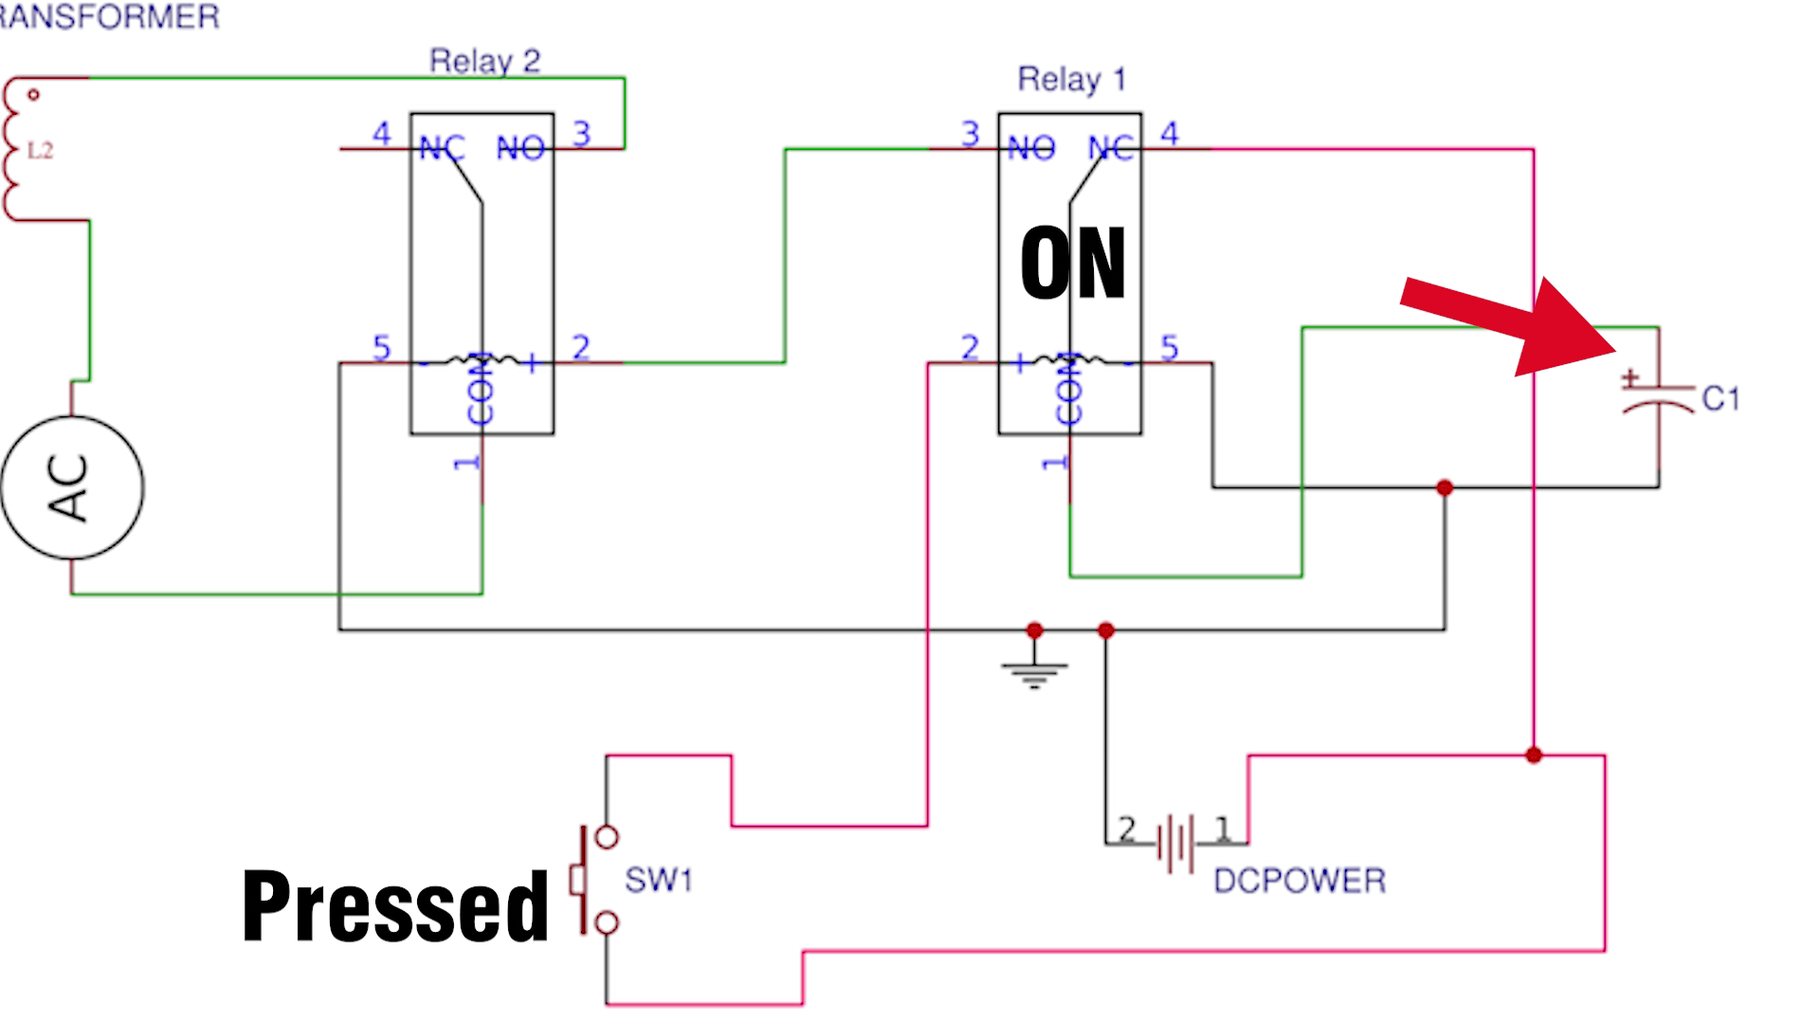


Working-
When power is connected, This DC Power source charges the capacitor, if the switch is pressed it activates the Relay 1 and charge of capacitor activates the Relay 2, Since capacitor can hold very few amounts of energy it quickly discharges and Relay 2 turns off
Using thing charge of capacitor we turn on the transformer for few seconds ad we spot weld!


Step 4: Soldering!


Once you have everything you can solder circuit on a PCB or a perf board. I chose PCB because thing project involves mains voltage so it is better to get it done by a professional manufacturer. Anyways I used a screw terminal for capacitor because we can change it easily later.
Step 5: Assembly


Slice about 1 inch of insulation of Transformers both end, then measure about 2 inches of 2.5 Sq.mm copper strand and insert it in the wire we just sliced repeat this for both ends of the transformer. Now use electrical tape and cover the cut we made for Insulation, Now use hoes clip to secure copper strand in its place. After which you can use zip ties to hold both wires together and make an arm for spot welder!
Step 6: Mounting Everything!

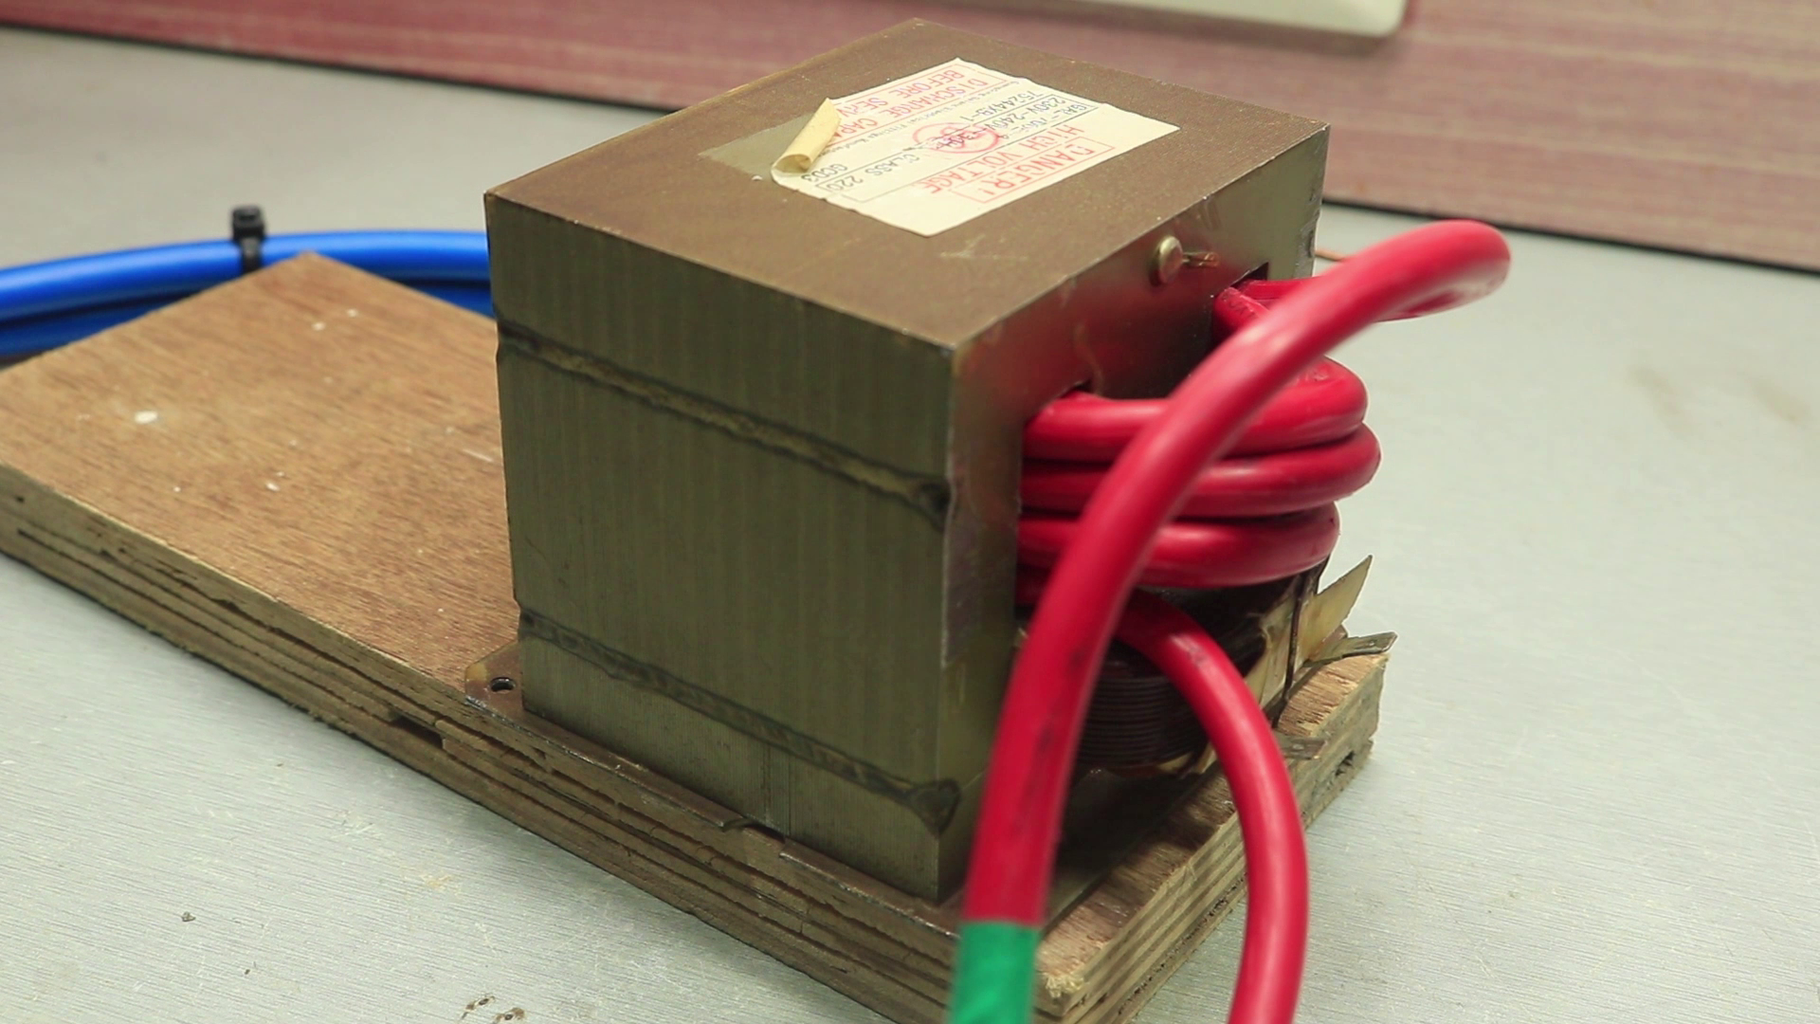


Once we are done with Circuit and assembly of Transformer we can mount the Transformer on a piece of wood and hold it down using some screws. After which you can mount the battery and the circuit and connect every mains wire and a switch and you are done!
Step 7: Test and Done!


For the first weld, I tried 47uF capacitor it was too weak so I added another 100uF in parallel and welds were much better. Value of capacitor can totally depend on the type of weld you are doing so its trial and error method.
Step 8: Thank You!
If you like my work
Feel free to check out my YouTube channel for more awesome stuff:
https://www.youtube.com/c/Nematics_lab
You can also follow me on Facebook, Twitter etc for upcoming projects
https://www.facebook.com/NematicsLab/

Participated in the
Build a Tool Contest


