

Introduction: DIY ESP8266 Programming Board


One of the most annoying problems of the ESP8266-01 module is that it isnot possible to plug it into a breadboard directly for fast prototyping.We need to attach the breadboard adaptor to esp and then place on the breadboard, and after that some complex connection between usb to ttl module and esp. When I was working on esp I faced many problems, to assemble the circuit on breadboard and when required disassemble it which consumes time.
Then I decided to make a smart, fast and free solution for it. This helps me to faster programming esp easy assembling, fitted with and other circuits. It is easy to use, directly get attached to laptop without any extra cable.
So let Start making it!!
Step 1: Things Required


1.Soldering Iron
2. Soldering Flux
3. Soldering Wire
4. Wires
5. Small piece of PCB
6. 10uf capacitors (2)
7. Male Headers
8. Female Headers
9. Battery Clip
10. Asm1117 or lm1117 3.3v regulator
11. Esp8266-01
12. Usb to ttl converter
Step 2: Circuit Diagram


The Simple circuit diagram. Jp1 jp2 are the jumpers where we are connecting Headers.
Step 3: Make Circuit on PCB


Solder the Female headers on pcb for usb to ttl, esp8266 and asm1117 .
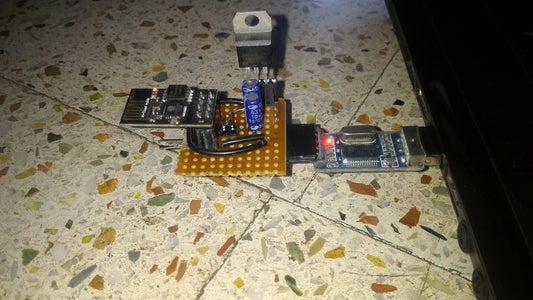
Step 4: Full Circuit Ready


Place all the components. The board is ready to Use.
Step 5: Flash Mode

Flashing The ESP8266
Take a patch cord connect gpio2 and Ground.
Step 6: Use ESP8266 As Standalone

While using ESP8266 standalone remove the usb to ttl and insert battery terminal on the place of 5V and Ground.
Step 7:

Participated in the
Circuits Contest 2016

![Tim's Mechanical Spider Leg [LU9685-20CU]](https://content.instructables.com/FFB/5R4I/LVKZ6G6R/FFB5R4ILVKZ6G6R.png?auto=webp&crop=1.2%3A1&frame=1&width=306)


