

Introduction: DIY Knock Hockey Game


When the ice melts from the first burst of spring, the hockey fun doesn’t have to stop. Take hockey inside with DIY Knock Hockey, a wood table-top game which makes for hours and hours of fun.

This tutorial utilizes a table saw to create the necessary rabbets and miter joints. These are great intermediate table saw skills to learn, practice and utilize in your work flow. Strong, clean joinery really sets your project apart from the pack. While kid-focused, this project isn’t really designed to be made with young maker help.

I use this game to help teach basic concepts of physics, such as momentum, rebound angles, and friction. Game play teaches turn-taking and sportsmanship. Lastly, the rules are incredibly simple…but “house” rules unleash cooperative play and teach fairness.
Thank you for your continued support.
Thank you for visiting my blog. To support for this site, please like WoodshopCowboy on Facebook or follow me on Instructables. Twitter, Pinterest or Instagram.
Step 1: Materials & Tools
DIY Knock Hockey
Materials:
- 16” x 24”x1/4” thickness MDF or plywood
- 1”x6”x6’ Pine, No. 2 Common
- 1 1/4” Dowel (the kind coat hangers are made of)
- about a 1’x1’ section of 1/2” plywood, as high quality as you can get.
Tools:
- Table Saw with Combo Blade
- Miter Saw
- Dado Stack
- Digital Angle Gauge
- Pin Nailer & Air Compressor
- Drill with Small Brad Point Bit
- Scroll Saw
Step 2: Milling & Dimensioning


Milling & Dimensioning:
- Use your table saw to rip the 1”x6” pine into 2” wide strips.

- Use your table saw to trim the MDF to size.


Step 3: The Goalie Block

The Goalie Block:
- Use a miter saw to chop four 2”x2” pine blocks.
- Glue two squares together to form a goalie block.
- Repeat with your remaining squares.

Step 4: Dimensioning the Frame


Dimensioning the Frame:
- Set up a 1/4” dado with a dado blade on your table saw. Attach a sacrificial fence, then slide the fence until it just kisses the outside of the dado blade. Raise the blade to match the MDF base thickness.
- On each 2” stack, run a rabbet on the edge. Use a feather board if possible to keep the board from lifting which creates a light dado and decreases safety. My frame strips were slightly warped during this build, and it showed in my final product.
- Remove the dado blade and replace with a crosscut or combo blade.
- Set the bevel angle to 45 deg using the digital angle gauge for accuracy.
- Using the miter gauge, crosscut sled or sliding table, crosscut a miter on the table saw. Your ends should be 16 3/4” on their outer edge, while the sides should be 24 3/4” long. Make sure you use a depth stop to make equal lengths.

Step 5: The Goals


The Goals:
- The goal is 4” long and 3/8” tall.
- Mark out it’s location on each end.
- Drill a small pilot hole with the drill and bit.
- Thread a scroll saw blade through the hole and cut out the goal.
- Clean the saw marks with a sharp chisel.

Step 6: Assembling the Base


Assembling the Base:
- Assemble the frame with glue and pins from the pin nailer.
- Drop the MDF panel into the resulting rabbit. Trim, if necessary, then glue and nail in place.
- Fill any gaps with wood filler. Wait until dry, then sand smooth.
- Attach the goalie blocks in a diamond orientation with wood glue. The goalie center should be 3” from the goal on the center line.
- Cut small corner blocks from left over scrap using a miter saw set at 45 deg. If your scrap is too small to safely cut on the miter saw, use a hand saw.
- Attach corner blocks with pin nails.

Step 7: Sticks


Sticks:
- Sketch two hockey sticks on the 1/2” plywood.
- Cut out with a scroll saw.
- Sand the edge smooth on a bench sander.
Step 8: Puck

Puck:
- With a very fine tooth saw, cut 1/4” slices out of the dowel. Use v-blocks as a jig to hold the dowel to the workbench as shown in the DIY Hockey Stick tutorial.

Step 9: Sand & Finish

Sand & Finish:
Sand and finish as desired.
To achieve my effect:
- Beginning at 80-grit, sand through the grits to 220
- Seal the entire board with a thinned amber shellac, applied with a brush.
- Paint several coats of craft acrylic paint in your design.
- Seal with watered down Minwax Polycrylic sealer.
I use the Silhouette Cameo & vinyl stencils to design the names & faceoff circles. Silhouette School is a great blog with tutorials to create these special shapes. You can also download the SVG and STUDIO file here. I describe my process in more detail in the DIY Custom Bike tutorial.
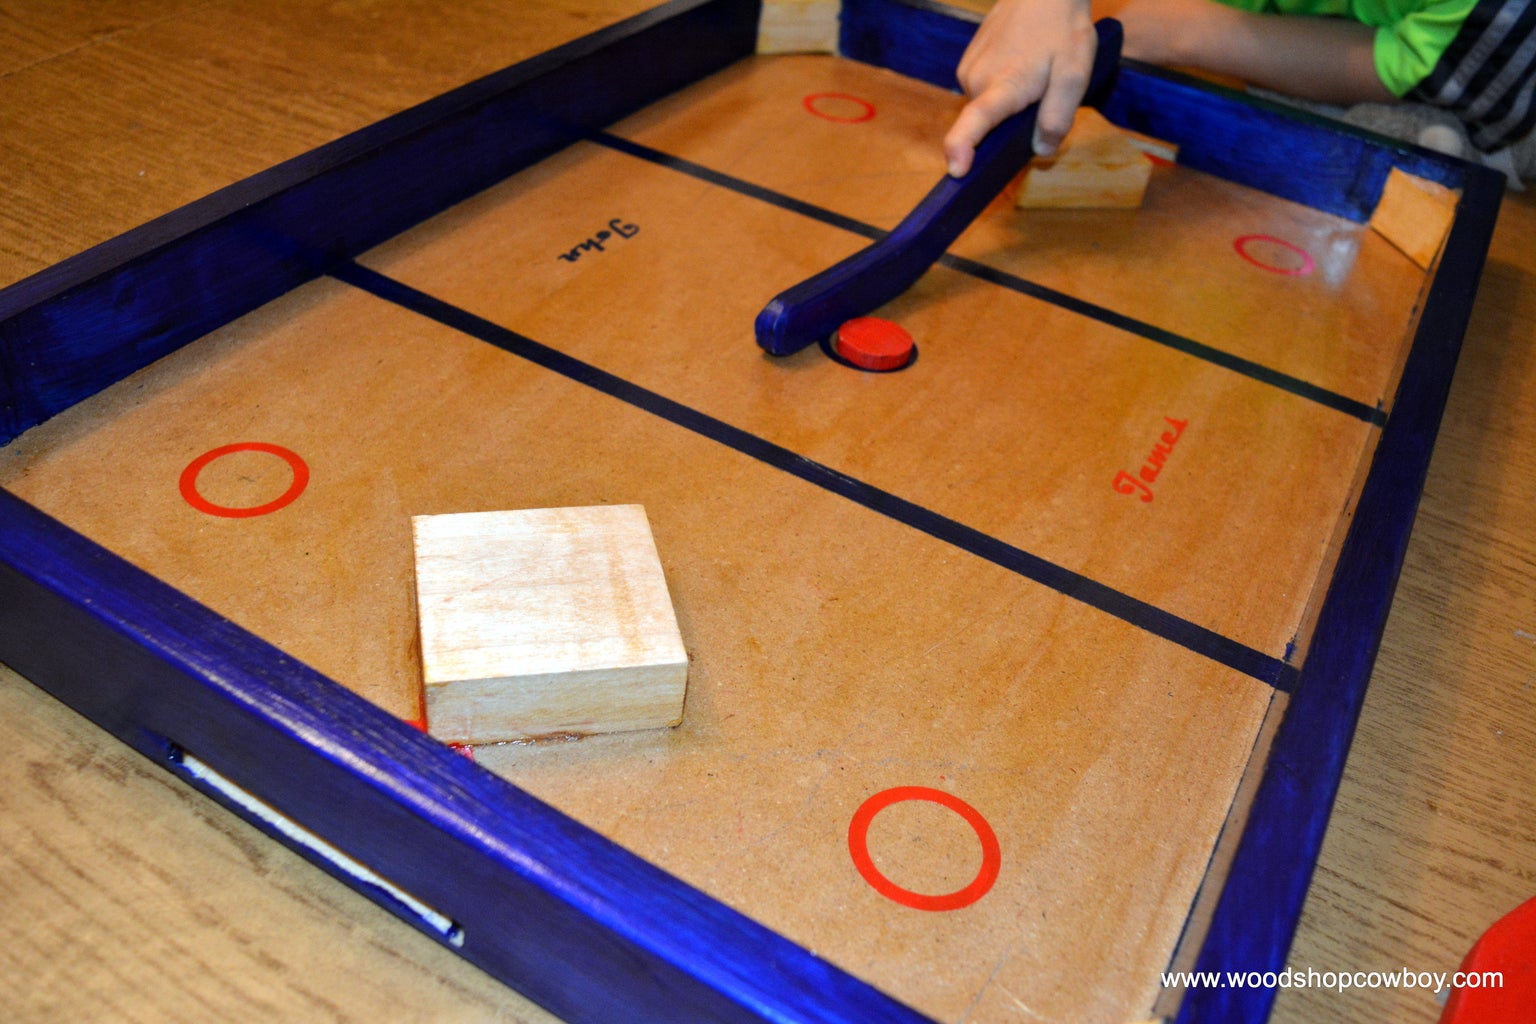
Step 10: Play!


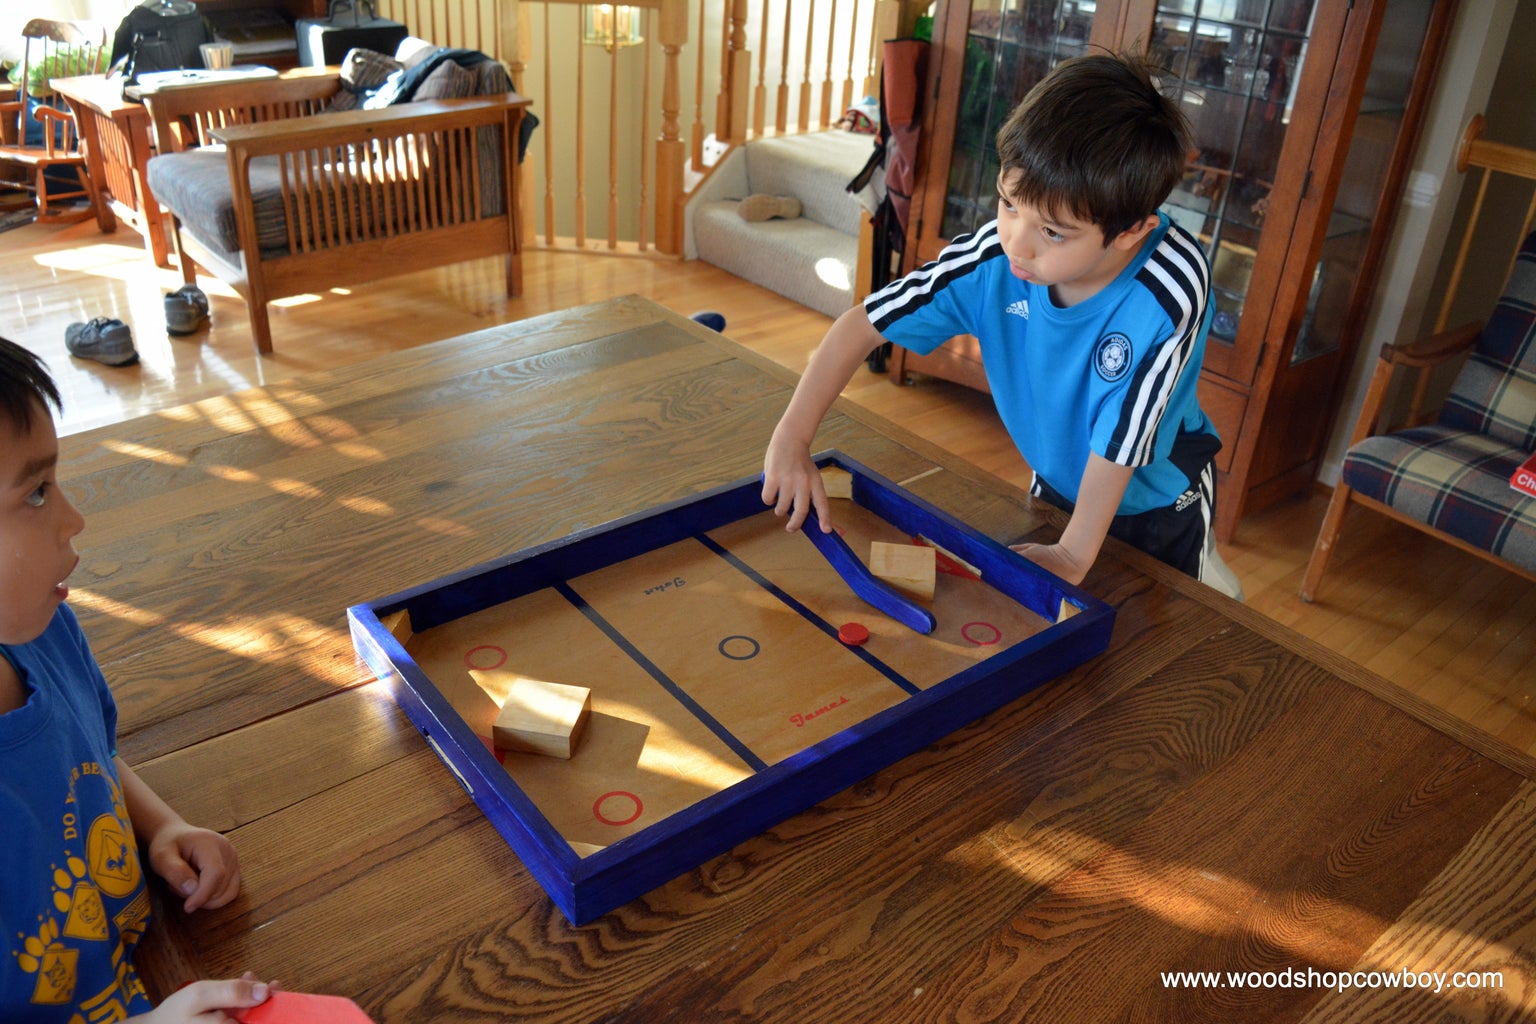


Rules:
The Carrom Official Rules can be found here.
Family Version:
Players take turn taking shots to get a goal. Players can’t shoot in each other’s “defense zone”. If the puck lands in the red zone, players can squeeze the puck between their fingers and the goalie block to shoot the puck across the board. First player to 7 wins.
Thank you for your continued support.
Thank you for visiting my blog. To support for this site, please like WoodshopCowboy on Facebook or follow me on Instructables. Twitter, Pinterest or Instagram.

Participated in the
Woodworking Contest 2017


