

Introduction: EZ LED Glasses


There have been an array of awesome LED Googles, Glasses, and Masks here on Instructables. Our little maker wanted to build his own. The Chibitronics Circuit Stickers made it possible for him. This project is perfect for any age and is a great way to introduce a child to electronics.
What you need:
- Chibitronics LED Stickers
- 3V Coin Cell Battery
- Copper Tape
- Construction Paper
- Clear Tape / Craft Glue
- Paint or embellishments if you wish
- Scissors
Step 1: Cutout the Glasses Template


Your glasses can be of any size or shape you like. We opted to use a "3D Glasses" template so we could use the side of the glasses to hold the battery. There are plenty of printable templates around the internet. Here is a template from NASA that works.
Print out the template and tape it to a construction paper or light card stock. Cut out accordingly. You can adjust the size for your child just be sizing the template up or down.
Step 2: Create the Circuit


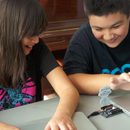
Have your child choose where they would like the LEDs and sketch out the circuit with them. We found that the battery on the side of the glasses worked well. For our project we kept it very simple, just a battery and 3 LEDs in parallel. If you want more than three LEDs, you could put a battery and separate circuit on each side of the glasses.
Keep it simple and let your child do the work. if they need help, guide them through it. If you are crafty but feel circuit-challenged, then review the Chibitronics tutorial.
After you pencil out your design, apply the copper tape first. Try to lay it out with out breaking the circuit. If you need to cut the tape, or it breaks, make sure you overlap the joints so you don't lose conductivity. The copper tape is your wire, so if there is a break in the circuit the LEDs will not work.
Copper tape goes first, then the stickers. Test as you go along. If an LED does not seem to light up, press it down a little harder. You might need some clear tape over it since the mask flexes when worn.
Step 3: Enjoy!


We have been having a lot of fun with the Circuit Stickers. For anyone who is into crafting, it is an easy way to add another dimension to your projects. For children it is a perfect way to engage them in a fun project.
About FUBAR
Fair Use Building and Research (FUBAR) Labs is New Jersey’s First Hackerspace. We are Nonprofit Corporation that provides a location where people with common interests, such as computers, electronics, DIY, software, technology, science, and crafts can meet and collaborate. We are an open community offering classes, workshops, study groups, and long term projects. FUBAR Member have 24×7 access to the space and all the equipment.
Open Hack Night – Thursdays 6:30 PM
Bring a project, get a tour of the lab, or just hang out and learn. You'll often see 3D printing, laser cutting, autonomous vehicles, etc., being worked on.
Soldering Sunday – Sundays 1:30 PM
Open to the public. Curious about electronics? Want to learn how to solder? Come and we will teach you.
Check us out on Meetup: http://www.meetup.com/FUBAR-Labs-Hackerspace-in-Highland-Park-NJ/

Participated in the
Papercraft Contest

Participated in the
Make it Glow!


