

Introduction: GitPi: a Private Git Server on Raspberry Pi


Git is usually used in synchronization with GitHub — the former is a source code management system and the latter is a website where you can share/contribute Git repositories with the larger internet community.
For those wanting to get started with GitHub, I've written this Instructable: Introduction to GitHub.
But, what if you want to keep your repositories private? The usual answer is that you have to pay for this service. Boo.
A lot of us have code-in-progress that we want to properly put onto the Git system, but ins't ready for public consumption. Nor do we want to pay for the service of private hosting.
However, using the Raspberry Pi, you can set up your own Git server on your home network.
This Instructable will cover setting up your Raspberry Pi as a Git server with repositories saved onto an external USB thumb drive. My example uses the Mac OS, but can be extended to other platforms as well.
You should already have Git installed on your laptop and know the fundamentals of how to use it. Check out the Introduction to GitHub Instructable if this is not the case.
I've used two sources to figure out how to set up GitPi: a guide by Thomas Loughlin and one by Monkey Hacks.
They're both good, but neither one did exactly what I wanted or explained it fully, which is one reason I wanted to write this Instructable.
Step 1: Set Up Your Raspberry Pi for Ssh

First, setup a Raspberry Pi for ssh access and that it's on your home wifi network, which means that you can log into it from your laptop.
I wrote this Instructable: Ultimate Raspberry Pi Configuration Guide, which covers how to do this.
Once you go through these steps, you'll be able to transfer files to your Raspberry Pi via the Terminal application.
Note: I'm using a Mac for this Instructable, but you can extend this to other platforms.
Step 2: Init the USB Thumb Drive

We will save all the Git repositories onto a USB thumb drive, rather than the Raspberry Pi's SD card.
This will give you an independent storage drive for your Git repositories, which is easily-readable on your laptop.
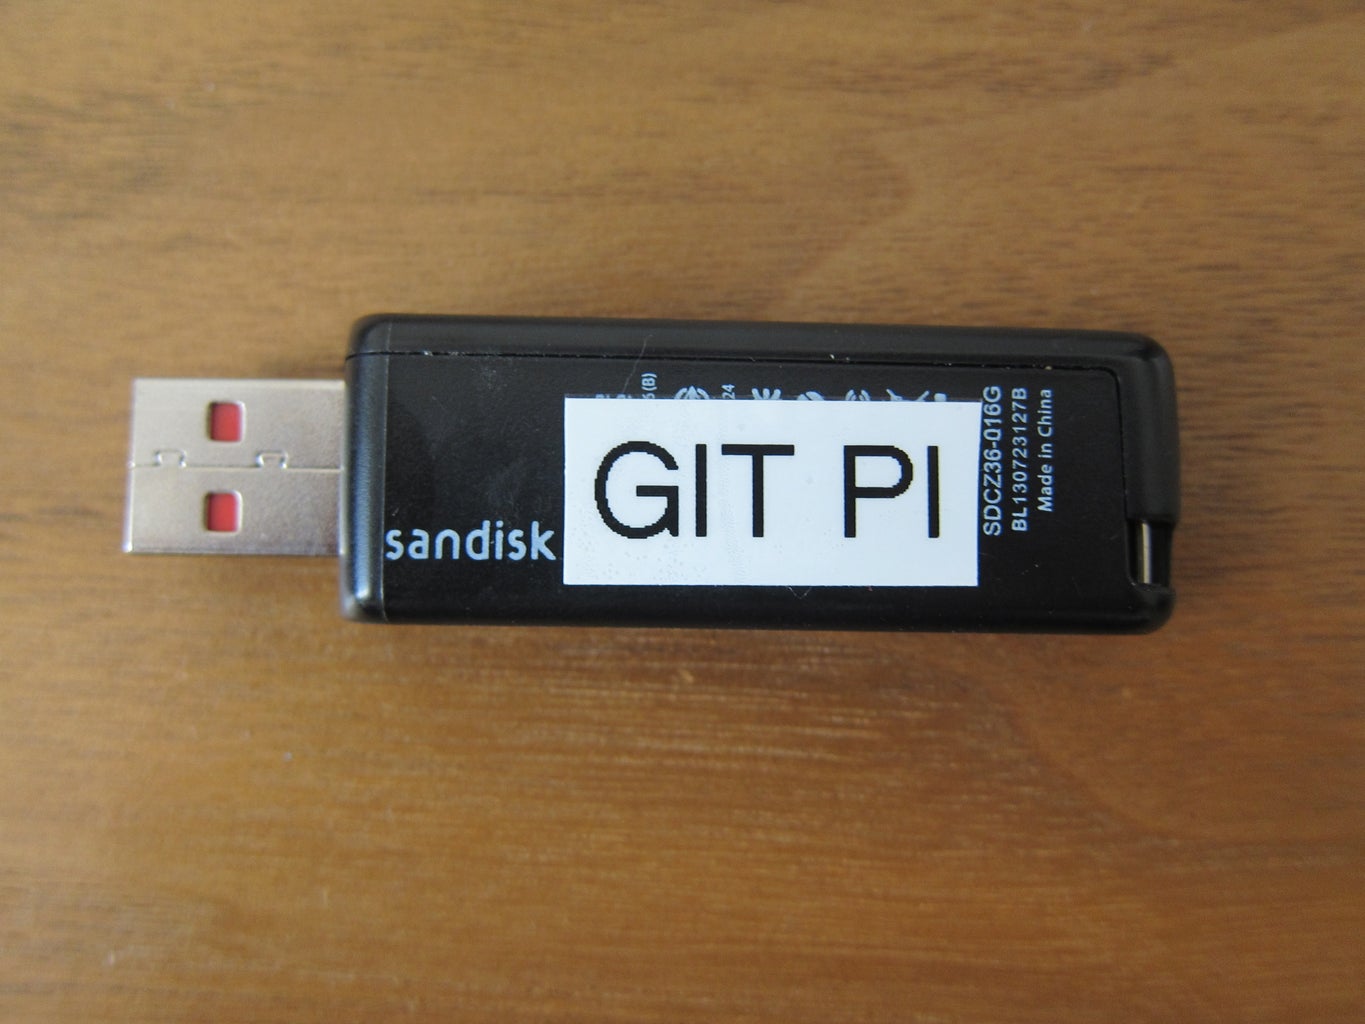
Open Disk Utility. Erase the USB drive, format as MS-DOS (FAT) and call the volume GITPI. I also use a labelmaker to affix a label on the back so it doesn't get mixed up with my other USB thumb drives.
Mine is 16gb, which should be plenty.
Step 3: Run Latest Package Updates

Open the Terminal window and on the command line, type:
ssh pi@10.0.1.64Run the latest package update and upgrades, just to make sure everything is current.
First the update:
sudo apt-get updateThen the upgrade:
sudo apt-get upgradeThen reboot:
sudo reboot
Step 4: Install Git on the Raspberry Pi

sudo apt-get install wget git-coreYou'll see terminal output. In this case, the packages were already installed (maybe with the update/upgrade from last step), but you see some sort of success at this point.
Now, turn off the Raspberry Pi by unplugging the micro USB power cable.
Step 5: Permanently Mounting the USB Drive


I'm not sure if this matters, but I always leave the wi-fi dongle in the lower USB port and use the upper one for the external USB drive/keyboard/other things.
Wait a few seconds and then ssh back into the Pi.
ssh pi@10.0.1.64What we then type in;
mkdir usbdrvWhat we are going to set up is a mount point — a way to always map this directory to the USB drive.
now, type in:
sudo blkidcheck out output — we are looking for the USB drive device info, which is easy to identify because we called it GITPI when we initialized it.
Mine reads:
/dev/sda1: LABEL="GITPI" UUID="6D34-1514" TYPE="vfat"
This should be the similar on yours: /dev/sda1 is the USB thumb drive device.
Now, we are going to edit what is called the file systems table to make the USB drive map into the usbdrv directory
Type in:
sudo nano /etc/fstabHere is the tricky part. We are going to modify the fstab file so that this device maps to the usbdrv directory.
add the line to the end of the file (you can copy and paste this line)
/dev/sda1 /home/pi/usbdrv vfat uid=pi,gid=pi,umask=0022,sync,auto,nosuid,rw,nouser 0 0
important: this is 1 line, not broken up over two lines (the Instructable is doing weird things to the formatting).
What this does is to map the /dev/sda1 device — any thumb USB drive to the usbdrv directory. The flags are ones that I cribbed from the Thomas Loughlin guide. Admittedly, I'm not sure exactly what they do, except for allow the drive to be a read-write drive and not tied to a specific user.
Cntl-X, Y, Return to save.
Then restart:
sudo reboot
If you want to learn more about drive-mapping and mounting, this eLinux Guide has a lot more information.
Step 6: Test the USB Transfer

Then, on the command line:
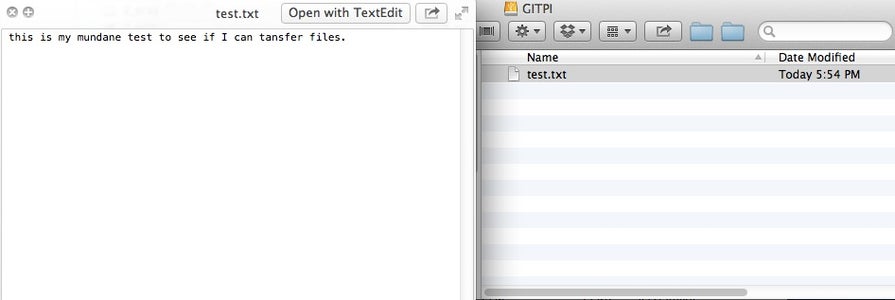
nano usbdrv/test.txtThis will create a text file in the usbdrv directory — which is actually the USB thumb drive itself called test.txt. Put some text in the file, like mine pictured here.
Cntl-X, Y, Enter to save
At the command line:
ls usbdrvAnd you'll see a lone file, test.txt.
Turn off the Raspberry Pi. Pull the thumb drive and mount it onto your laptop.
Presto! You can read the text file on your laptop. Delete the file, pull the drive, put it back into your Raspberry Pi and power the Pi back up.
The cool thing is that the Git repositories can be read by your computer and are not tied to the Pi. The usbdrv will always mount to whatever USB drive you put into the Pi. If you have source code overflow problems, you can always swap out USB thumb drives.
Step 7: Set Up Your Pi Git Directory

I'm currently developing a Twitterbot called justdiedbot, which you will hear more of down the the road. It's not as morbid as it sounds, and this is part of my ongoing "Bot Collective" project, which is a series of Twitterbots.
Just to show how it's done it, here are my steps for local Git configuration. Open a separate Terminal window and type in (using your source directory, not mine).
cd /Users/scottkildall/PythonScripts/justdiedbot
git init
Now, do a similar thing on your Raspberry Pi. In a second Terminal window, ssh back into the Pi. We are going to create a directory called justdiedbot and initialize it with Git. Once again, substitute your source directory names rather than using mine.
mkdir usbdrv/justdiedbot.git
cd usbdrv/justdiedbot.git
git init --bare
This creates a new directory with a .git extension and an empty Git repository. For the geeks in the audience, here is a detailed discussion of what the --bare flag does.
You'll repeat this step for each source code directory that you'll be using for your GitPi activity.
Note: some readers of this Instructable have reported that you need to call "sudo" before the git init steps, so if you have permissions errors, type in: "sudo git init"
Step 8: Add the Remote to the Pi
First, navigate into you local directory, for example:
cd /Users/scottkildall/PythonScripts/justdiedbotOf course, you should type in your local directory path. One trick with the Finder is that you can drag-and-drop the folder to complete the path, typing in 'cd ' and then drag the folder into the Terminal window.
Add a remote to the pi. A remote essentially is a shortcut to a longer URL/path. The user is pi@10.0.1.64 — the same one that we are using for ssh.
Make sure to substitute your Pi's IP address and your own source code-named .git directory instead of mine. Type in (once again, subbing your own IP address and source directory)
git remote add pi pi@10.0.1.64:/home/pi/usbdrv/justdiedbot.gitYou only have to add the remote one time. From here on out, we will refer to this remote as pi.
Step 9: Push the Code Onto the Pi

git add .
git commit -m "initial commit"
git push pi master
This will add all the files in the justdiedbot directory, commit the adds with the message, then push them onto your GitPi.
You'll see some output, showing (hopefully) the successful results.
Step 10: Done! Take a Look
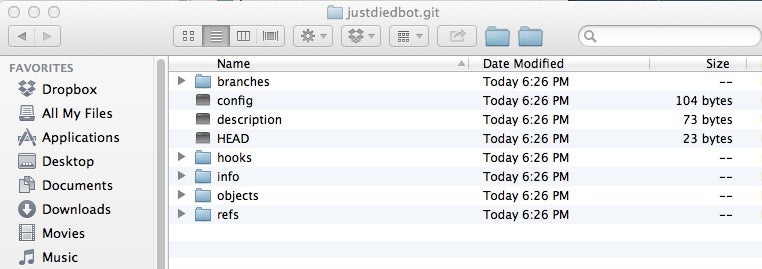
If you put the USB thumb drive back onto your laptop, you'll have access to all the Git files, seen here.
For future source code management for a project, simply repeat step 9.
To add more projects, repeat source code steps 7-9.
This is completely compatible with GitHub, since you'll be using a different remote for GitHub, so when you're ready to go public, you can put your repositories on GitHub and still use your Pi as your home backup.
I hope this was helpful!
Scott Kildall
For more on Raspberry Pi code and other projects, you can find me here:
@kildall or www.kildall.com/blog


