

Introduction: Glow in the Dark Rainbow Jar


I'm back ruining yet more stuff. This time was a jam jar. I almost used a mason jar,but then I came to my senses.
Step 1: You'll Need

Glow in the dark paint
Glitter
A jar with lid
Scrap fabric
Elastic band or glue
Step 2: Coating the Jar With Paint


Drop different amounts of paint from different angles inside the jar and let it drip in different patterns. Turn and twist the jar to guide the paint.When the glass is completely conver with paint sprinkle glitter all over.
Alternetively drop the paint at the bottom of the jar,not on top of each other ,add a drop of water to make the paint looser,sprinkle glitter ,place the lid back on and give it a shake,being careful so the paint doesn't all mix at once making a very dark colour. This will take longer to dry,and the paint might loose some of its glowing.
Step 3: Whilst Drying


Put the lid back on and with the paint still wet turn the jar upside down,and at different angles so it slowly drops down the sides creating new patterns.
When the paint has completely dried, cut a piece of square fabric that's just bigger than the jar lid ,place it in the middle of the lid on top of the jar and secure with an elastic band or glue it in place
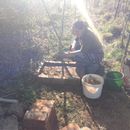
Step 4: Charging the Paint

This will last for ever"ish" but you'll need to keep charging the paint. On the picture above you'll see the most unique state of the art technology that I designed and built ,all by myself as well, a piece of string just under the rim of the jar hanging from the lamp. I should probably have this patented really.
But it works lol.
I'm going to leave mine outside as it will be charged by the sun and hopefully glow stronger.
Step 5: As a Gift

The edgehog family that lives in their own mini garden seem to like it and it goes well with the decorum too. :)

Participated in the
Rainbow Contest 2016


