

Introduction: How to Corpse a Skeleton (The Quick and Dirty Way That DOES NOT Involve Latex)


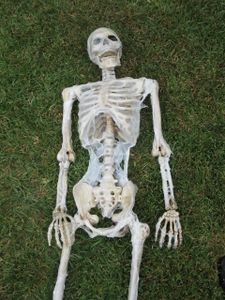
What you'll need.
A Skeleton
Clear Plastic Tarps
Variable Temperature Heat Gun (I assume it's possible to do this with an embossing heat gun, but don't. Get a proper one.)
Wood Stain
Brushes (I used both sponge and bristle brushes)
Step 1: Mummy Up Your Skeleton

Sounds exactly like what it is. Wrap a layer or two of plastic around your skeleton. Then get ready to hit it with that heat gun.
Update: This project was inspired by Allen Hopps who showed us how to make human pelts out of trash bags. I thought, 'I wonder if drop cloths would work on skellies,' and they did! (I did find out later that Allen also had that idea...)
Step 2: Melt It


After you've wrapped a layer or two of plastic (and it's totally fine to have one layer in some places and two layers in other places), you'll want to get out your heat gun. Essentially, you're shrink wrapping the skeleton in plastic tarp. If you burn through the tarp that's totally okay. The more "holes" in your flesh, the more realistic it looks.
Step 3: Lather, Rinse, Repeat


Flip your skeleton over and hit the plastic on the back with the heat gun. Notice how the spots where the plastic tarp ends meet give the feel of tendons.
Step 4: Back to Front

And again on the front. (And again, on the back.)
Step 5: And... Paint!

Wood stain provides wonderfully realistic colour tone for fleshy skeletons. For my "Burnt Offering" skeleton I used a dark stain (Jacobean) and for my "Flayed Man" I used a redder stain (Red Mahogany). The "White Oak" stain is also great, depending on your desired final effect.
Step 6: Details


My "Burnt Offering" has a lot less meat (since he was meant to be BBQed). This effect was achieved by fully coating the corpsed skeleton with the wood stain (sponge brush).
My "Flayed Man" has more meat (since he only lost his skin). This effect was achieved by very lightly drybrushing (bristle brush). I did this in two coats. Please, notice the details on the back (pictures four and five) where the "overlay" of the plastic seems more lifelike.
Step 7: That's All!


Let it dry. If your finished product is too "shiny" (I wanted BBQ and oozing flesh on mine, so shiny is good) you can hit your finished product with some matting spray. If you won't be putting your skeleton outside, you can use Elmer's white glue for the same (albeit a bit messier to apply) effect.
This process also works on "Blow Mold" (a.k.a. Blucky) skeletons. See the last image for what I did with my ($1.00 each) skeletons from Dollar Tree. They're miniature skeletons, they stand about six inches tall. (Unretouched on the left, Corpsed on the right.)

Participated in the
Halloween Decorations Contest


