

Introduction: How to Make a High Temp Silicone RTV Mold


These techniques will work for pretty much any pourable mold-making material (although with urethanes you will need mold release), I just happen to be using high-temp silicone because it's what I have, and I have it because I can cast pewter (and other low temp alloys) with it. You would also be able to use this method to make waxes which you then cast using investment and more conventional metals (gold, silver, etc.).
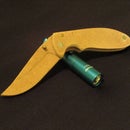
The pictures of pouring are from when I molded an aluminum flashlight reflector, and the mold pictured in the last step (and this step) is one of my ring molds.
Step 1: Materials


You really don't need all that much stuff to make a mold.
- A part to make a mold of
- Mold Max 60 Rubber (available from Smooth-On), or any other RTV (room temperature vulcanizing) rubber
- A mold box (can be any watertight container that fits your part)
- Clay for the sprue
Step 2: Spruing the Part


This is one of the most important parts of the process, because if you get it wrong you’ll either have to spend an inordinate amount of time sanding and grinding miniscule details, or maybe you won’t even get a good casting at all. A mold that yields incomplete castings can be somewhat remedied by cutting air vents, but at the beginning just try to place your sprue in a logical spot (e.g. if you’re casting a clown, don’t put a sprue on its face. Unless you’re deathly afraid of clowns, in which case go right ahead).
In my experience a good configuration is to put a large mass at what will be the bottom of the finished mold. This provides a large reservoir that “sucks in” the molten metal, increasing the chances of getting a complete casting even if you have thin sections in your piece.
Step 3: Pouring the Mold


This is also extremely crucial and needs to be done right. There are a bunch of ways that molds can be prepped and poured, but I’ll just be telling you my method for today. Now, I don’t know about you, but I don’t own a $600 vacuum pump (we do have a bell jar, but that’s another story). Because of our lack of vacuumability, I do things the cheap easy way.
First, mix up your mold rubber. The best choice here (in my opinion) is to use a silicone RTV rubber, because silicone sticks to pretty much nothing but itself. As I mentioned earlier, you can use urethanes, but they always require mold release. They stick to everything.
I use a product called Mold Max 60, because it contains iron oxide and other additives that drastically increase the lifespan of the mold when it comes into contact with hot metals. This particular product can withstand temperatures up to about five hundred degrees Fahrenheit. If you're only planning on cold casting (resins, plasters, and such), there are tons of different silicones on the market that you can try out and see which ones work for you.
When you're mixing the rubber, I recommend using the two cup mixing method (where you mix it in one cup, pour it into another, and mix it again there) to ensure that all of your rubber has been mixed properly. This will help prevent any uncured spots in your final mold.
Now comes the important bit. Make sure your part is firmly secured in place within your mold box with the sprue, but nothing else, touching the base of your mold box. Take your mixed mold rubber (enough to completely cover the part with about half an inch of material) and slowly pour it into your mold box in a threadlike stream, at the lowest point of the mold. This should pop any large bubbles trapped in the liquid rubber during the mixing process.
If you have any left over rubber, try to use it instead of just letting it cure in the mixing cup. It's usually a good idea to have a small part on the side ready to be molded in case your calculations were slightly over (which, of course, is always better than being under).
After your mold is filled to the height you need it, tap the whole thing on the table a few times to help any errant bubbles dislodge themselves from your part and float up to the top. Now let the mold cure in peace for a day or two, whatever your manufacturer recommends.
Step 4: Cutting the Mold
Unfortunately, I couldn't snap any pictures of this because we humans are notorious for having only two hands, and both are necessary for this process. However, it's pretty easy to do, and you should be able to follow along with the written instructions. If you're still having trouble visualizing how to do this, there are some rather good instructional videos on Youtube.
Using a scalpel, X-Acto knife, or something similar, carefully cut the mold in half. For the first few cuts on the outside of the mold, move your hand in a squiggly motion so you end up with a wavy edge, which "keys" the mold together when reassembled, and helps with realignment. Now all you have to do is pull your part out and you're done! You've now got a completed mold you can use to your heart's content.


